1-100 Mk48 Dragon Wagon
myminifactory
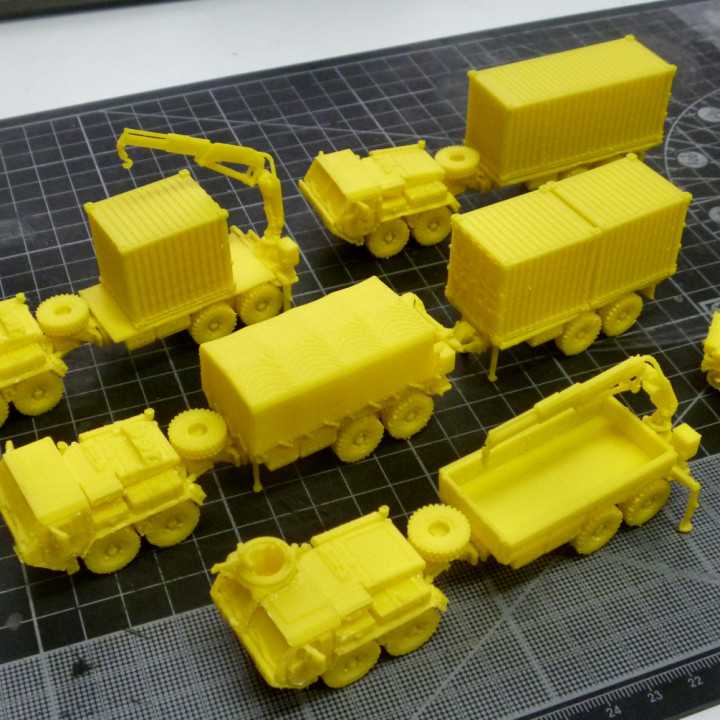
Bergman 1-100 Mk48 Dragon Wagon LVS with mk14 & mk17 trailers Please remember: CC BY-SA-NC license. Mk48 LVS (Logistics Vehicle System) was developed in parallel with the HEMTT, so the cabs are similar (but not identical.)The vehicle is seperated into two modules, the tractor and a trailer. The special feature of the vehicle is that it has a hydraulic joint at the rear of the tractor unit. When joined with the trailer, the vehicle is 8x8 (ie all wheels driven) and has an astonishingly small turn radius pretty much equal to its length. (About 1/3 of the HEMTT's turning circle.) Any tractor unit can unite with any trailer unit, and can at any time disengage and unite with a new trailer. For now I have modelled two trailers:mk14 flatbed trailer for general loads, 10' and 20' ISO containers.mk17 tray-style trailer with hydraulic crane. Can carry 1x 10' ISO container, or general loads. Tray sides are removable.mk14 trailer can also be converted to an unpowered trailer with a tow adapter. (Mk48/17 with mk14 trailer makes for a rather large unit.) Mk48/14 Dragon Wagon LVSMk48/14 Dragon Wagon LVS (Field-fitted door armour)Mk48/14 Dragon Wagon LVS (MAK) (Marine Armour Kit) Mk48/17 Dragon Wagon LVSMk48/17 Dragon Wagon LVS (Field-fitted door armour)Mk48/17 Dragon Wagon LVS (MAK) All tractors should have a spare wheel glued onto the mounting boss, although it is optional. All tractor versions have the option of the MG mounting kit being fitted.There are 3 different mount rings to choose from: (I suggest that these are glued into place.)Plain ringRing with Gunner Shield Kit (the round one)Ring with angular rear shield as used on MRAPs Weapons supplied: (glue to ring.)M240M2 HMGM2 HMG with ACAV shield Mk14 trailer has no options except for the tow adapterTwo hydraulic legs are required. Glue into the square sockets at the front of the trailer, in either lowered or raised & rotated position. Mk17 trailer has 3 options:Open trayFlatbedTray with raised cover. (Needs folded crane) I have provided 3 versions of the Palfinger crane:FoldedOpened up, boom horizontalOpened up, boom raised Two hydraulic legs are required. Glue into the square sockets at the front of the trailer, in either lowered or raised & rotated position.Two stabiliser jacks are required. Fit into the rectangular sockets under the crane mount. When retracted, the legs point UP and the booms are fully pulled in. When extended, the legs point DOWN and touch the ground, and the booms are extended outwards. This project has been a real mission. There are very few references available for this unique and very complicated vehicle. The best pictures were in the user manual, illustrating the various hit-here-to-disassemble instructions, and the ones showing the locations of the warning stickers. The crane was an absolute beast to get right, working mainly off photos. (It was drawn in the open position, and the various joints later rotated to unfold / fold it.)I will revisit this one at some point to do the other 3 versions (mk15 third-wheel tractor, mk16 wrecker, mk18 ribbon bridge/container hauler.) But for now I've had enough. None of my initial versions were adequately printable for FDM, so there are SLA and FDM versions of all tractors and trailers. These are seperate downloads due to file size. All vehicles and trailers printed sitting on their wheels.Clean out between wheels underneath first, then the outside of wheels. Be careful around the front steps. I've beefed them up, but that won't help you if you cut through them... Do the wheels/underside first, the fun details last. The supports will protect all the details while you manhandle the wheels clean.You'll need to cut across the top of the supports pretty much everywhere. The hydraulic spagetti bunch on the rear of the tractor will clear ok if you cut down between the two dangling hoses from the top.Print the folded crane in its correct orientation (ie pivot stub pointing down) and it will clean up quite easily. The opened crane were printed on their sides, with the hose detail up.Trailer legs and stabiliser jacks were printed on their sides.ISO containers printed in their correct orientation.
With this file you will be able to print 1-100 Mk48 Dragon Wagon with your 3D printer. Click on the button and save the file on your computer to work, edit or customize your design. You can also find more 3D designs for printers on 1-100 Mk48 Dragon Wagon.