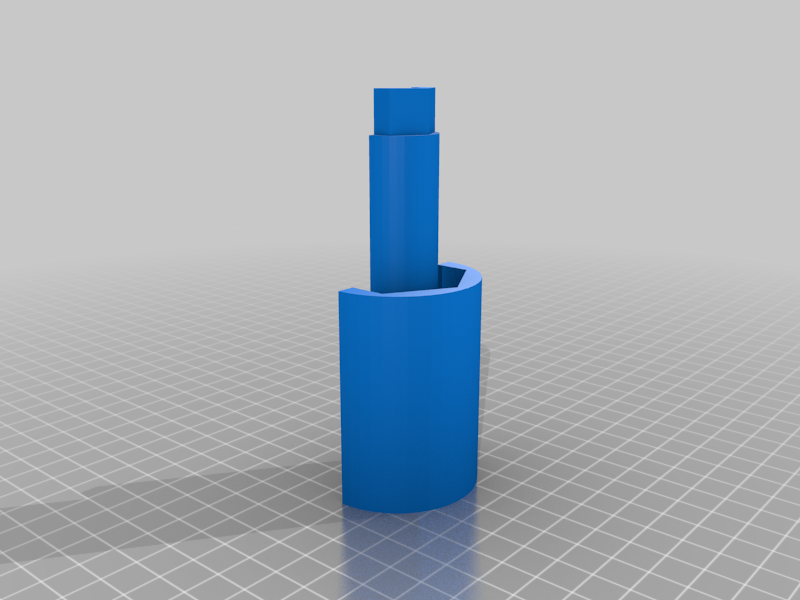

1-3/8" Water Barrel Rear Nut Installation Tool
thingiverse
#How to Install a Replacement 1-3/8" Nut Water Barrel Spigot Bulkhead Fixture# While my son was mowing the lawn, he clipped our water barrel and broke off the faucet/spigot from the barrel's threaded bulkhead attachment. The bulkhead insert was a weak plastic piece that couldn't be saved, so we ordered a nice solid brass replacement. When we got it, we were faced with the issue of "how do we install this?". It's way too deep to reach, and the filling hole is too small. It wasn't just a case of screwing the new threaded bulkhead mount into what was left of the barrel wall, which it sort of did. That is a recipe for disaster, as when the barrel fills, all that water pressure will try to spit it out. It *needs* the 1-3/8" backing nut. And we didn't have long spindly arms to thread down four feet into the bottom of a barrel through a six-inch filling hole. Cue the 3D printed blind-installation tool! Here's the procedure: 1. Insert the front end of the barrel fitting into the existing hole, pushed up flush against the outer barrel wall. 2. (Pic 1) Run a guide wire through the barrel bulkhead outlet up to the top of the filling hole. We used bailing wire and turned the barrel upside down for a gravity assist to get it out the filling hole. 3. Join the backing nut and washer together with some silicone sealant so they stick together. I also stretched the rubber sealing washer out a bit so it would better fit over the rear threads. Pic 2 shows in order left-to-right the backing nut, two washers and the bulkhead outlet. 4. (Pic 3ish) Insert the nut/washer onto the installation tool. 5. Insert the guide wire through the hole in the middle of the installation tool/nut/washer assembly, pointed so the inside rod will go through the barrel bulkhead fitting. 6. Knot the rear of the wire so you will be able to tug it up to the fitting. 7. Drop the works down into the barrel and start pulling the wire out of the outlet fitting. 8. (Pic 4) Tug & jostle it until the center post comes through the fitting 9. (Pic 5) Use a three-quarter inch wrench (or vice-grip) to grip the center post, and turn it *counter-clockwise* to get the nut on the back to start threading onto the outlet fitting. 10. (Pic 6) Gently tighten it up. This is just printed plastic, so it won't take much torque, but it will be enough to squish the washers and give you a sufficient seal. 11. (Pic 7) Push the center-post back into the barrel, and extract the installation tool back out of the filling port! Designed in Solidworks 2015. First revision nut dimensions were a bit tight, and there wasn't enough "neck" to let the nut fully run down the length of the thread. That's why it's so long. **Edit** After installation, it looks like I stretched the "cup" end the same amount as the pin. Adjusted for a 29mm long throat, for more strength and quicker printing.

With this file you will be able to print 1-3/8" Water Barrel Rear Nut Installation Tool with your 3D printer. Click on the button and save the file on your computer to work, edit or customize your design. You can also find more 3D designs for printers on 1-3/8" Water Barrel Rear Nut Installation Tool.
