110 Film Scanner with Nikon Camera
thingiverse
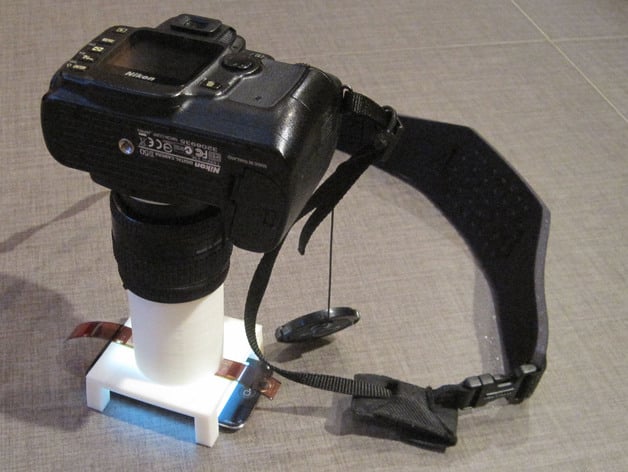
This is a system for using a Nikon camera with a lens reversing ring to scan 110 film. The reversing ring allows for a short focal length and high magnification perfect for negative scanning. Instructions In addition to your printed pieces, you will need... Nikon SLR and F mount lens Nikon lens reversing ring (I use the BR-2A) Light source (tablet or cell phone screen works well using a flashlight application) ML-L3 IR remote or a programmable universal remote are useful for triggering the camera Prior to printing the tube, you will need to determine the desired tube length. Put on the lens reversing ring and your reversed lens. By adjusting the focus (and zoom if you have it), determine the appropriate distance from a negative to produce a mostly full frame image of the negative. This is your tube length. Put the tube length into the customizer and generate your custom STL. If you have a 50mm lens, the included STL should work. As you can see by the photo of my setup, black plastic doesn't appear to be required for good results. The table looking object is used to raise the focal plane away from the light source. This, or some frosted glass is needed if you are using something like an iPad. If not used, you will see the individual pixels shining through the image. With the reversing ring, the focal length is relatively short so this small table is sufficient to blur the individual pixels into a nice even white light source. As illustrated in the photo, the light source goes on the bottom (if you use an iPad, just put the table on the face of the iPad). Run a flashlight application on the light source. The film goes on the table with the image you wish to photograph over the hole. Look through your camera with the lens reversing ring and tube attached (focus and zoom as needed). You will need to have your camera in manual mode since the reversing ring breaks the cameras contact with the lens electronics. Be sure the physical aperture on the lens is wide open to minimize exposure time and keep the focal plane narrow. A remote trigger helps as you will find you need about a 1/2 to 1/20 second photo to appropriately expose the shot. Touching the camera during the shot could blur the image. Check your histograms so you use as much of the exposure range as possible. This will give you the most room for adjustment later. Once you have the photos taken, move them to your computer and open them in your editing program of choice. Crop, invert, and level balance it and you should get a great image. I plan to work out a similar system for 35mm film, but 110 was my first try since I have lots of shots from my childhood. 35mm will require flaring of the tube and bigger holes on the tube and table. This is still a work in progress, but it does work just fine. I'll update the design as I use it. Note the cat picture is an example scan. The photo was taken in 1986 using a 110 film camera.
With this file you will be able to print 110 Film Scanner with Nikon Camera with your 3D printer. Click on the button and save the file on your computer to work, edit or customize your design. You can also find more 3D designs for printers on 110 Film Scanner with Nikon Camera.