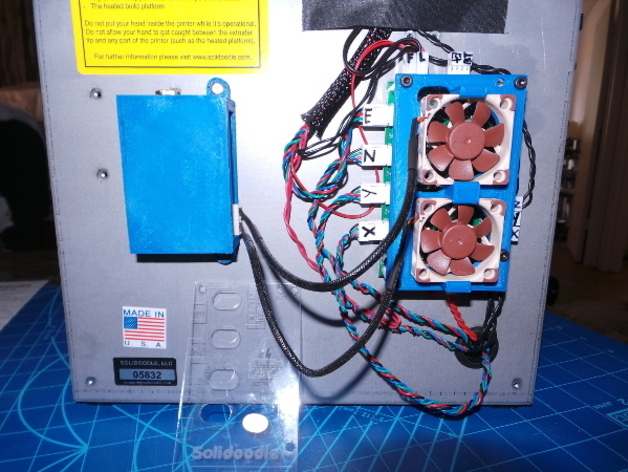
12V Power Box
thingiverse
A box to stick to the back of my Solidoodle that provides a bunch of 12V power for fans and things. I use it with my electronics cover plate http://www.thingiverse.com/thing:168594 (but plenty of additional fan headers are available if I want to add additional fans to cool the stepper motors). More babbling about this can be found at http://tomhorsley.com/hardware/solidoodle/solidoodle-fanpower.html. Instructions Print the powertop and powerbottom pieces. Get some patience, some wire, a soldering iron, a Radio Shack 276-150 circuit board, a Radio Shack 274-1563 DC Power Jack, 8 Digi-Key WM4301-ND 3 pin fan headers (Molex part 0022053031), and two 1/4" cylindrical neodymium magnets. I used 3 pin fan headers because most of the fans always seem to have 3 pin connectors, but I don't connect the pin corresponding to the yellow wire to anything. Solder the headers to the circuit board, strip a zillion little pieces of wire and solder them in as well. I put the headers in the row of holes that provide 3 connected sets of holes (there is one of these on each side of the circuit board, but one of them is farther away from the edge of the board - I used the one closest to the edge since that positioned the headers nicely for access). I used the two power bus strips down the middle of the board for ground and 12V and spend a lot of time making absolutely sure I really connected the right pins to the right power strip. The power jack is slightly tricky. It has to be screwed in from the back of the hole, so I soldered wires to it, but didn't connect them to the board till after screwing in the jack. Once the jack was secure, I cut the wires to the proper length, and soldered them to the appropriate power strips on the circuit board. Now you can sand or file anything that doesn't quite fit, make sure the circuit board fits on the posts in the top piece and the bottom piece fits on the bottom. Drill out the magnet holes, epoxy the magnets flush with the bottom, glue the bottom to the top with acetone/ABS mixture, and you are done. The openscad files are provided so you can fiddle with the size of the magnet holes if you have different size magnets, or add bigger posts and use screws if you don't like penmanently gluing the parts together.
With this file you will be able to print 12V Power Box with your 3D printer. Click on the button and save the file on your computer to work, edit or customize your design. You can also find more 3D designs for printers on 12V Power Box.
