13:30 Printable Headphones
thingiverse
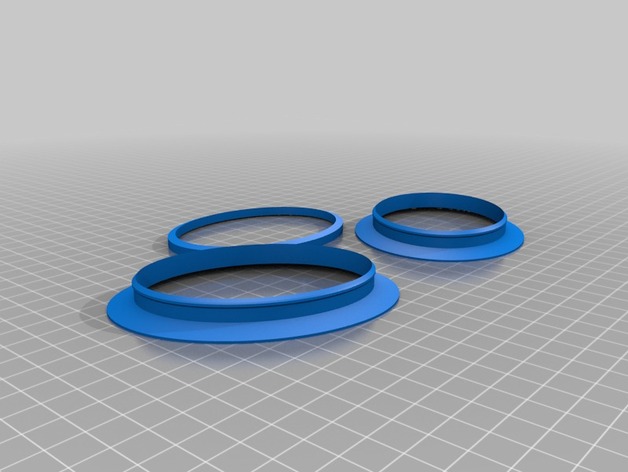
This project started as a thought piece around printed consumer electronics and the idea that they could be as easy to turn into working product as they are to print. Meaning that once off the print bed, such an object could be assembled without any tools, and be made functional by readily attainable components. Being electronically simple yet functionally complex, headphones seemed like a good fit to stress test this premiss. The first go at this idea resulted in good looking, well working model that we created at our studio on a professional ABS FDM machine (Dimension 1200ES, print time about 13 hours and 30 minutes, hence the name). It worked well here, but the machine we used is not very accessible to the average maker, and two of the critical parts relied heavily on soluble support printing that this machine specializes in. To really test this idea of printed CE, it needs to be created by the people who would use it. To this end, I have begun to adapt the design to the Maker Bot Replicator. The main challenge being how to build to a similar level of quality and without soluble support. With a bit of experimentation, I am pretty confident it can be done. So look for some updates on that soon! In the meantime, here is the current model(s), component list, and instructions to make your own working headphones right now. File Update(09/12/2013): For those of you who truly want to customize 13:30 I have added STEP files of both the V1 and V2 versions. Enjoy! File update(10/15/2012): Did some further work on the 'Replicator' version of 1330 last week and this past weekend. As mentioned above, the goal of this mod is to create self supporting speaker housings that builds cleanly on single material printer with out the need for soluble support. So far its been a real interesting discovery process and this latest version, called V2, is actually the 5th iteration of this challenge. V2 still requires some custom breakaway support structures (in the file) so its not quite there yet, but it is real close. I have uploaded the latest STLs for V2 1330 headphones for you to try out. Enjoy! Instructions New! I have created a quick 'promo' video that shows the creation of a 13:30(v1) printed off of a Dimension 1200 machine. While maybe not as good as a step by step video tutorial, it does go through the assembly and I hope it helps clear up some of the less clear construction steps. this vid can be found here:http://vimeo.com/64761836 What you will need besides the printed parts: Speakers: 2X 40mm 0.1w round speaker drivers from Digikey.com, model number GF0401M-ND RCA jacks: 2X barrel jacks Also from Digikey.com, model number CP-1413-ND 8 inches of 20 gauge (or less) insulated wire: Divided into 4 equal lengths. Can be found at Radio Shack, or Monoprice.com, etc. RCA to 3.5mm cable (3ft): Again can be found at Radio Shack or Monoprice.com, etc. Frost King Rubber Foam Weather-seal or equivalent, 3/4inch wide by 7/16 inch thick: You will need about 18 inches of this. Can be found online or at many hardware stores like Home Depot, etc. Springs (for solder-less construction): 4X 4mm(0.16 inch) diameter by 8mm(0.32inch) length metal springs. We found this part can be a bit hard to source if you look for just this spring. To make it easier, do what we did. Use the springs from two disposable, retractable ball point pens. Semi-stretchable fabric: 2X small 8inch by 8 inch squares of spandex or lycra like fabric. We knew we were going to be building a few of these sets so we grabbed a yard of material from Fabrics store but an old T-Shirt will also work. The components will run roughly $15-$18 depending on what you use and the video link below can help guide you through assembly:http://vimeo.com/64761836 The Build Packs: This headphone model has 9 parts that are divided into 3 different builds optimized for the Replicator build platform. You can print them in any order you wish, but I numbered them just to make it easier to organize here. Each pack contains the following bits: Pack 1 build will take about 1 hour and 51 minutes to build. It contains the left and right speaker pad frame (which are identical) and one of the two identical speaker frame clips (for securing fabric). Pack 2 will take about 5 hours and 45 minutes to build contains the left and right speaker caps (identical), the second speaker pad frame clip, and the head loop. Pack 3 will take about 7-8 hours to build and it contains the most the left and right speaker housings. Pack 4 is the same as pack 3 but it includes some additional experimental break away slabs designed to help control the build quality of this complex piece and it will also take about 7-8 hours to complete. Pack 1 and 2 are shouldn't require any support but 3 will require full support and 4 will need at least external support. My goal is to eventually get these speaker housing to build without support. I have also uploaded the individual parts if you want to create you own build packs. Three of the parts (ear pad frame, earpad clip, and speaker cap) are identical left/right pieces and will need to be duplicated. The rest are unique models. Assembly: One of the main goals here was to create a set of parts that could snap together without the use of tools and to use components that wouldn't require soldering. Depending on you build quality and part shrinkage some clean up may be required, at least that is what we are finding. A Dremel tool comes in real handy for this but some medium grit sandpaper will get the job done too! Time willing, I think I would like to supply a more illustrated version of the instructions but let me know if you think that is really needed. Step1: Wiring the speaker housings. Start by cutting 4 pieces of 20 gauge wire about 2 inches in length and then strip away about a half inch from each end. The thread the striped wire partially through the contacts of barrel and contact plate of the disassembled RCA jack. Fold the wire back on itself and twist them to create a firm electrical contact. You may wish to solder at this point. It is not necessary but it does make for a more reliable connection. Next you will want to insert the wired RCA jack barrel into the speaker housing so that the threads are on the inside. Then slip the wired contact plate and last tightly thread on the nut to secure this assemble firmly into the housing. Next fold the contact plate over at 90 degrees so that it is not sticking out. Repeat these steps for the other speaker housing. Admittedly, because of the small spaces here, this is the most frustrating part of assembly, but be patient and you will get there. The next step depends on you. You can now solder the bare wires to the speaker drivers and then press them face up into their divot inside the speaker housing. But if you want to do this without soldering, grab the 4 springs. As with the RCA jack contacts, you are going to want to thread and twist the each bare wire ends around the last one or two loops in the spring and the twist it to create a secure connection. Then push the springs into the pockets in the speaker divot so that the wire twist at the bottom of the pocket. The press the speaker down on top. Make sure to position the speakers so they have good contact with the springs when pressed in place. Whether you have soldered this assembly or not, now is the right time to test the speakers and make sure you have good electrical connections. My preferred method is plugging in the RCA to 3.5 cable and then plugging that into an audio source. The drivers won't be super loud at this point so listen carefully to make sure they both work and are about the same volume. If they are not, now is the time to trouble shoot your connections. You don't want to get to the end of the build only to find you have to tear everything back down because driver isn't working. Step2: Completing the speaker housings Next take the speaker cap pieces and snap them into the speaker housings. Make sure the cylinder bit on the face is pointed toward the bottom of the housing where the RCA jack is. Again do a sound check to make sure the speakers didn't bounce away from their contacts (for solder-less construction). Now take the foam weather seal strips and carefully push them, sticky side down, onto the face of the speaker caps along the speaker caps outer lip. You will want to run each strip all the way around so that you finish with nice little foam oval on the speaker cap (removing the extra material at the end). Go back and squish the weather strip to the sides around the narrow center of the speaker cap to prevent the strip from sticking to the speaker cone material. Step3: Create Ear pads This part is going to sound a bit complex but it really pretty simple. Put your square of fabric flat on the table or other surface (the bit that is face down will be the visible side of this when you are done). Place the ear pad frame face down in the center of the fabric (so that the flattish part is against the fabric). With the frame in the center pick up the four corners and collect them in the center. With the four corners still collected slip the ear pad frame clip down around the corners so it is outside the collected fabric. While pulling up on the collected fabric push the clip ring down to the neck of the ear pad frame that is now in the inside of the collected fabric. While keeping the fabric taught snap the ear pad frame clip past the top lip of the ear pad frame all the way around. Cut away the loose material from the back of the ear pad frame with scissors or an exacto knife (being sure to cut it as close as possible to the clip ring). Do this again for the other frame and then snap them onto the face of the speaker housing. Your headphone speakers are now complete! Step4: Finish Slide the completed speaker housing assemblies onto the head loop with the RCA jacks pointed down. Hook up your RCA to 3.5 cable and you are done! Go enjoy your new headphones, and let me know how they turned out!
With this file you will be able to print 13:30 Printable Headphones with your 3D printer. Click on the button and save the file on your computer to work, edit or customize your design. You can also find more 3D designs for printers on 13:30 Printable Headphones.