16x16 LED matrix grid with diffuser and hidden power cable
thingiverse
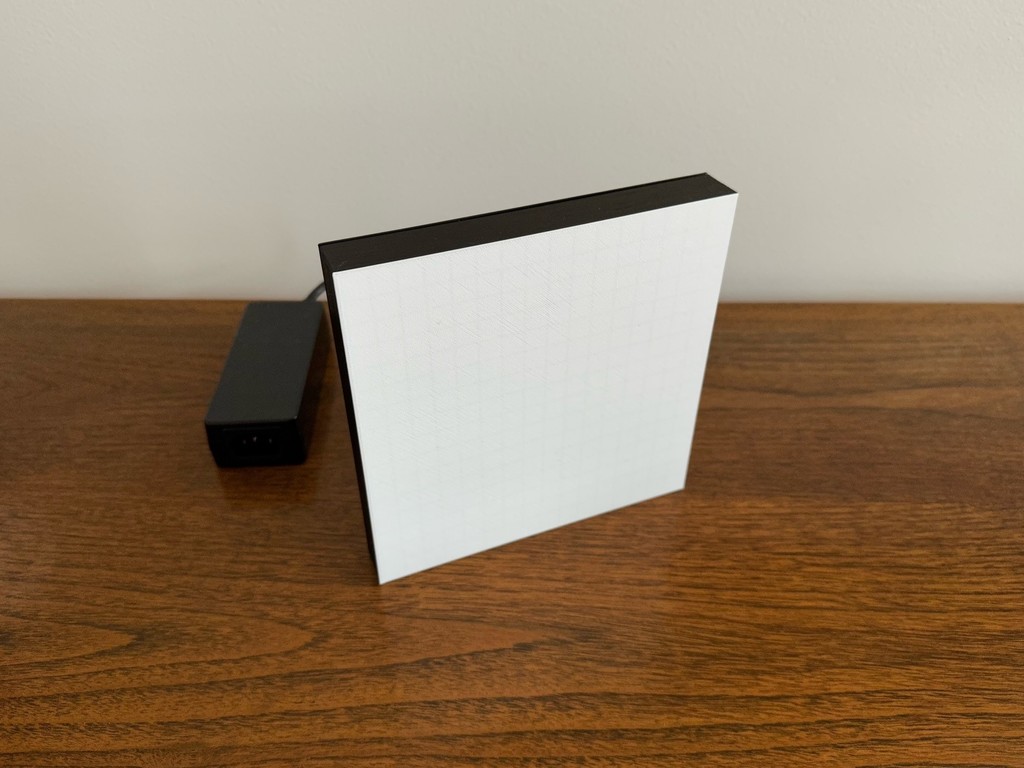
This is a remix of https://www.thingiverse.com/thing:4459985 (Remix selector is broken) Features: * Fits standard 16x16 LED matrix * Rear hidden power barrel jack * Internal supports for panel * Lots of space for dev board to drive the LED matrix Its designed to house a ESP32 or ESP8266 running something like WLED (https://github.com/Aircoookie/WLED) Powered via 5v DC external brick You can check out this video on youtube to see how to build these sorts of LED matrix's. https://www.youtube.com/watch?v=WSex5f1qzH8 "Make it work" did a great video using the original housing. Personally I'm not a fan of connecting the ESP directly to the board and I built a messy cable loom instead. There are a few options with the diffuser: Front option 1) The first 2-3 layers of the RGB grid are printed with clear filament. Pause the print after the solid layers and continue with white filament. The light will be bright but you will get a bit of bleed through between pixels. Front option 2) The first 2-3 layers of the RGB grid are printed with white filament. Pause the print after the solid layers and continue with black filament. The light will be muted and you wont get much bleed between pixels. (This is the final version I settled on) A perfect first layer is mandatory. Inside is a central support for the LED panel. I put some light foam between the support and the matrix. If you really want to get advanced you could cut a large piece of 0.4mm think aluminium and slip in under the entire matrix. (This would provide a good heatsink for the LED's) The main frame includes a notched section to fit in a metal panel. I have also included a printable panel instead of aluminium. Not sure if it would help or hinder being made from plastic. (My version pictured does not have the insert) The back and main frame can be printed out of any colour. The front presses into the main frame. Its a moderately tight fit. If its a bit loose you could use a few dots of glue or poster putty. For the screws. I used standard computer fan screws. You need to go slow and careful as its quite tight. (I just slowly worked the screws in and out the first time to cut the threads) File Information: * 16x_16_Main_Frame (Remix) - hidden connector.stl = This is the main frame with hidden barrel jack connector on the back. * 16x16 Back (Remix) - hidden connector.stl = This is the corresponding back for the frame with the hidden connector. * 16x_16_Insert (Remix) = This panel is optional. It sits under the LED panel and help spread the heat. It would be best to make this out of aluminium. * LED Matrix 16x16 front with frame (Remix).stl = This is the diffuser and grid. * LED Matrix 16x16 front with frame (Remix) - thin.stl = This is the diffuser and grid. The diffuser is a little bit thinner. (2 layers instead of 3. Its much better than the 3 layer version... but isn't as strong.) Here are the main parts I used: * LED panel - https://www.aliexpress.com/item/4000544584524.html * Barrel Jack 2.1mm version - https://www.aliexpress.com/item/33049477849.html * ESP32 WROOM 32D - Lots of models available. I had one sitting around. There is plenty of room inside the case for a mini or full size board. I do recommend using the ESP32 vs ESP8266. For the extra $1 or so the additional processing speed is worth it. (especially if you turn on advanced features and connect microphones etc. Feel free to comment if you successfully make this.
With this file you will be able to print 16x16 LED matrix grid with diffuser and hidden power cable with your 3D printer. Click on the button and save the file on your computer to work, edit or customize your design. You can also find more 3D designs for printers on 16x16 LED matrix grid with diffuser and hidden power cable.