18650 x40 battery case
prusaprinters
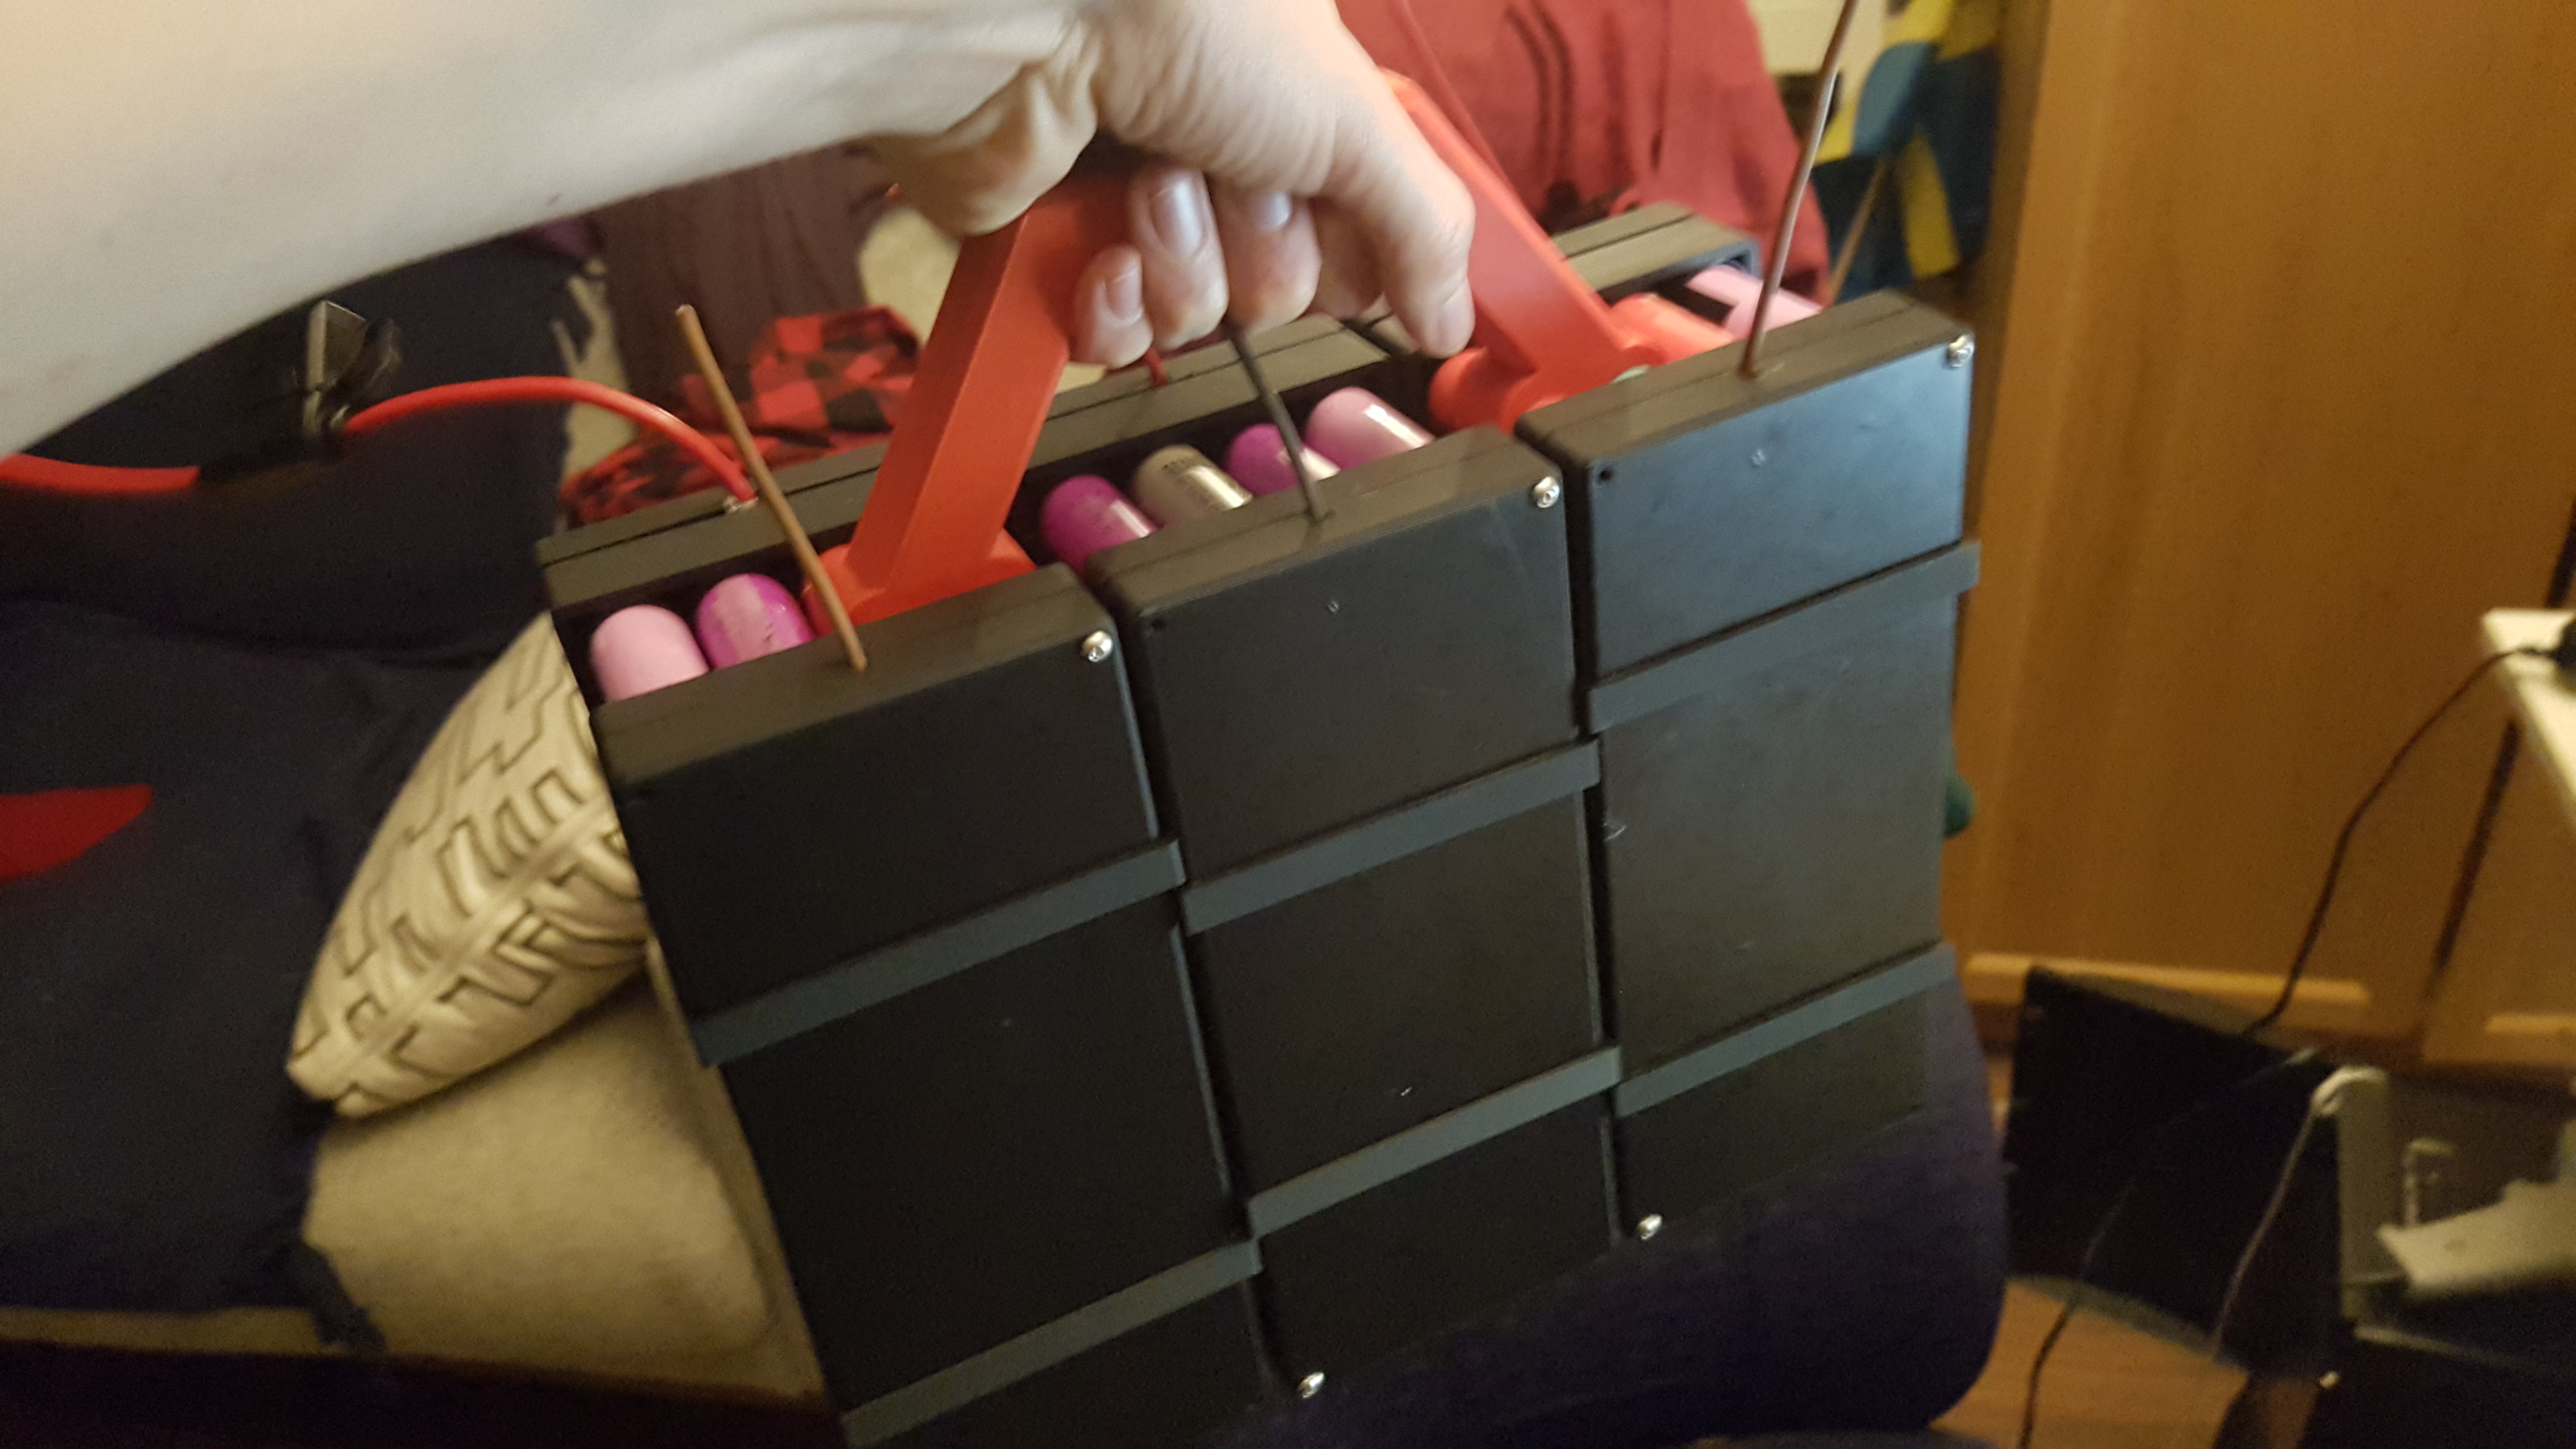
<p><strong>Update 2020-05-04</strong><br/> It could be defficult to put the two batteryholder parts together with batteries in the middle, because they wouldnt allways line up with the holes. This batteryholder_v2 helps with that.<br/> Also added a lid with cutout for the cable. I had a few lids split horizontally when i tried to make those holes manually.</p> <p><strong>A module based 18650 battery pack</strong><br/> Print the connector to join multiple x40 packs together, as many as you want!<br/> Print the attachment board to mount stuff on the side of the pack.</p> <p>For one module, you will need: 2x Lid and 2x BatteryHolder. If you dont plan on using springs inside the BatteryHolder, you proberbly want to design your own Ring parts to suit your needs, because the pack height will be different. otherwise, print 2x Ring aswell.<br/> If you plan on more than one module, print one or two HolderConnectorWide to connect two BatteryHolders together.</p> <p>The Handle part will probably only fit like its shown on the pictures; across 3 boxes on the top.</p> <p>You might want to cut off some of the battery holder, if the holder you are planning for doesn't have springs in it, just to save some material.</p> <p>For safety reasons, add 5 amp fuse wire to connect the springs to the bussbar on atleast one side. Batteries might die by shorting out essentially becoming a big wire. If this happens, all the amps of the other batteries will rush through the fuse wire and melt it, disconnecting the shorted battery from the pack.</p> <p>When you assemble a module, make sure all batteries within it are within about 0.3 voltage. Once both batteryHolders are on tightly they will start evening out their voltages. If the voltage difference is too grate on say one battery, the rest will charge that battery with a lot of amps. That might kill that battery one battery.</p> <p>I'm using the Victron SmartSolar and have been playing around with the settings. The settings i've arrived at for my 12v battery pack, is selecting battery preset LiPo and changing the float voltage to 12.0 and the absorption voltage to 12.3. This way the charger goes from bulk charing (pushing as many amps as possible into the battery), to absorption mode for up to 4 hours, to float. If you have a load on the solar charge controller it will take power from the battery untill the batery reaches the float voltage, before it will start using the solar panel power to try not to go under float voltage.<br/> Once the solar panel voltage reaches all-most-zero (like at night), the charger will consider doing another absorption charge.<br/> For some reason, the solar charger won't let me go under 11.7 volt. In the future, i might add another module to my pack, to get the voltages up.</p> <p>You should also put up a fuse that will limit the max outtake from the battery, to protect the bussbar and the wires inside your modules. that way you make sure that a short out side your battery wont melt the wires you use. I found a fuse holder in a local car-part dealer and i'm using a 15 amp car fuse (the black box on the red wire.</p> <p>You should decide on a wire/plate thickness for your buss bar, that can handle the load (amps) you plan to draw out from the battery pack, and then some.</p> <p>Apart from some M3 screws I used the following items:<br/> <a href="https://www.aliexpress.com/item/50-Pairs-Metal-Battery-Spring-Plate-Set-for-AA-AAA-Positive-Negative-Contact-New/32870772743.html?spm=a2g0s.12269583.0.0.73621fd6ToAKLI">https://www.aliexpress.com/item/50-Pairs-Metal-Battery-Spring-Plate-Set-for-AA-AAA-Positive-Negative-Contact-New/32870772743.html?spm=a2g0s.12269583.0.0.73621fd6ToAKLI</a><br/> Some twisted wires,<br/> Car fuses</p>
With this file you will be able to print 18650 x40 battery case with your 3D printer. Click on the button and save the file on your computer to work, edit or customize your design. You can also find more 3D designs for printers on 18650 x40 battery case.