Spoolie the spool holder
prusaprinters
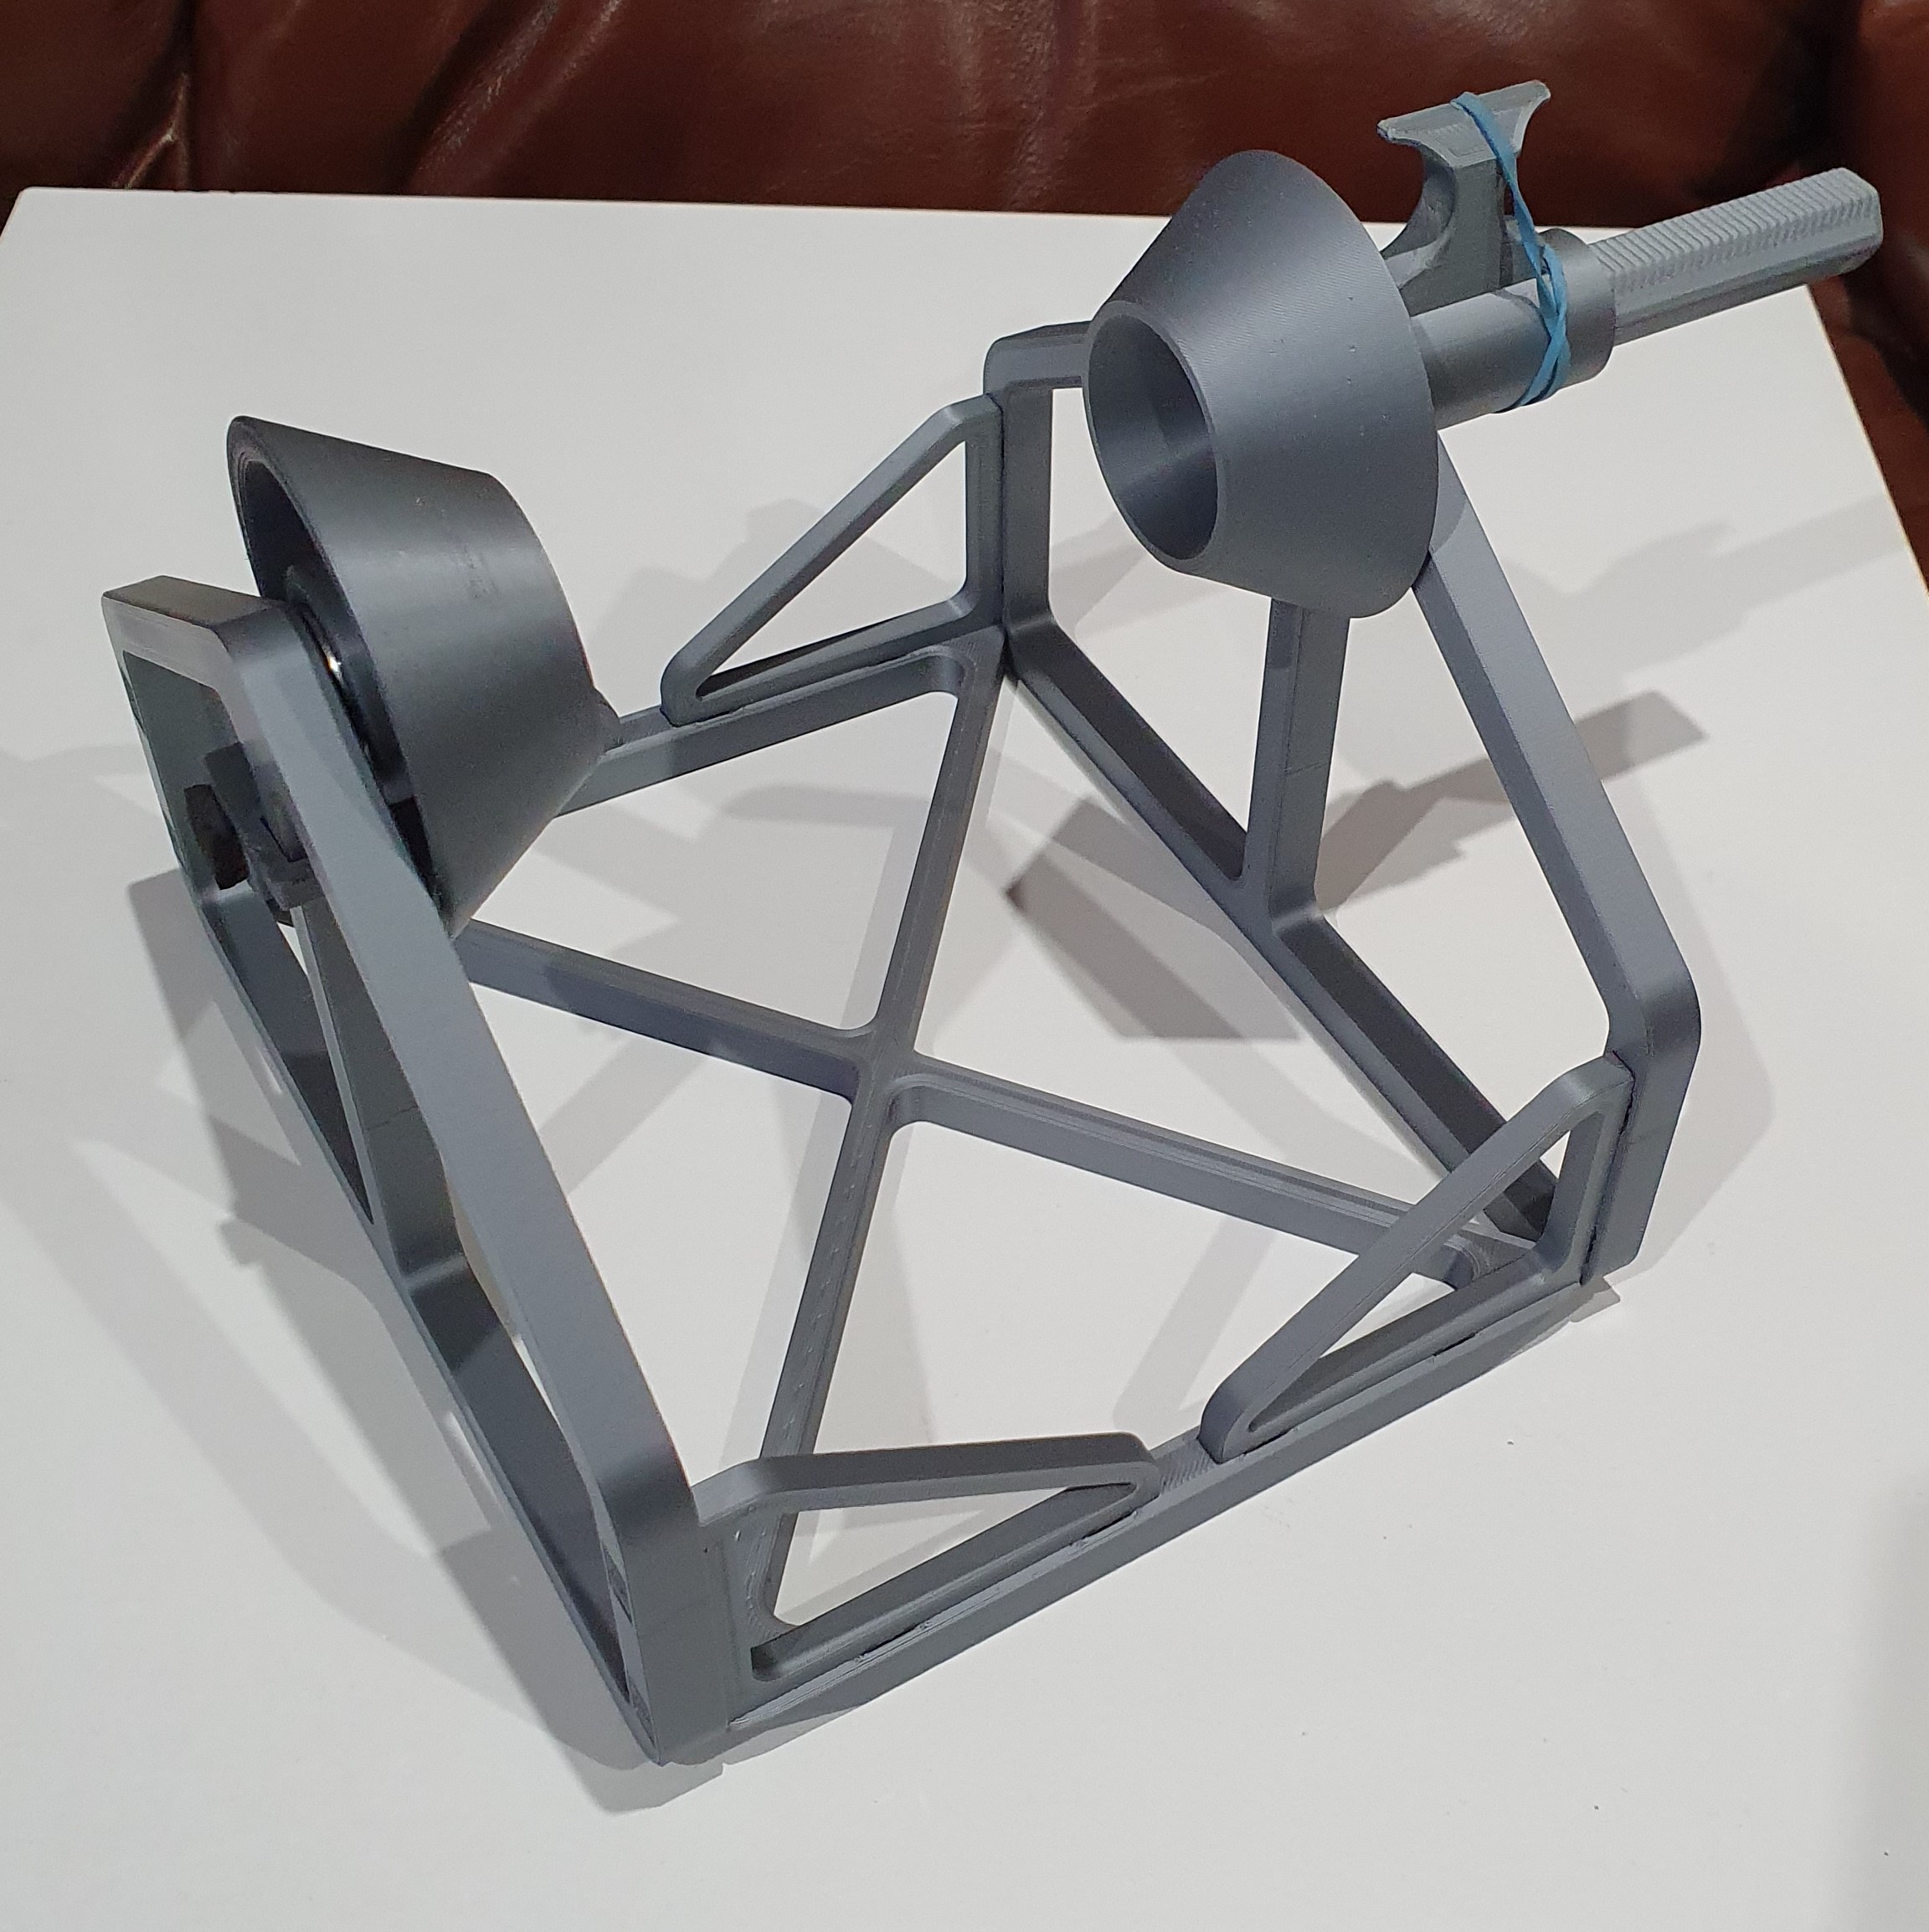
<p>This is a little project because I don't like the standard clip-on spool holder that came with the Prusa i3.</p> <p>It's a self centering, adjustable, quick change and quiet spool holder designed to for use with 1kg spools. Probably best to place it beside the printer instead of behind it. Ideally, secure a short length of PTFE tube to guide filament to the centre of the top of the frame.</p> <p>The only non-printed parts are 2x608z bearings, rubber band and 10mmx10mmx15mm dense foam.</p> <p>I tried to design everything to require minimum support.</p> <p>To see the video of Spoolie in action:<br/> <a href="https://www.reddit.com/r/prusa3d/comments/g3tlfv/my_first_personal_project_requirements_were_a/?utm_source=share&utm_medium=web2x">https://www.reddit.com/r/prusa3d/comments/g3tlfv/my_first_personal_project_requirements_were_a/?utm_source=share&utm_medium=web2x</a></p> <h3>Print instructions</h3><p>I printed in PLA for the rigidity.</p> <p>This was done is several jobs as some parts needed have different layer heights. You can probably use 20% infill, I used 40% for everything. I printed everything with 4 perimeters but you can use less if you desire. Where I mention supports required, it will always be the "support on build plate only" option.</p> <p>Non-printed parts required are 2x608z bearings, rubber band and 10mmx10mmx15mm dense foam.</p> <p>Things printed at 0.1mm layer heights:</p> <ul> <li><p>Shaft: this was printed with the logo facing up and support for the bearing mount. Add a cylinder modifier for the bearing mount and make in 100% infill</p> </li> <li><p>Stop: printed with the angled face on the bed so the teeth were at the top at an angle (like the shaft teeth print), required support</p> </li> </ul> <p>Things printed at 0.2mm layer heights:</p> <ul> <li><p>Spool Centre (x2): printed with the smaller diameter on the bed. May need a brim, my first print failed but the i properly cleaned the bed and it printed fine</p> </li> <li><p>Spool Centre Small (x2): included at request, I would print with larger diameter down with support, ensure to remove support properly and check depth to ensure bearing sits flat</p> </li> <li><p>Side Passive: printed to the bearing mount was facing up. This required support. Use a cylinder modifier for the bearing mount and make 100% infill</p> </li> <li><p>Side Active: print with the large flat side on the bed</p> </li> <li><p>Base: print with the curved edges facing up</p> </li> </ul> <p>Things printed at 0.3mm layer height (these can be printed in 0.2mm if wanted):</p> <ul> <li><p>Corner Brace (x4): print flat</p> </li> <li><p>Clip Securer (x16): print on its side so they look like arrows pointing to the side of the bed when looking from above the build plate</p> </li> </ul> <p>Assembly:</p> <ol> <li><p>Parts: all.<br/> Check and post-process all parts if required. Pay attention to the shaft going to the hexagonal hole. Sand the sand as needed until it can be moved back and forth through the hole easily but ensuring there is minimal wiggle/play. Also, pay attention to the teeth on the shaft and stop; clean them as required.</p> </li> <li><p>Parts: side passive, shaft, spool centre (x2), bearing (x2).<br/> Push fit the bearings into and onto the respective parts. Note that the bearing will sit a bit above the surfaces; this was done for clearance purposes.</p> </li> <li><p>Parts: side passive, side active, corner brace (x4), clip securer (x8).<br/> Carefully insert the clips on the short side of the corner braces into the rectangular holes in the sides. Make sure you insert them the correct way up!!! Note that each rectangular slot has different sized openings at each end, you will need to start inserting the clips into the smaller opening.<br/> Unfortunately, you may see delamination of your perimeters here on the clips, don't worry, push all the way in. On the other side, insert a securer into each clip hole and push all the way in. This should pull/push everything into place and it should be feel fairly solid.</p> </li> <li><p>Parts: shaft assembly, side active assembly.<br/> Insert the shaft through the hexagonal hole ensuring the teeth are facing up; they should be visible through the slot in the cylinder. Make sure the spool centre sits on the same side of the frame as the corner braces.</p> </li> <li><p>Parts: base, clip securer (x8), side active assembly, side passive assembly.<br/> Place the Base so the curved edges are facing down (you should be able to see the countersink of the hole) and take one of the side assemblies and insert the corner brace clips into the rectangular slots in the base and insert slip securer's in the same way you did in step 3.</p> </li> <li><p>Parts: stop, rubber band, assembly.<br/> With the assembly orientated so the side active is on the right, insert the stop teeth down and the angled surface facing you. If the stop is the wrong way around the ratchet system will fail. Gently place the rubber band over and around the stop and cylinder letting it rest in the slots.</p> </li> <li><p>Parts: foam, assembly.<br/> Insert the foam into the square hole until it's touching the surface of the spool centre, this will add some resistance to stop the spool from unwinding more than required in the event your extruder moves fast. Cut foam shorter if desired</p> </li> <li><p>Parts: assembly, spool (empty or with material).<br/> check the ratchet system is working, insert a spool and close it, pulling on the frame a little to give it some tension and give it a whirl!!</p> </li> </ol> <p>Optional: add rubber feet to the bottom or secure it down with max 4mm countersunk screw</p>
With this file you will be able to print Spoolie the spool holder with your 3D printer. Click on the button and save the file on your computer to work, edit or customize your design. You can also find more 3D designs for printers on Spoolie the spool holder.