1Kg Filament in Dremel 3D45 Solution #2
thingiverse
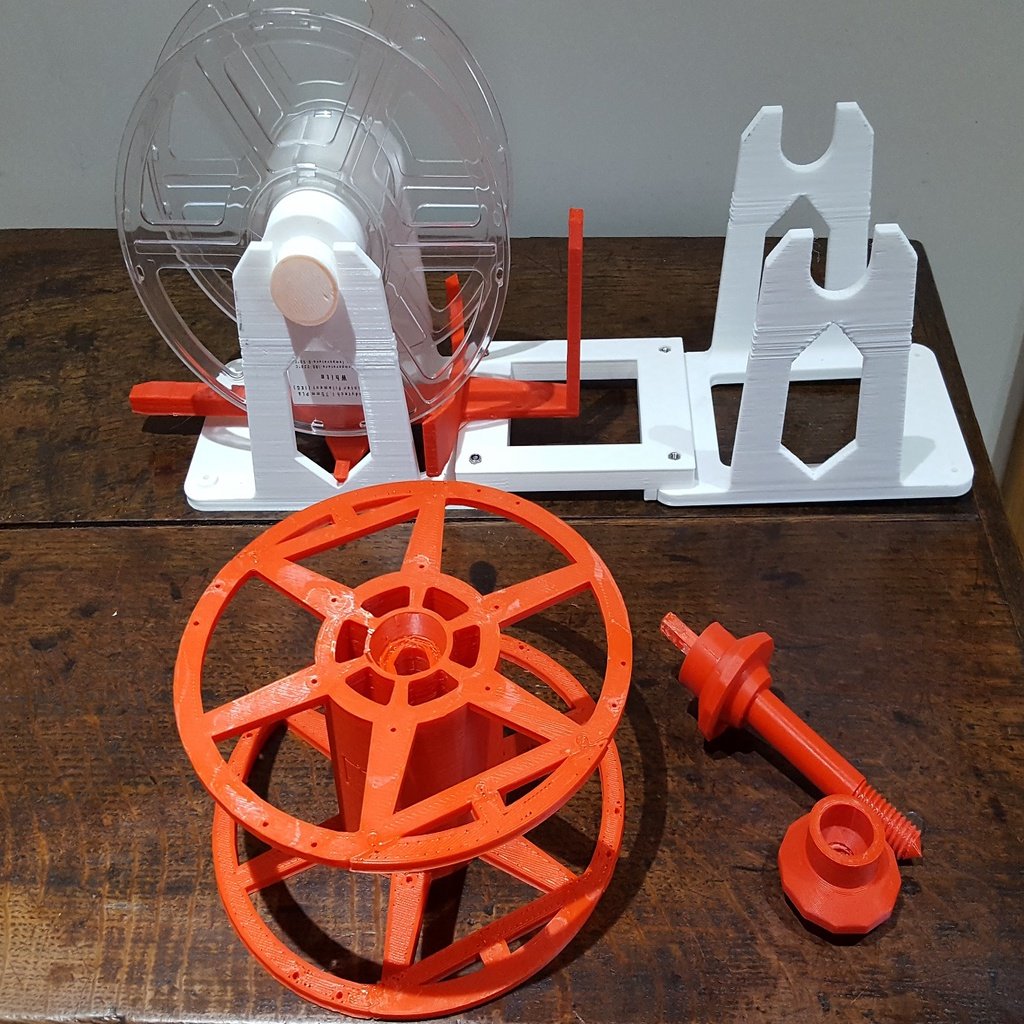
1Kg Spool inside your Dremel 3D45 ===================== Whilst I would generally recommend the Dremel 3D45 printer, one of its more irritating features is that the filament spool door aperture is 180mm diameter. Most third party filament spools are 200mm in diameter so they will not fit inside the printer. Or will they? I have tried feeding filament from an external spool into the printer however it is far better to have the spool inside the printer housing for several reasons. 1. The filament feeds more smoothly causing less blockages in the print head. 2. The filament is kept warm so that it remains dry. 3. The printer enclosure remains closed so that there is less temperature variation to spoil your print. 4. There is no clutter of spool and spool holder around your printer. I have two alternative solutions to the problem. 1. To cut, or break off at least 10mm from around the edge of the inside flange of a 200mm diameter filament spool so that it will fit into the printer (See my [thing:3818976](https://www.thingiverse.com/thing:3818976)). 2. To print a 180mm diameter spool and wind the filament on to it (this Thing). Solution #1 requires that you can cut or break off the perimeter of the the third party filament spool which is okay if it is brittle. Solution #2 (this Thing) requires more parts to be printed but is often the easier option to implement. You may like to try both. Print the spool -------------- Print two spool halves and four flange edges. For convenience I incude a STL file with a spool half and two edges laid out to fit the Dremel 3D45 print bed. Print two of these. Use the locating lugs on the flange edges to attach them to the flanges then glue them in place. Use acetone melt glue for ABS. Superglue for most other plastics. Align the two spool halves, apply glue then push them together until they lock.. Print a door cover ------------ You need to make a door cover to fit the spool. This is two cover halves, two hooks and a handle. Download these files from my [thing:3818976](https://www.thingiverse.com/thing:3818976) and assemble according to the instructions on that thing. The spool clamps included with that Thing are optional. Print a Spool Clamp --------------- Print the Spool Clamp 1Kg spool version included with this Thing and screw it into the door cover handle from the outside. This is an exact fit for the 1Kg spool so you can screw it all the way in. Alternatively, print the Long version included with the door cover files which may be used with any filament spool including Dremel spools. When using the Long version it is essential to screw it in just sufficient to support the filament spool but not so tight that the spool does not spin freely. DO NOT OVERTIGHTEN else you may break the hooks off the door cover. Print the Spool Winder Drill Adapter ---------------------- Use this to wind third-party filaments onto your spool. This is best printed in PLA a bit hotter than usual, so that you get good adhesion of the layers that form the screw. If you must print in a plastic which does not bond well, such as ABS or nylon then there is a hole to take an optional M4 x 60mm machine screw to strengthen the layers forming the threads to reduce the chances of them snapping off. If your printer prints a thick first layer (as mine does) then you may need to trim the edge of the hole in the base with a knife before inserting the drill bit. The bit is designed to be a tight fit and may need a gentle tap with a hammer to insert it. It will probably be tight enough without gluing. Winding the filament ---------------- Place the spool with the filament on sturdy mounting so that it can rotate freely. Attach the drill adapter to the printed spool and fit it to an electric drill. Set the drill to the slowest speed. Secure the end of the filament to the printed spool and start to wind it with the drill. Guide the filament with your hand. If you have a clean cotton glove this will protect your hand and clean any loose particles off the filament. Alternatively use my Spool Holder system. Using my Spool Holder system ------------------------ The drill adapter is designed to fit my Spool Holder [Thing:3823334](https://www.thingiverse.com/thing:3823334). If you want to use my Spool Holder then print two Holders and join them together the series joiner (see photo on this Thing.). You can print the optional Guide Lever and Pivot included with this Thing files. The filament needs to feed from the bottom of the third-party spool onto the bottom of the printed spool to keep downward pressure on the assembly and reduce the possibility of the spools jumping out of the holders. 1. Place the Guide Lever and Pivot in the base of one of the Spool Holders and put the spool of filament on the same holder using the axel and a well fitting spindle. Have the filament coming off the bottom of the spool towards the second spool holder. 2. Attach an empty printed spool (this Thing) to an electric drill with the Drill Adapter. Set the drill to its slowest speed. Place the assembly onto the second Spool Holder. 3. Thread the end of the filament through the guide and secure it to the empty printed spool. 4. If you are left handed you will probably hold the drill handle in your left hand and use it in normal rotation. If you are right handed then set the drill in reverse rotation. 5. Wind the spool slowly and carefully with the drill using the Guide Lever to control the speed of the filament spool and guide it onto the printed spool. Do not wind it too tightly near the flanges else these may bend or even break off. Move the Guide slowly from side to side in order to keep successive windings close to each other and compact . Alternatively use the hand crank instead of a drill. If operating by hand it is probably safe to guide and tension the filament by hand so I suggest that ypu not bother printing the two filament guide components. My Dremel 3D Printer Things ============== * Spool winder for Dremel spools [Thing:3793381](https://www.thingiverse.com/thing:3793381) * Manual spool winder [Thing:3918099](https://www.thingiverse.com/thing:3918099) * Dremel compatible spool. Standard size [Thing:3922866](https://www.thingiverse.com/thing:3922866) * 1Kg Filament in Dremel 3D45 Solution #1 [Thing:3818976](https://www.thingiverse.com/thing:3818976) * 1Kg Filament in Dremel 3D45 Solution #2 [Thing:3835745](https://www.thingiverse.com/thing:3835745) * MasterSpool for filament refills [Thing:3875917](https://www.thingiverse.com/thing:3875917) * Build Plate for Dremel 3D45 [Thing:3851463](https://www.thingiverse.com/thing:3851463) * Nozzle Box, 9 - 27 larger nozzles [Thing:3831799](https://www.thingiverse.com/thing:3831799) * Spool Holder [Thing:3823334](https://www.thingiverse.com/thing:3823334) * Filament Guide Wheel for Dremel 3D45 Printer [Thing:3806514](https://www.thingiverse.com/thing:3806514) * 80mm Air Filter for Dremel 3D45 [Thing:3802160](https://www.thingiverse.com/thing:3802160) * 15 Labels for Filament [Thing:3786182](https://www.thingiverse.com/thing:3786182) I design these things for myself but I have published them for you. If they make your life easier or save you money then please do not forget to "Tip Designer"!
With this file you will be able to print 1Kg Filament in Dremel 3D45 Solution #2 with your 3D printer. Click on the button and save the file on your computer to work, edit or customize your design. You can also find more 3D designs for printers on 1Kg Filament in Dremel 3D45 Solution #2.