1U Rack Mount Raspberry Pi 3B+ 4B POE Hat
thingiverse
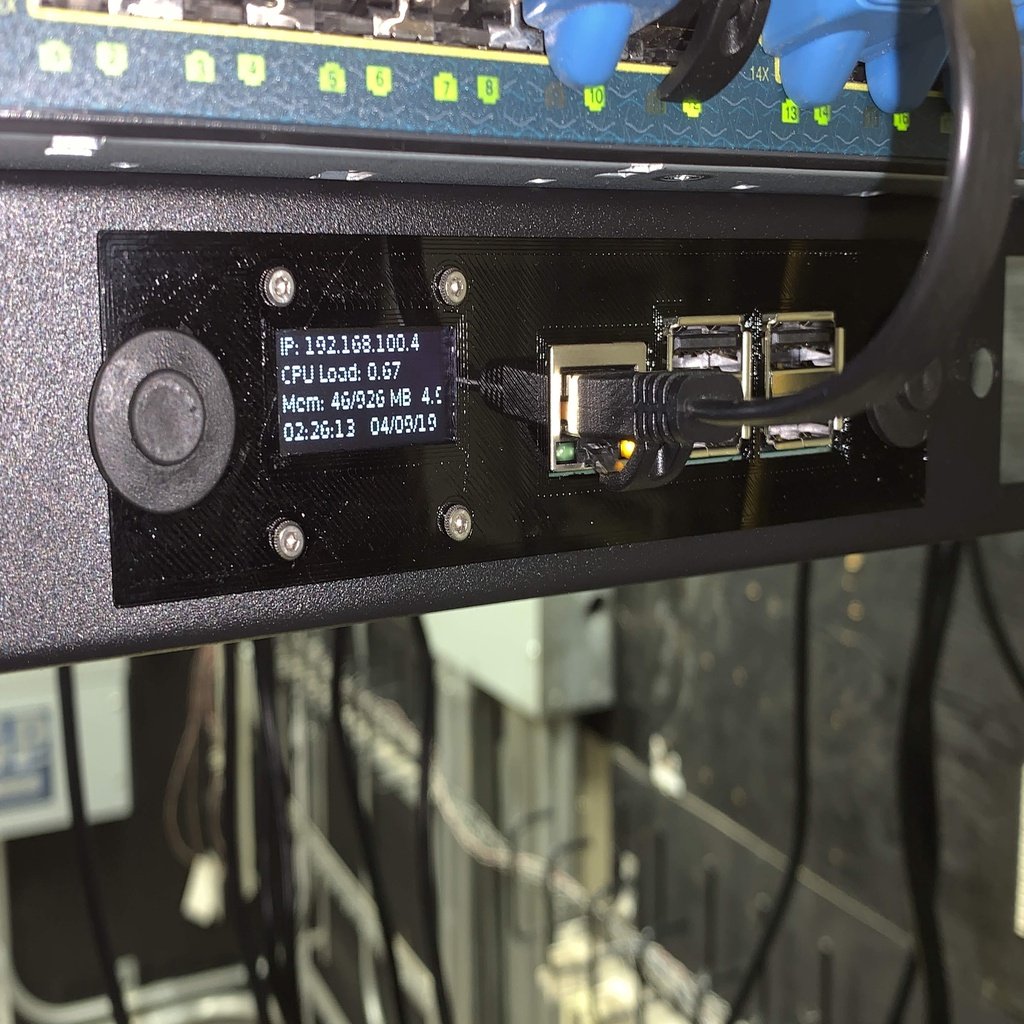
Updated: No screws needed for OLED. This is a remix to use a 3 Slot Blank LGX Fiber Patch Panel, and a 128x64 OLED Display. Parts List: 1U LGX Blank Fiber Patch Panel - 19 Inch OLED Display Module 128x64 OLED Display Raspberry Pi POE Hat 2 - Skirt Blind Rivets (6.3mm Hole Size) 2 - M2.5 Screws to attach the Pi Directions: Solder 4 wires or use pin connectors and attach them to the OLCD Display. Solder them to the correct GPIO pinout, on the bottom of the board. https://lmgtfy.com/?q=raspberry+pi+pinout Attach screen using the 4 M2 Screws and Nut, do not over tight. Attach Pi to Switch. See original posts to configure OLED. I replaced the Disk command to display the date and time instead, since this is used as a NTP Server. Setting up NTP Server: https://lmgtfy.com/?q=Raspberry+pi+NTP+Client+and+Server Setting up OLED: https://lmgtfy.com/?q=https%3A%2F%2Flearn.adafruit.com%2Fadafruit-pioled-128x32-mini-oled-for-raspberry-pi%2Fusage To add the Date, replace line 90 on the file stats.py: cmd = "date '+%I:%M:%S %d/%m/%y'" You will have to use nylon/ninja flex if you want to print the push clip. or purchase these from amazon. Works much better... https://www.amazon.com/Leviton-47615-NYL-Push-Lock-Structured-Centers/dp/B0018DOBG2 https://www.homedepot.com/p/Leviton-Push-Lock-Pins-for-Structured-Medi-Amp-Centers-20-Pack-47615-NYL/302008834
With this file you will be able to print 1U Rack Mount Raspberry Pi 3B+ 4B POE Hat with your 3D printer. Click on the button and save the file on your computer to work, edit or customize your design. You can also find more 3D designs for printers on 1U Rack Mount Raspberry Pi 3B+ 4B POE Hat.