2" Faux Wood Blinds Stepper Mount
thingiverse
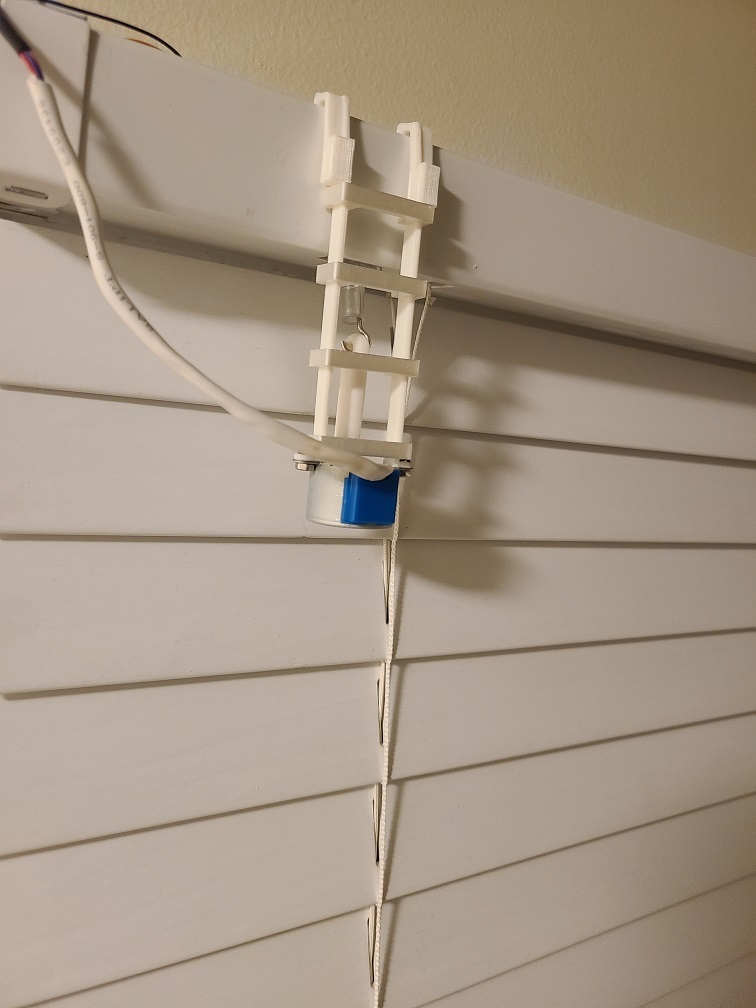
UPDATE 9/14: Changed the motor adapter again. Made it square, so it catches the tilter better. You may need to use a file to bore out the hole after printing depending on your blinds. UPDATE 9/13: Had one of the supports break, so I remixed a little. The supports are now thicker and 1 cm shorter. The accompanying motor adapter was also shortened. In addition, instead of using the plastic brackets, the main supports have holes to use 3x25mm bolts with heat-set inserts in the opposite support. This will be stronger and not catch on the blind valance, which the other supports did. Remixed from the original to fit my 2" faux-wood blinds from Home Depot. The software I used to control them was from this project on GitHub: https://github.com/thehookup/Motorized_MQTT_Blinds I used to use servos to control the blinds but I never got the amount of closure that I really wanted. They would always be partially open. Using this method means you leave in the built-in tilt control so you get the benefit of the built-in clutch. The tilt rod inside the head-rail will only spin when the motion is started from the tilt-rod. That's why the blinds don't slip when you change them manually and why you have to take the tilt mechanism out when you use a system built into the head-rail. They stick out from the valance that came with the blinds but I have a larger valance over one window and I'm going to get a bigger one for this window too. They take a little while to open/close but they are much more effective than the systems to control them from the head-rail directly. You can see a video here: https://youtu.be/1z7zKRRMPaE
With this file you will be able to print 2" Faux Wood Blinds Stepper Mount with your 3D printer. Click on the button and save the file on your computer to work, edit or customize your design. You can also find more 3D designs for printers on 2" Faux Wood Blinds Stepper Mount.