200 Watt Bluetooth 5 Speaker Boombox *Source Files Included!*

200 Watt Bluetooth 5 Speaker Boombox *Source Files Included!*

thingiverse

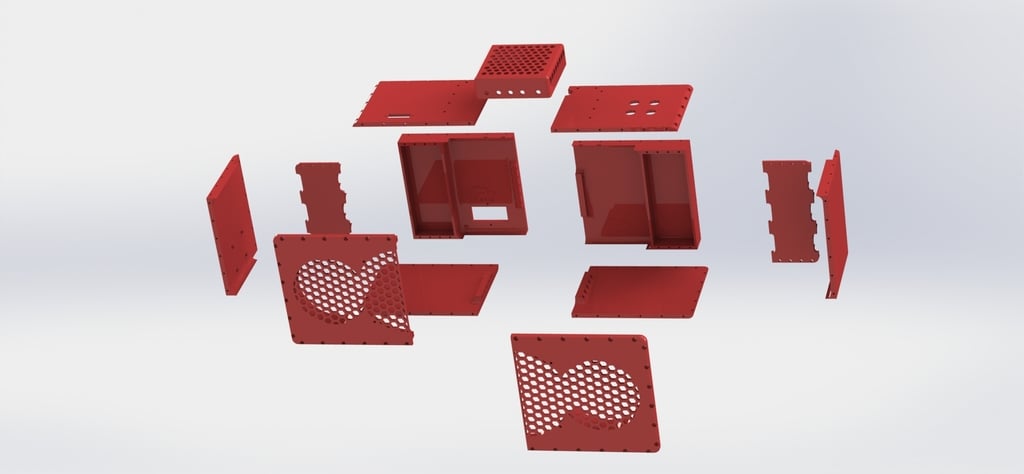
So I got bored again. This project involves some serious electricity. Both in amps and volts. There is 120v AC inside this completed unit and many many amps of lithium-ion power otherwise. There will be detailed wiring guides included and in the end it's no harder to wire than you're average 3D printer. Take care, use your head and take your time. Don't substitute wire gauges! This time I got on ebay and bought some stuff from China. I will be including the links to the exact items I bought. Feel free to substitute! Some from Amazon, some form Ebay, some from McMaster-Carr. The idea was a mostly portable 200 watt bluetooth speaker. I wanted lithium ion power and as many watts as China says I can have. I have used the TPA3116 amps before and they work great. I found this one https://goo.gl/2eBmeX on Ebay pretty cheap. It has decent heat sink, good selection of adjustments, good input and output connector options and even a 5v output plus it runs on 12-24 volts I went looking for a bluetooth module with decent connectors and features that's not obnoxious. I found https://goo.gl/LzuAqu on ebay again. This one is bluetooth 4.0 with a set of wires and JST type connectors which I have the crimps for. It's 7-30 volt power so very easy to use. It has solder tabs for buttons and isn't crazy big or small. It even has microphone connection for phone use, I;m gonna use that too. I wanted a battery gauge so I grabbed https://goo.gl/yxdiJG off ebay. It's simple to use and mount so yeah, all I needed. On to speakers! I got https://goo.gl/xga3TQ for side speakers and one https://goo.gl/k5LkNR off ebay for the sub. They are cheap car speakers but certainly decent enough for this job. Plus look, so yellow aven if they are a pyle.. Needed some buttons for the bluetooth and went with 16mm stainless steel flush mounts off ebay. I didnt want to wait so paid a bit more to get them from the USA. https://goo.gl/n4Y2GZ Now on to the batteries. I used to repair tools and have a lot of "bad" lithium batteries for drills and things. I tore them apart carefully and extracted the cells. Using all the chargers I could find and my load testers I managed to get 18 good 18650 cells. With that number I am doing 6 packs of 3 parallel cells. If you go for used batteries TEST THEM FOR CAPACITY and always use a balance board. There are other ways to get the cells too. One of the cheapest is to find power banks on amazon with decent ratings. One I like for cells and the board inside is handy too is https://goo.gl/EmR9rU This thing hovers around $25 most of the time though for a full load here you would need 3 of them. So this runs at 24 ish volts. That's 6 x 18650's together in series hence my pack of 3 batteries in parallel and 6 of those packs in series for 3x the amps and 6x the volts of a single cell. Now for some wiring of this pack! I made another CrapCAD diagram for this one: ![wires](https://goo.gl/K59j2e) This shows the 6 packs of 3 18650's wired together in series/parallel. The protection board monitors packs so it has the same 7 connections the charger does. You need to Y these to run a set to the charger. I used this protection board for 6 cells: https://goo.gl/dor51J I used https://goo.gl/5hYXWg for the set of balance wires run to the charger and just split them at the board. To charge it I plan to use a nice hobby charger. I picked https://goo.gl/8H27Vi for t's size and price, plus a nice display! Going to mount this in the top left side with the wheel and screen accessible and all the wiring connections made inside per the diagram above. With this balance charger and the protection board inside the unit should have good battery life and safe charging. I will post wiring, pictures and better instructions once I finish this. For now this is just kinda a way to keep track of it for me and you. So to get power into this I am using an IEC plug from Amazon. It has a switch and noise suppression. https://goo.gl/Z5rbQ2 and it's cheap. Then I wanted a way to power the unit from the wall while it charges. To do this I got a 6amp 24v power supply from amazon https://goo.gl/PUX2F2 and a 120 volt double throw relay https://goo.gl/VuYzsV The relay connects the power into the amp from the battery when no 120v is applied over to the power supply one it gets 120v power so nothing gets shorted together. Also the input plug has a fuse. To wire the relay, charger, 24v power supply and AC side see this diagram: ![mega](https://goo.gl/PCdYin) The blue wires are AC 120v. Red is positive 24 volts DC and black is negative 24 volts DC. With this arrangement the unit will switch from battery to wall power as soon as the AC is turned on. The relay prevents the battery and 24 volt DC power supply from connecting together directly and causing potential issues, like a fire. Besides powering the load which is the amplifier board the 24 volt DC power supply also powers the charger to charge the internal batteries. Now I designed this to fit on my Anet A8. The box is meant to be screwed and glued together. I ordered https://www.mcmaster.com/#99397a489/=1bi6neq from Mcmaster-Carr. These are meant to be used in plastics, stainless steel and look pretty good.They wont vibrate out either but on the main body I plan to superglue the flat edges too. It currently uses 145 screws >.> Yeah, I like the look of them though. Thank you, enjoy, like, share and comment! Don't be shy! - Updated 2/10/2018 with latest files and AMF copies. - Update 2/18/2018 Printing parts! https://www.youtube.com/watch?v=YOHUB8JxVU8 - Update 2/21/2018 Split up the HUGE rear sections into panels to make it easier to print. Print one of each file. You'll need a lot of screws to put it together. I recommend using PETG. I have the fronts and amp enclosure printed in glow in the dark PLA and am printing the sides in semi-clear green PETG. Assembly to come. #BOM: - https://goo.gl/f8juVY Amplifier X 1 - https://goo.gl/iwatZN Bluetooth X 1 - https://goo.gl/s8uHDS Battery Meter X 1 - https://goo.gl/nTYHZR Stereo Speakers X 1 pair - https://goo.gl/r8pY65 6.5" Subwoofer X1 - https://goo.gl/h2M2rf Buttons x 4 [I ordered 5 because it's cheap] - https://goo.gl/oKeJLv Balance Board X 1 - https://goo.gl/Kh2d17 Charger X 1 - https://goo.gl/T63a3w Input Panel X 1 - https://goo.gl/hkNt4R 24V Power Supply X 1 - https://goo.gl/o31v9s 120V SPDT Relay X 1 - https://goo.gl/TNwmzV Screws X 150 - https://goo.gl/sL1DXT Source of batteries, it is meant to use 18 x 18650s but can use as few as 6, or 12. Thank you Thingiverse community for inspiring me to make this junk! Like, enjoy and share! - Update 2-21-2018 Added wiring diagrams and instructions. Last of the parts ordered. - Update 2-23-2018 Added the place for the IDST charger and built retention straps for it. - Update 3-7-2018 Finished the final touches and uploaded the Solidworks source files for easy customization..

Download Model from thingiverse

With this file you will be able to print 200 Watt Bluetooth 5 Speaker Boombox *Source Files Included!* with your 3D printer. Click on the button and save the file on your computer to work, edit or customize your design. You can also find more 3D designs for printers on 200 Watt Bluetooth 5 Speaker Boombox *Source Files Included!*.