220X
thingiverse
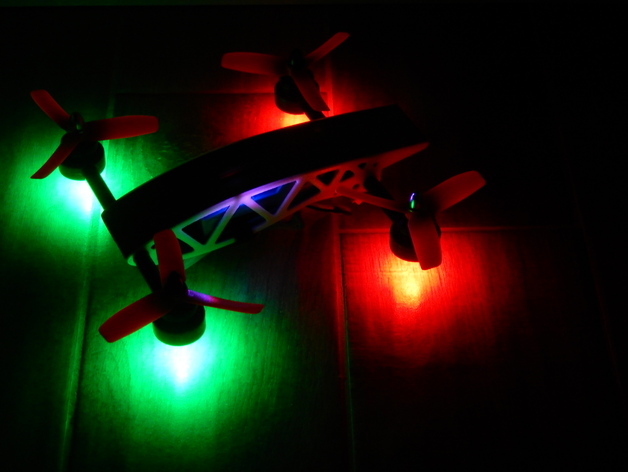
Mini 220 M2M size quad copter for fun flying. It could be equipped with FPV set like Quanum ELITE TX CAMERA COMBO (http://www.hobbyking.com/hobbyking/store/__89779__Quanum_ELITE_TX_CAMERA_COMBO_Micro_Cam_VTX_25mW_40CH_5_8GHz_NTSC_EU_Warehouse_.html) for FPV flying. Model is designed around next components: -Turnigy nano-tech 850mah 3S 25~40C:http://www.hobbyking.com/hobbyking/store/__32549__Turnigy_nano_tech_850mah_3S_25_40C_Lipo_Pack_EU_Warehouse_.html -Skyline32 Mini Flight Controller:http://www.hobbyking.com/hobbyking/store/__105214__Skyline32_Mini_Flight_Controller_w_Baseflight_Cleanflight_EU_Warehouse_.html -Round 12A ESC with Red LED For Spedix Series Multirotors:http://www.hobbyking.com/hobbyking/store/__101610__Round_12A_ESC_with_Red_LED_For_Spedix_Series_Multirotors_1pc_EU_Warehouse_.html -DYS 1804-23 2000KV BX motors:http://www.hobbyking.com/hobbyking/store/__91925__DYS_1804_23_2000KV_BX_Series_Set_of_2_Motors_CW_CCW_EU_Warehouse_.html -Diatone Bull Nose Polycarbonate 3-Blade Propellers 4040:http://www.hobbyking.com/hobbyking/store/__102869__Diatone_Bull_Nose_Polycarbonate_3_Blade_Propellers_4040_CW_CCW_Black_2_Pairs_EU_Warehouse_.html For receiver anything similar or smaller than Multiplex RX-6-DR Light. Frsky 4 channel will fit perfectly. EDIT : Updated engine holders, so now should fit to ESC-s. Also forgot to wrote down tube lenght... It should be 125mm long and don't forget to drill a hole for power and signal cables at the center of tubes. If any problems with printed parts, just contact me via PM, will do my best to solve it. Update 19.08.2016 After few tries, finally engine holders are OK. Now round ESC-s fit with capacitor and I hole size for better cooling. I also added 2 covers for engine holders. One has hexagon pattern and Other letter K (my logo). Engine covers print with 0,1mm resolution for better results and use at least 50% infill or more. Update 23.08.2016 Just changed engine holders and added photos of finished model. Update 26.08.2016 Video: https://youtu.be/TBbfSNQn0bU Print Settings Printer: GEEETech I3 PRO B Rafts: No Supports: No Resolution: 0,2mm Infill: 20% Notes: I used Cura for slicing STL parts. Since parts Left F and Right F are very long, make sure that sticks very well to heat bed surface other vice they will just peal off surface. I used Esun ABS silver, blue and luminous blue. For motor holders use 50% infill. Bottom and top layer thickness 2mm, also shell thickness is set to 2mm. Post-Printing Parts fit very tight, so little sanding will be needed to assemble model. I just sanded top and bottom of fuselage and at the end smoothed it with nitro thinner and soft cotton cloth. Just make sure to soak cloth other vice it will stick to the model. While smoothing parts make sure not to stop in middle of the surface and that cloth is clean (max 3 strokes per cloth, other vice you will get matt finish). For rest of parts it can be used acetone vapor technique. I made holles little bigger, since printed parts shrink little. Boom holes are 10,4mm, but at the end I just use 10mm drill bit and make holes perfectly round and exactly 10mm diameter. At the end just glue central parts ( part Left and Right E). Best way is to use CA glue. But before fit them inside fuselage to get them straight and on right place. Use few drops of glue just to attach parts together (here I use CA accelerator). When CA cures, remove fuselage and add glue to the stitching surfaces. For booms I used CFK tube 10mm with 0,5mm thick walls. Best source for tubes:http://www.ebay.com/usr/composite-point?_trksid=p2047675.l2559. Since parts fit tight, only few drops of CA will do the yob or small self tapping screws will do just fine. I will use 12mm clear tape to stitch fuselage parts. Since FC board has USB on rear side, I suggest you to change board orientation in Clean flight SW. FW for board is naze 32, so don't forget it to update it to latest stable FW and calibrate sensors. Fly safe and by the rules of your country!
With this file you will be able to print 220X with your 3D printer. Click on the button and save the file on your computer to work, edit or customize your design. You can also find more 3D designs for printers on 220X.