2U Rack Mountable Raspberry Pi Holder for Raspberry Pi Super Computer
thingiverse
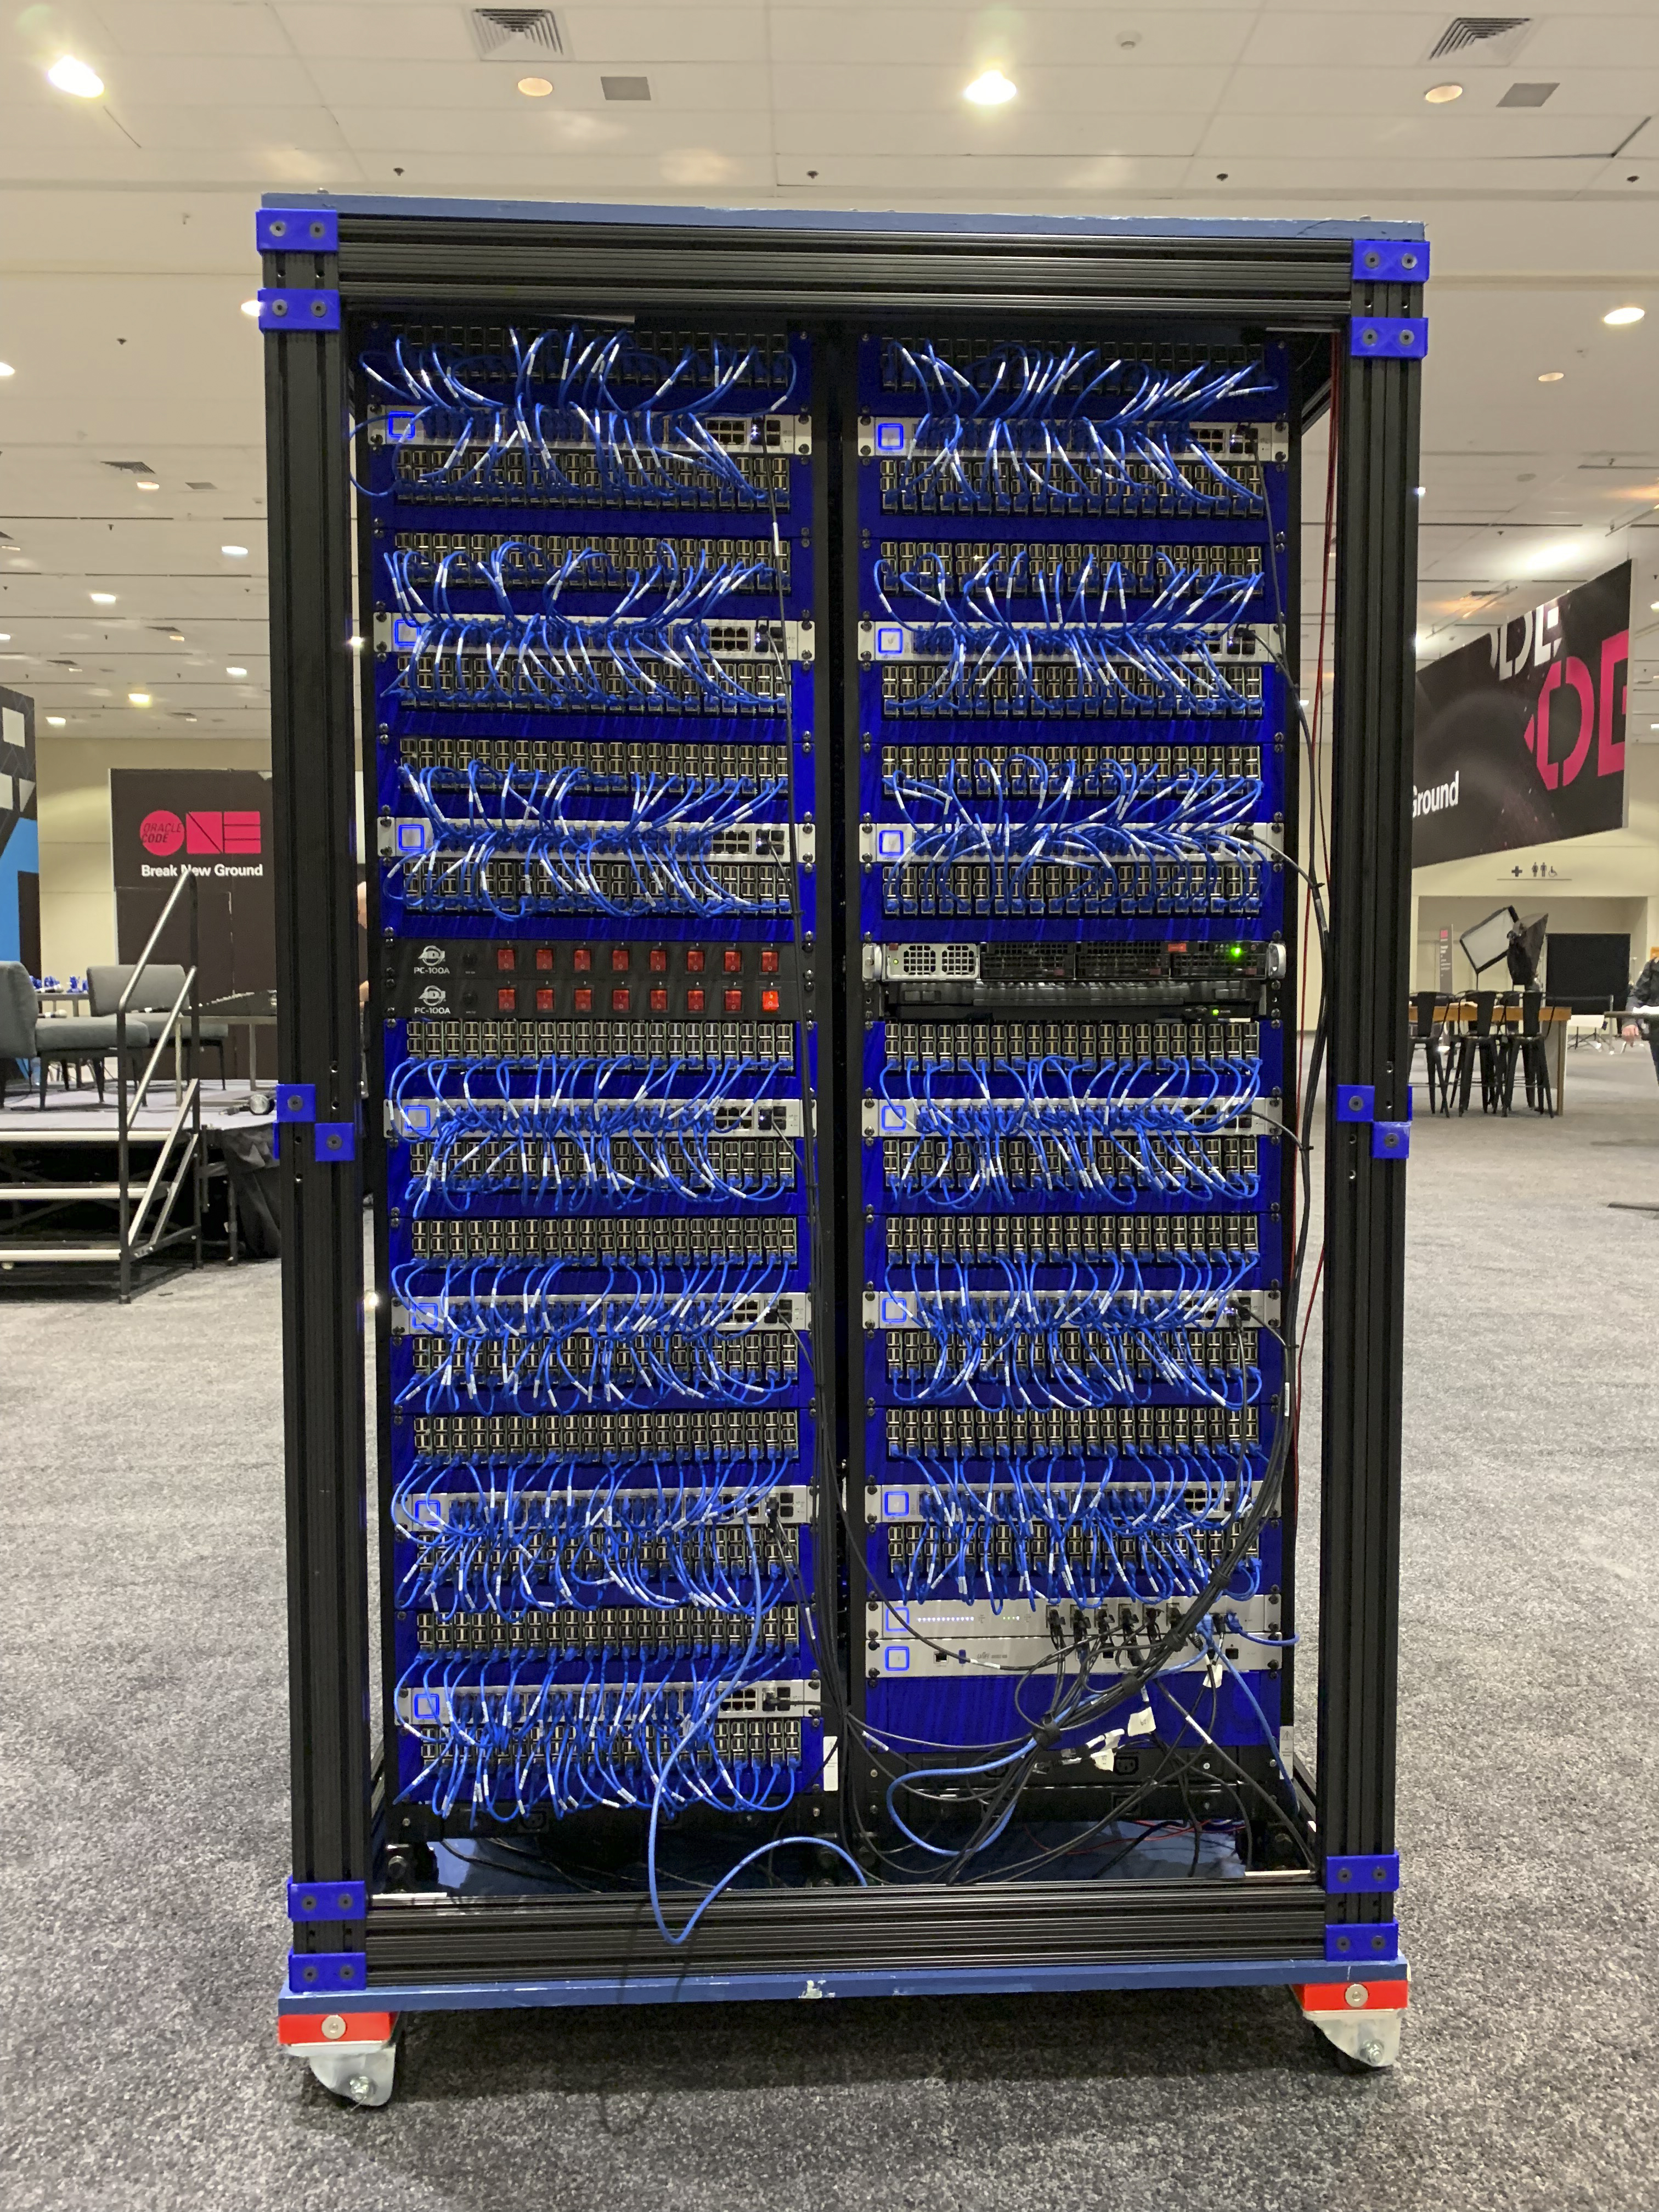
Here is the 2U rack mountable for 21 Raspberry Pi 3B+. This is the rack that held the 1024 Raspberry Pi at CodeOne San Francisco 2019 in the Raspberry Pi Super Computer. You will need to gather the following: 1. (21) Tapered Heat-Set Inserts for Plastic, Brass, M2.5 x 0.45 mm Thread Size, 3.4 mm Installed Length, Packs of 100. Order 94180A321 from McMaster-Carr. 2. (21) Button Head Hex Drive Screw, Passivated 18-8 Stainless Steel, M2.5 x 0.45 mm Thread, 5mm Long, Packs of 25. Order 92095A457 from McMaster-Carr. 3. (4) 10-32 3/8in long screws with flat head. Order 91253A001 from McMaster-Carr. 4. (1) 18" 80/20 Series aluminum extrusion, 15 .5in x 1in - available on Amazon at https://www.amazon.com/gp/product/B00IWZFPCS/ref=ppx_yo_dt_b_search_asin_title?ie=UTF8&psc=1. 5. (21) Raspberry Pi 6. (21) 90 degree micro USB cables 7. (1) 24 port or larger switch 8. (1) 24 port or larger 5v USB power supply - available on Amazon at https://www.amazon.com/gp/product/B07MB12XZ4/ref=ppx_yo_dt_b_search_asin_title?ie=UTF8&psc=1. 9. And various tools Note: Before ordering the items above, please double-check to verify everything looks good. It has been a while since I ordered these, and while I have gone back through my receipts, there could be some mistakes. If you find any errors or have questions, please let me know. Steps: 1. Print (21) of the Pi2UHolder.stl files 2. Print (1) of Pi2ULeftBracket.stl 3. Print (1) of Pi2URigthBracket.stl 4. Insert a threaded insert into each of the holes in the Pi2UHolder.stl 5. Place the Raspberry Pi on top of the Pi2UHolder.stl, push on the 2 bottom holes and insert the bolt through the top hole and tighten into the threaded insert. 6. The 18in 80/20 is a bit too long. You will need to cut off 16.35mm. The most accurate way to do this is with a mill. 7. Tap the 2 holes on either side of the 80/20 to 10-32. 8. Push the 80/20 into Pi2ULeftBracket.stl, and bolt in the two 10-32 bolts 9. Slide on (21) Pi2UHolder.stl with Raspberry Pi attached from step 5 above 10. Push the Pi2URigthBracket.stl onto the remaining bit of 80/20 11. Congratulations!
With this file you will be able to print 2U Rack Mountable Raspberry Pi Holder for Raspberry Pi Super Computer with your 3D printer. Click on the button and save the file on your computer to work, edit or customize your design. You can also find more 3D designs for printers on 2U Rack Mountable Raspberry Pi Holder for Raspberry Pi Super Computer.