3.5 inch Drive Bay to 2.5 inch Adapter Tray--V2--MOD 02/17/16
thingiverse
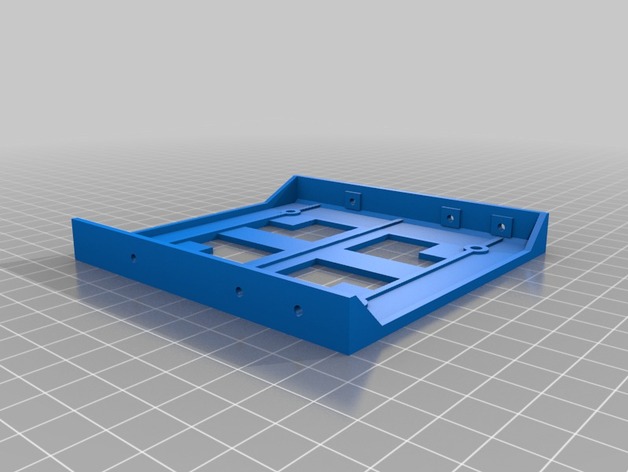
NEW DESIGN 02/17/2016: OLD DESIGN IS TOO WIDE! NEW DESIGN USES LESS MATERIAL. This version is much smaller and incorporates a more versatile tray mounting pattern and greater strength. Note that one end has a higher wall, so the drive will only fit properly over the lower wall end. This is a pair of 3.5 drive to 2.5 drive adapter designs. One uses a typical M3 nut (approx 5.3mm across the flats x 2.3 thick). The other is a simple mounting hole which can be drilled and tapped M3 (maybe just tapped), or to use other hardware that is similar (#4-40?). It all depends on what you have or can get. I used transparent ABS and the nut version for one I am using. I used medium speed with a .5mm nozzle and .3mm layers on a Taz 4. Cooling after 5 or 6 layers to achieve sharp edges. The hex mount is oversized but worked fine with a hex nut measured at 5.36 across the flats. It yielded a tight enough fit that the nuts stayed in without glue. If your hex recesses are a bit too loose, use a tiny drop or two of CA glue or fingernail polish to make a proper fit. You do not want a nut floating around somewhere in your computer! Use a wooden tooth pick to pick up a small amount of glue that you took from a one drop puddle. It is likely though that will not be necessary unless you use very fine layers and have perfect alignment and other settings. The other design is adaptable, but primarily intended to tap M3 (or 4-40) for mounting the adapter tray. The screws I used were typical M3 x .5 pitch x 3mm long computer screws. You can find them in hardware stores, or maybe a local repair guy will give you a few. Print Settings Printer Brand: LulzBot Printer: TAZ 4 Rafts: No Supports: No Resolution: .3mm layers Infill: 60% Notes: Used 3mm ABS. Should work fine with PLA and HPS, etc. FOR TAPPED VERSION YOU CAN USE AN M3 TAP OR JUST FOR AN M3 SCREW TO CUT THREADS. DO NOT OVERTIGHTEN!!! Post-Printing Typical hole cleanup for clearance of M3 screws which attach 2.5 inch drive. In the tapped version cleanup and use an M3 tap if you have one. You can clean up the hole a bit an use an M3 screw to tap the hole, but be careful. If the hole is not large enough or you go too fast you could split the piece. Use a phillips #1 to bevel the entry to the tapped hole. Use CA (superglue) to set nuts. M3 nuts available on Amazon. Use M3 srews tro hold nuts while carefully putting some CA glue at edge of nut trying to keep it off the screw threads. Back out the screws to break any CA on the threads within a couple of minutes of applying glue. How I Designed This Designs were created using MicroCADAM Helix Modeling V5 (June, 2001) and exported to STL.
With this file you will be able to print 3.5 inch Drive Bay to 2.5 inch Adapter Tray--V2--MOD 02/17/16 with your 3D printer. Click on the button and save the file on your computer to work, edit or customize your design. You can also find more 3D designs for printers on 3.5 inch Drive Bay to 2.5 inch Adapter Tray--V2--MOD 02/17/16.