3.5 mm (F) to BNC (M) connector adapter
prusaprinters
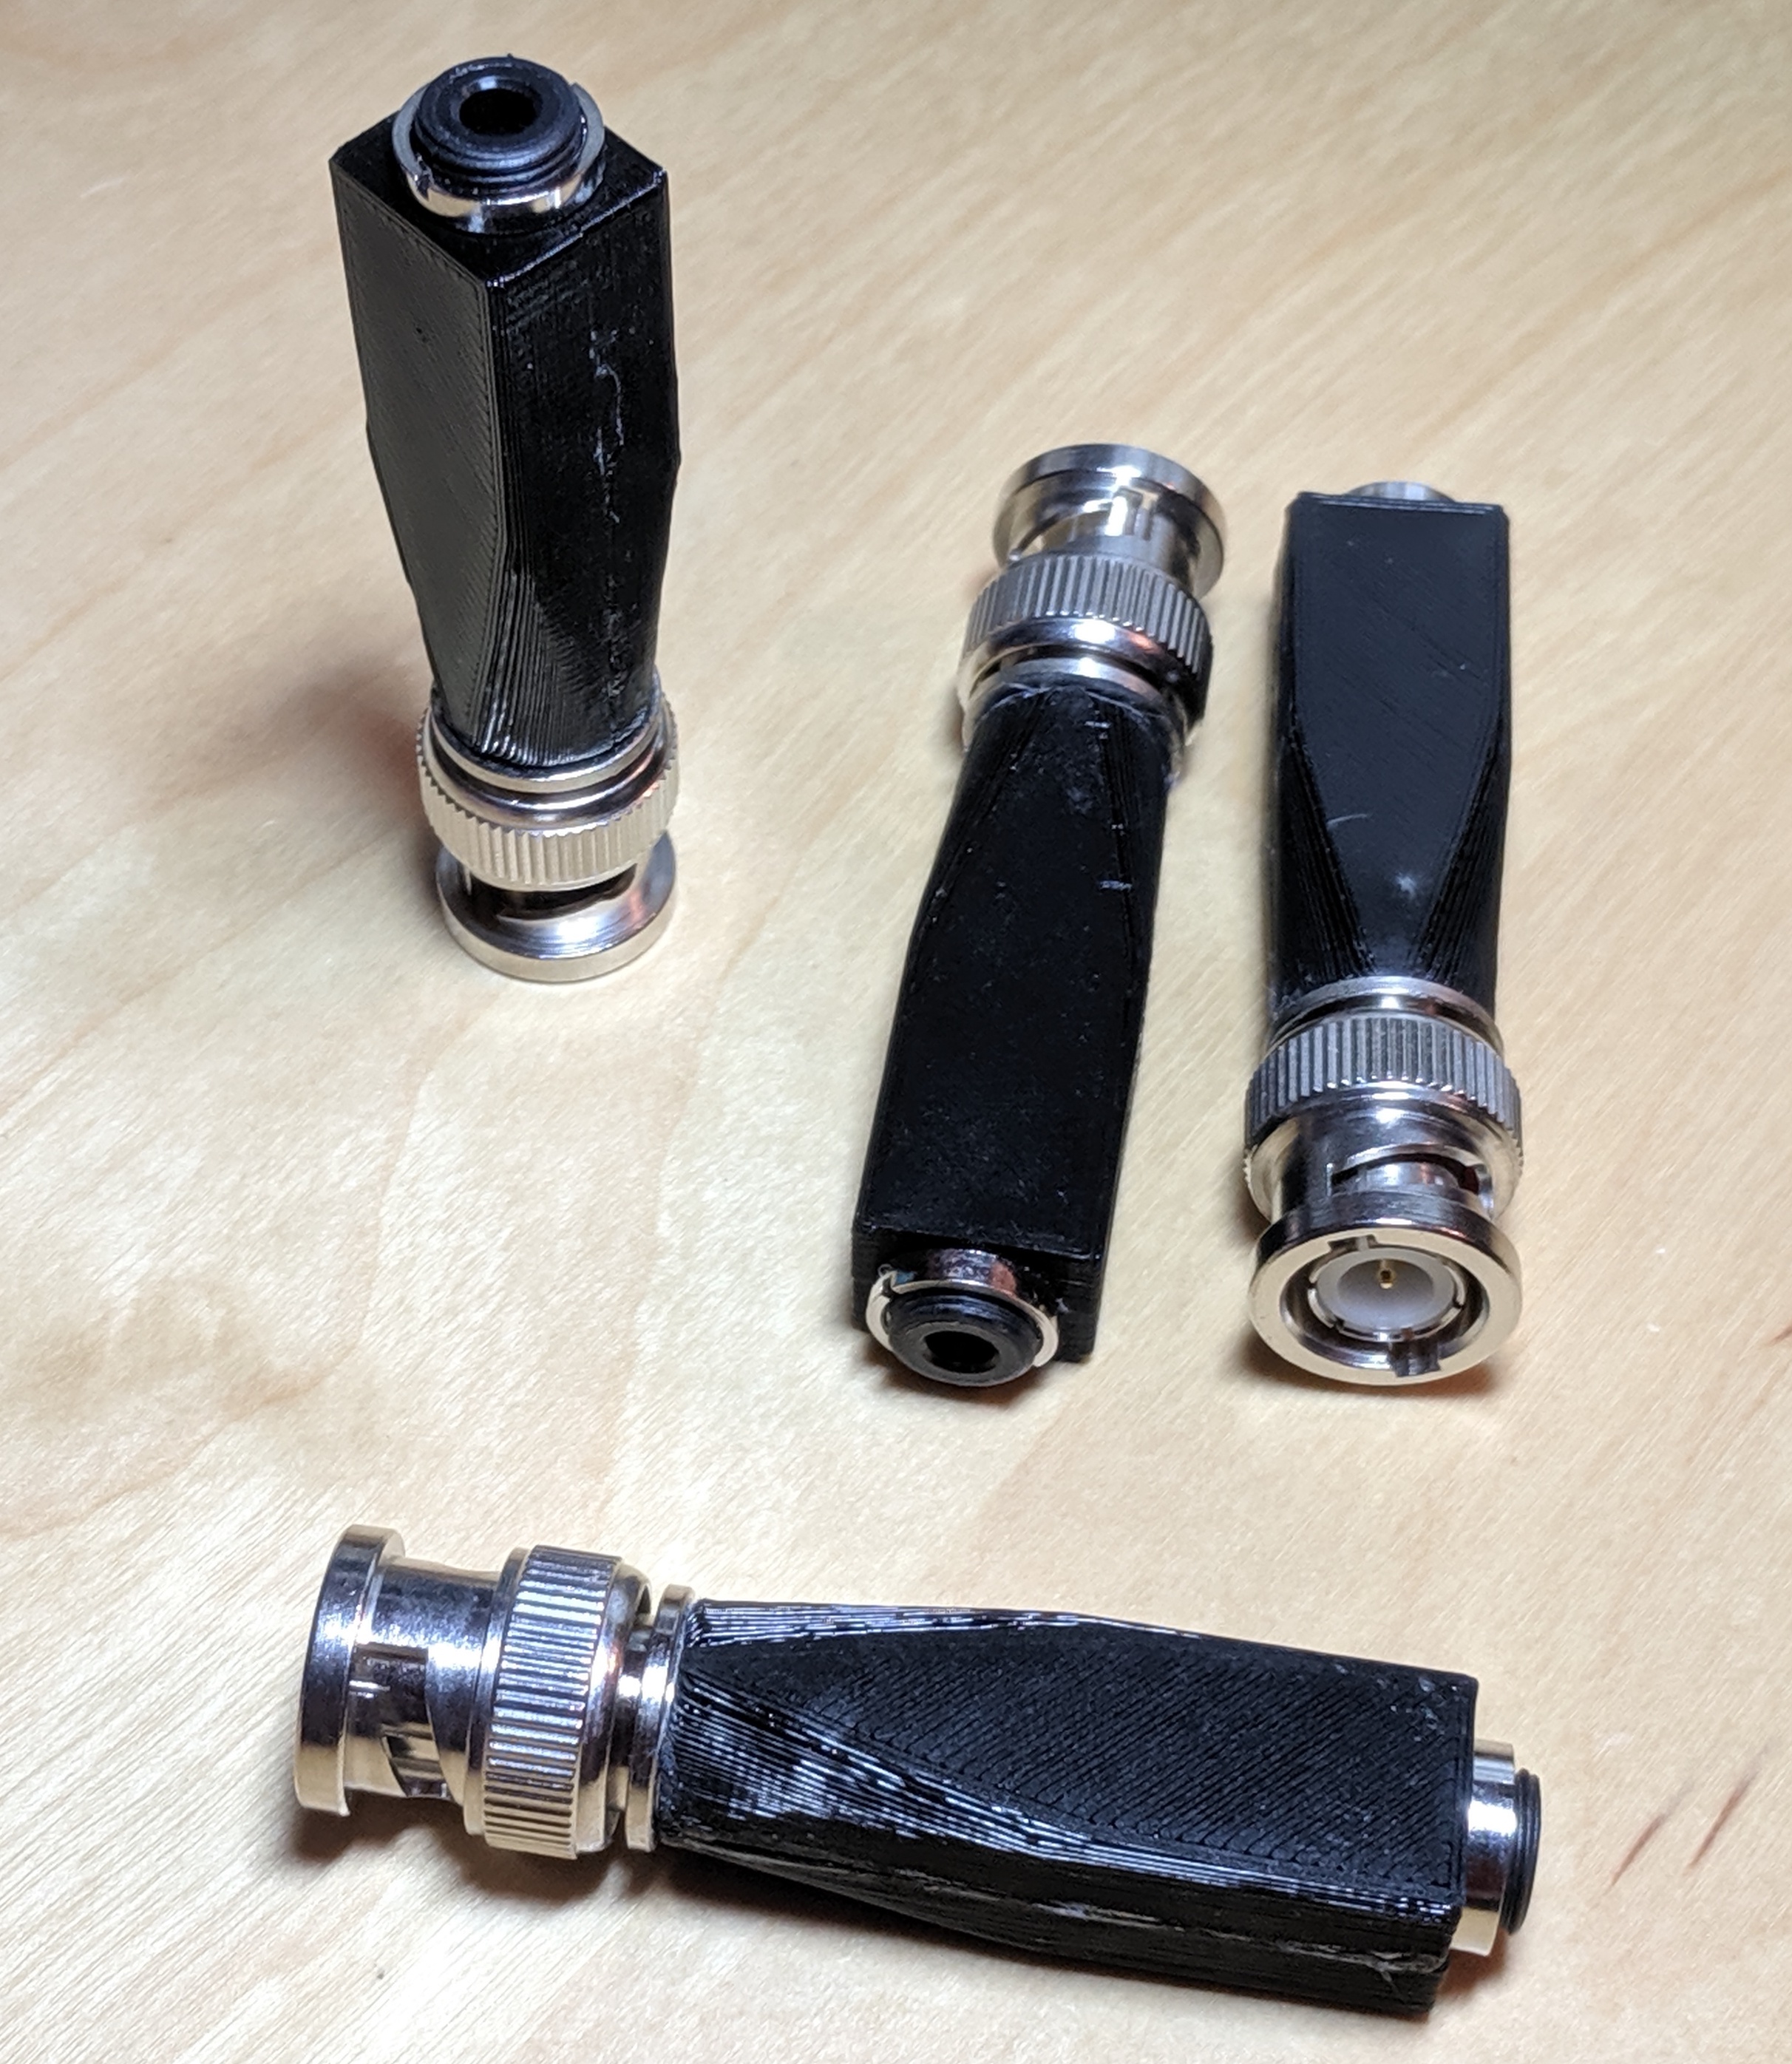
<p>It's easy to buy an adapter that's BNC (F) to 3.5 mm (M) but I've only found the other way in cable form, so I made my own. It could be used to adapt BNC jacks to accept 3.5 mm patch cables as used in modular synthesizers, or to connect a shortwave receiver antenna to a radio with a BNC connector.</p> <p>There is enough room in the center to add resistors for a pad network or other similar circuit. It could be shortened by 1 cm if this is not needed.</p> <p>Designed for use with the following non-printed parts:</p> <ul> <li>BNC: Amphenol 112420</li> <li>3.5 mm: Lih Sheng LJE0352-4R (another panel-mount 3.5 mm jack could be substituted with minimal changes, but be sure to consider the position of the leads and solder joints).</li> <li>Wire or resistors as desired to make connections</li> <li>Cyanoacrylate glue to assemble and secure the BNC connector</li> </ul> <p>This design has had only one revision. Caveats and possible improvements:</p> <ul> <li>The specified hole diameters should probably be slightly larger; the housing edges did not quite meet each other, which is bad for secure gluing.</li> <li>The bottom surface is not actually flat, but close enough for slicing. I considered printing it the other way up, as an "arch", and that might be better for other connector pairings.</li> <li>The 3.5 mm end has sharp corners that could use some rounding.</li> <li>Better choices of connectors could perhaps be made: BNCs which have a solder tab for the shield, and 3.5 mm which are more compact while still being feasible to mount and solder.</li> </ul> <p>The OpenSCAD code was designed to be generalizable to different connector pairings, but additional work would be needed to make it really usable that way; there are a few "it works by accident or hardcoding" elements.</p> <p>Also on GitHub: <a href="https://github.com/kpreid/3dp-connector-adapter-box">https://github.com/kpreid/3dp-connector-adapter-box</a></p> <h3>Print instructions</h3><p>No support needed, barely.</p> <p>The gcode I uploaded is for MK3S+MMU2S because that's what I have, but it doesn't require multiple materials.</p> <h3>Assembly:</h3> <p>I found it possible and useful to secure both connectors before soldering, so that the short solid wire lengths fit correctly. I did not run into any issues with the PLA melting significantly. Thus, my suggested procedure is as follows.</p> <ol> <li>Sand a spot on the flat of the BNC connector. I found this to make the upcoming soldering slightly easier.</li> <li>Glue the BNC connector into one half of the housing, ensuring that the flat and the solder cup are facing upward. Make sure to apply glue to the entire surface since this area will be under the most potential mechanical stress.</li> <li>Whichever wires/resistors will be connecting to the BNC center contact, solder them to the 3.5 mm connector and trim the end to length to fit into the BNC solder cup.</li> <li>Insert the 3.5 mm connector into the housing and gently secure it using the panel nut,<strong>ensuring that the sleeve pin is facing out</strong> and that the wire to the BNC solder cup is in position.</li> <li>Solder the BNC solder cup.</li> <li>Cut a length of uninsulated wire that fits between the 3.5 mm connector's sleeve pin and the BNC connector's flat. Reheat the sleeve pin's solder to tack it in position.</li> <li>Solder the wire to the BNC connector's flat. This will be slow and not very elegant due to the large volume of metal sinking the heat. Make sure that the joint does not protrude above the circle of the connector end so that the housing will fit on later.</li> <li>If needed, resolder the other end of the wire properly with fresh flux, now that you don't need to hold the wire in position and have a hand free to add some flux-core solder.</li> <li>Glue the other half of the housing on. I tried to avoid getting any glue on the plastic body of the 3.5 mm connector, so that disassembly would only destroy the housing and not either of the connectors; I applied glue only to the BNC connector threads and the seam between the housing halves.</li> </ol>
With this file you will be able to print 3.5 mm (F) to BNC (M) connector adapter with your 3D printer. Click on the button and save the file on your computer to work, edit or customize your design. You can also find more 3D designs for printers on 3.5 mm (F) to BNC (M) connector adapter.