3 Channel PWM Controller
thingiverse
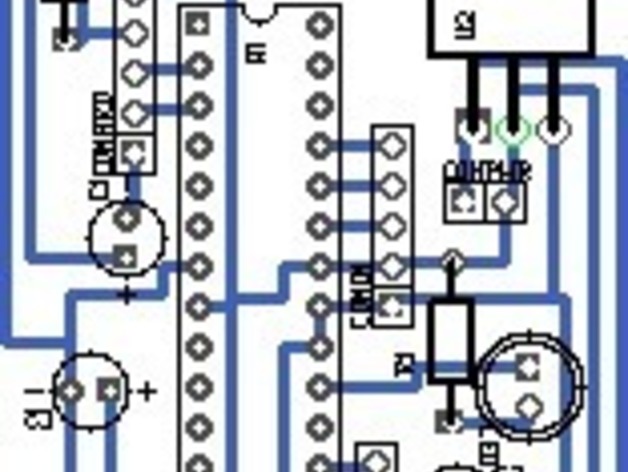
This is a design for a 3-channel PWM controller that can be used with 12V RGB LED strips like this one from DealExtreme. It also serves as an opportunity to create a personalized PCB. The features include a custom Arduino bootloader, three 200mA 12V PWM channels, three analog input pins, and it runs on 12V, making it suitable for car use. The design aims for minimal part count and simplicity. However, the first prototype had several errors that required jumpering and trace-cutting. The updated schematic should resolve these issues. A custom Arduino bootloader will be provided, along with an Arduino pinout. Although the author faced communication issues with the Atmega8 programmer, serial communication over specific lines works fine. Once the design is tested and refined, instructions will be provided on how to print and connect the boards. Additionally, a guide for printing the circuit using the ToMcat printer will be shared, involving Gerbv, Inkscape, and an inkscape plugin published by the author.
With this file you will be able to print 3 Channel PWM Controller with your 3D printer. Click on the button and save the file on your computer to work, edit or customize your design. You can also find more 3D designs for printers on 3 Channel PWM Controller.