3 motor or belted Leadscrew design for Hypercube 300
thingiverse
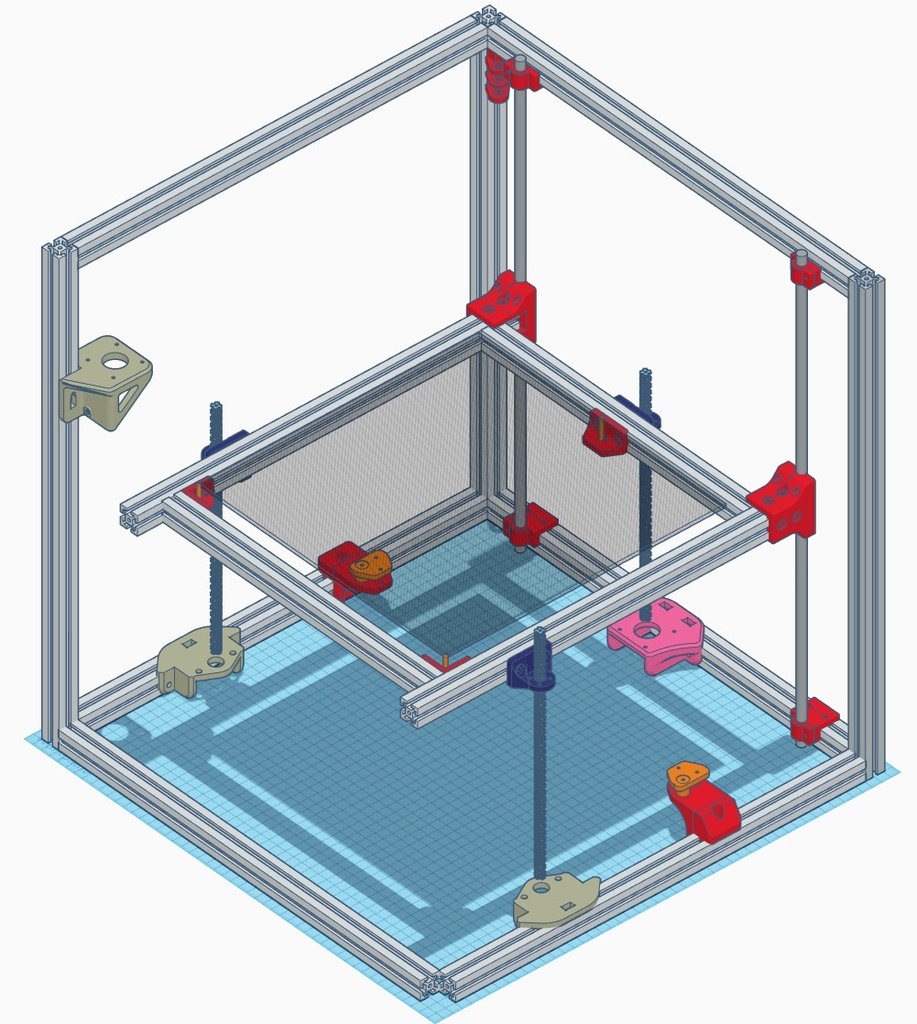
This is a Hypercube 300 redesign, using 3 leadscrews and 2 (or 4) support rods. It eliminates the center side extrusions and long rod support arms, and moves the rods to the back [and front] on the outside corners instead. May 9 - Redesigned the rod clamps to mount to the side of the extrusion instead of the bottom, which significantly increases the stability of the rods. Updated the bed mounting brackets to attach to the sides instead of the bottom, and made corner mounting brackets for beds that have 4 mounting holes. The 410mm 2020 bed extrusions are reused. You'll need 2 pieces of 2020 @ 320mm for the new bed frame design, and either 2 or 4 rods long enough to reach between your top and bottom extrusion. In my case, it's 500mm. The bearing cap plates can be downloaded from Sturdy HyperCube Z Carriage (in remix sources), or you can use your existing Z axis bearing holders, and just move the rods outside instead of aligned with the bed extrusions. Motor and pillow bearing mounts can be downloaded from Improved Z-Lead Screw Mounts (in remix sources) I've included 8mm and 10mm rod Z joiners. If you need 12mm joiners, find or build your own. :D My bed is very stiff with 3 leadscrews and 2 - 8mm rods so larger isn't really necessary. If you want to use 4 rods instead of 2, just duplicate the back parts to the front. The 2020 extrusions from the original bed design should be long enough to use for front to back Z joiners.
With this file you will be able to print 3 motor or belted Leadscrew design for Hypercube 300 with your 3D printer. Click on the button and save the file on your computer to work, edit or customize your design. You can also find more 3D designs for printers on 3 motor or belted Leadscrew design for Hypercube 300.