3-point levelling for Ultimaker with magnetic ball bearings V2
prusaprinters
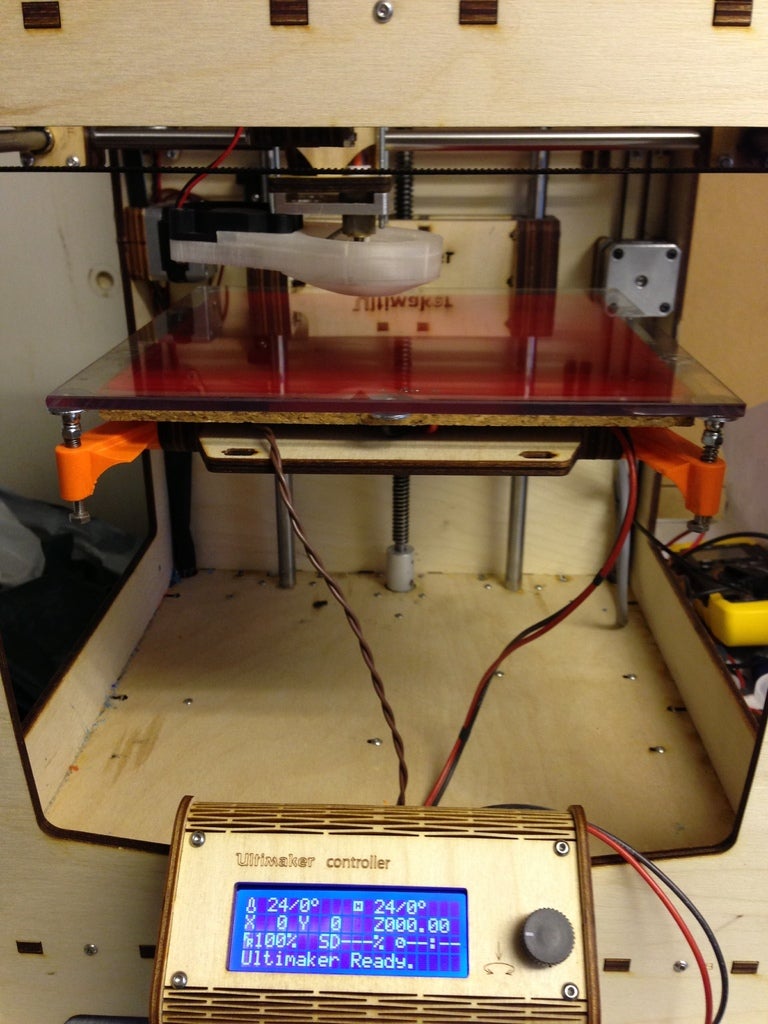
<p>Version 2 of 3-point levelling for Ultimaker with magnetic ball bearings.</p> <h3>Print instructions</h3><h3>Category: Other Summary</h3> <p>Version 2 of 3-point levelling for Ultimaker with magnetic ball bearings.</p> <h3> Instructions</h3> <p>Required parts:</p> <p>3x 7mm magnetic balls<br/> 3x M4 35mm socket heat bolts<br/> 6x M4 washers<br/> 3x M4 Nylon nuts<br/> 3x M4 regular nuts<br/> 2x M3 10mm bolts<br/> 4x M3 35mm bolts</p> <p>Tempered glass print bed replacement or use existing acrylic bed.</p> <p>Print all three parts. Size all holes with needle file so that respective bolts pass unhindered, especially the M4 holes.<br/> Remove print bed, then remove all 4 levelling bolts. Don't loose the levelling springs!<br/> Bolt the extension arms in place directly to the sides of the z-platform arms.<br/> Drill a 4.5mm on the laser cut spacer panel mid way between the screw blocks at the back. To properly drill the 3mm fixing holes, bolt the printed nut bed on the top side of the spacer panel, slightly tighten it and line up the fixing holes, then drill the 3mm holes.<br/> Bolt the nut bed at the bottom side of the spacer panel.</p> <p>Levelling bolts (M4) are fixed by first screwing in a regular nut all the way to the socket head, then passing them upwards through their respective holes (extension arms and nut bed). The nuts should easily sink in the hex receptacles to prevent them from rotating.<br/> Place a spring on each, then a washer, then a Nylon bolt. Use a socket wrench to tighten the Nylon nuts just one turn.<br/> Place the magnetic balls on the Nylon nuts.<br/> Place a washer on each of the magnetic balls.<br/> Place the print bed on the three levelling points, see that the bed sits on all three washers.<br/> Remove the print bed, place few drops of cyanoacrylate (super) glue on the washers, then place the print bed carefully on these washers.</p> <p>Make sure that your Z-stop is readjusted properly so that your print nozzle doesn't crash on the print bed.</p> <p>Level the print bed using whatever means you prefer. I used a dial gauge.<br/> First tighten the slack on the spring at the back. Move the nozzle (dial gauge) on top of it. Move the print platform up using the worm gear coupler and stop when the dial gauge touches the print bed and moves 0.05mm or so. Reset the dial gauge to zero. Move the nozzle to the other level points and adjust the levelling bolts to read zero on the dial gauge. Move to the back and check that it still reads zero, then the middle.</p> <p>Next, make fine adjustments to the Z-stop switch to stop the nozzle at the prescribed hight above the print bed.</p> <p>Happy level printing. Enjoy!</p> <p>If you like this design, feel free to donate and ask for improvements:<br/> <a href="https://www.paypal.com/cgi-bin/webscr?cmd=_s-xclick&hosted_button_id=AW57FTXN35YZE">https://www.paypal.com/cgi-bin/webscr?cmd=\_s-xclick&hosted\_button\_id=AW57FTXN35YZE</a></p>
With this file you will be able to print 3-point levelling for Ultimaker with magnetic ball bearings V2 with your 3D printer. Click on the button and save the file on your computer to work, edit or customize your design. You can also find more 3D designs for printers on 3-point levelling for Ultimaker with magnetic ball bearings V2.