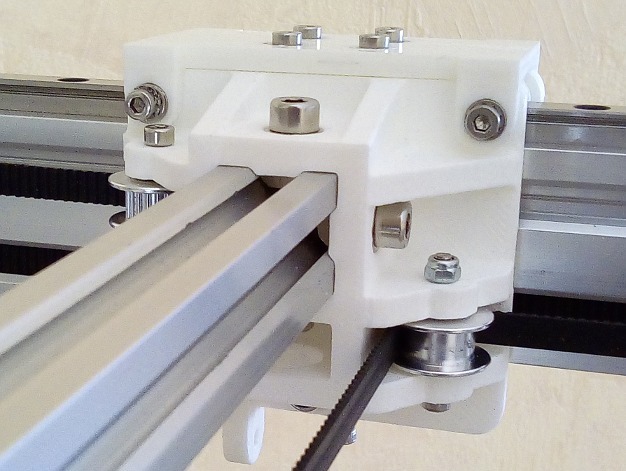
3-wheeled Y guide goes linear
thingiverse
I wanted to try linear rails while enjoying NickRimmer's design, which I could do without much fuss or grand new designs. If you have a 20x20 V-Slot rail for the X-Carriage, you can use this too with my "Y-Carriage_for_20x20_X-Rail", www.thingiverse.com/thing:3401126. I used two MGN9 350mm rails with thirty-six M3x8 bolts and thirty-six M3 hammer heads and two MGN9H sliders on which I mounted two of these mounts with four M3x8 bolts + washers and serrated washers each. Check that you don’t bottom out the bolts in the slider, so if you don’t use serrated washers, you’ll perhaps need extra washers to fill up the gap. Mount the combination loosely on the 20x40 rail. To connect the Linear Rail Mount to both the "updated_Y-Carriage-3-Wheels-1-Left/right" and the "Y-Carriage-3-Wheels-2_x2.stl" parts, which are still connected at the bottom the original way, I thought M3 bolts were strong enough. I made a M3-nut_mount for an ø5mm hole”, which has room for a M3 nut and provides secure centering for the bolts. The length of the bolts is a bit critical; you don’t want to have them touching the rail. You'll find also a M3-nut mount for a ø3mm hole for when you use stuff with ø3mm holes at the top, like my 20x20 adaptation and/or my Y-Carriage-2, because these M3-nuts are a pain to get on the bolts in that place. In total, you need eight M3-nut-mounts. I used four M3x16 bolts + nuts + washers + serrated washers. Check with each of them if there is enough room between the end of the bolt and the rail. I don't like critical, but I wanted to secure the nuts and have enough support thickness left in these M3-nut mounts. The flattened side of the nut mounts should be down, parallel to the 20x40. Check again whether these nut mounts are really free from the rail, with something thin, like paper or a thin flat print. I used a screwdriver under these nut-mount when tightening the M3 bolts, but still got it wrong when I wasn't careful. Adjust the lower wheel so it rests loosely in its groove and can help center the linear rail on the 20x40 rail when you are ready for the moment of tightening those eighteen bolts. Just ride the whole thing back and forth a couple of times and everything should center nicely. I take it you loosened the GT2 belts before the operation so you can really feel whether things go smoothly. Just tightening the lower wheels a little bit preloads the sliders, and I felt that is a good thing. Please correct me if I am wrong. Because the original Y-Carriage-3-Wheels-2_x2 cracked at the bottom (too much playing around, I suppose) I gave them an extra couple of mm there -> Y-Carriage-2.stl. When needed, you can drill the upper ø3mm -> ø5mm. Edit: Replaced M3-nut_mount-v1.stl with M3-nut_mount-v3.stl, because v1 was too big. I flattened it at the side, thus keeping enough flesh for the nut. Please see to it that you keep that flattened side down, parallel to the 20x40 rail, when fastening. Edit: Pointed to my "Y-Carriage_for_20x20_X-Rail", renamed the original M3-nut mount and added one for use with a ø3mm hole in. Edit: Added Y-Carriage-2 and changed text&pictures.
With this file you will be able to print 3-wheeled Y guide goes linear with your 3D printer. Click on the button and save the file on your computer to work, edit or customize your design. You can also find more 3D designs for printers on 3-wheeled Y guide goes linear.
