3D Chameleon Mk2 Prusa Mini Mounts
prusaprinters
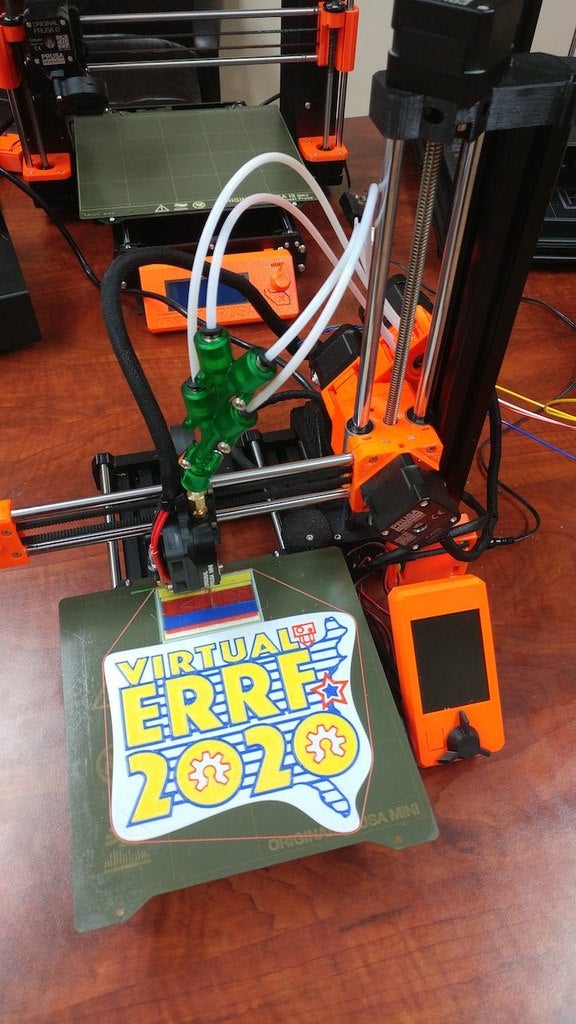
<p>These are mounts for the new 3D Chameleon Mk2 to replace the stock extruder with the 4 color 3D Chameleon Mk2. It includes the base plate, mount plate and endstop mount plate.</p> <p>Quick Steps to Install:</p> <p>Remove the stock extruder... disassemble it and remove the stock motor. (Leave it connected to the printer wiring.)</p> <p>Add the Mk8 Drive Gears to the Stock Motor (Removing the stock drive gear) and mount the motor the the 3D Chameleon using the four 30mm (black) M3 screws.</p> <p>Mount the 3D Chameleon to mount "B" using four 35mm M3 (silver) screws.</p> <p>Mount part "A" to the stock extruder location using two of the factory 12mm M3 screws previously removed from the stock extruder.</p> <p>Use four small zip ties to mount the 3D Chameleon (attached to Block B) to the frame (Block A) by passing the small zip tie through the two holes in the top of each block as well as the two bottom holes... pull zip ties tight and trim off excess.</p> <p>Attach the 3D Chameleon limit switch to the front right frame rail under the right side smooth rod using the T4 4040 T-Nut.</p> <p>Connect the wiring as per the 3D Chameleon instructions.</p> <p>The editable design can be found on Tinkercad here: <a href="https://www.tinkercad.com/things/hgYyl62dCqL-3dchameleon-prusa-mini-mount">https://www.tinkercad.com/things/hgYyl62dCqL-3dchameleon-prusa-mini-mount</a></p> <h3>Print instructions</h3><h3>Category: 3D Printer Accessories Summary</h3> <p>These are mounts for the new 3D Chameleon Mk2 to replace the stock extruder with the 4 color 3D Chameleon Mk2. It includes the base plate, mount plate and endstop mount plate.</p> <p>Quick Steps to Install:</p> <p>Remove the stock extruder... disassemble it and remove the stock motor. (Leave it connected to the printer wiring.)</p> <p>Add the Mk8 Drive Gears to the Stock Motor (Removing the stock drive gear) and mount the motor the the 3D Chameleon using the four 30mm (black) M3 screws.</p> <p>Mount the 3D Chameleon to mount "B" using four 35mm M3 (silver) screws.</p> <p>Mount part "A" to the stock extruder location using two of the factory 12mm M3 screws previously removed from the stock extruder.</p> <p>Use four small zip ties to mount the 3D Chameleon (attached to Block B) to the frame (Block A) by passing the small zip tie through the two holes in the top of each block as well as the two bottom holes... pull zip ties tight and trim off excess.</p> <p>Attach the 3D Chameleon limit switch to the front right frame rail under the right side smooth rod using the T4 4040 T-Nut.</p> <p>Connect the wiring as per the 3D Chameleon instructions.</p> <p>The editable design can be found on Tinkercad here: <a href="https://www.tinkercad.com/things/hgYyl62dCqL-3dchameleon-prusa-mini-mount">https://www.tinkercad.com/things/hgYyl62dCqL-3dchameleon-prusa-mini-mount</a></p>
With this file you will be able to print 3D Chameleon Mk2 Prusa Mini Mounts with your 3D printer. Click on the button and save the file on your computer to work, edit or customize your design. You can also find more 3D designs for printers on 3D Chameleon Mk2 Prusa Mini Mounts.