3D CNC Probe
thingiverse
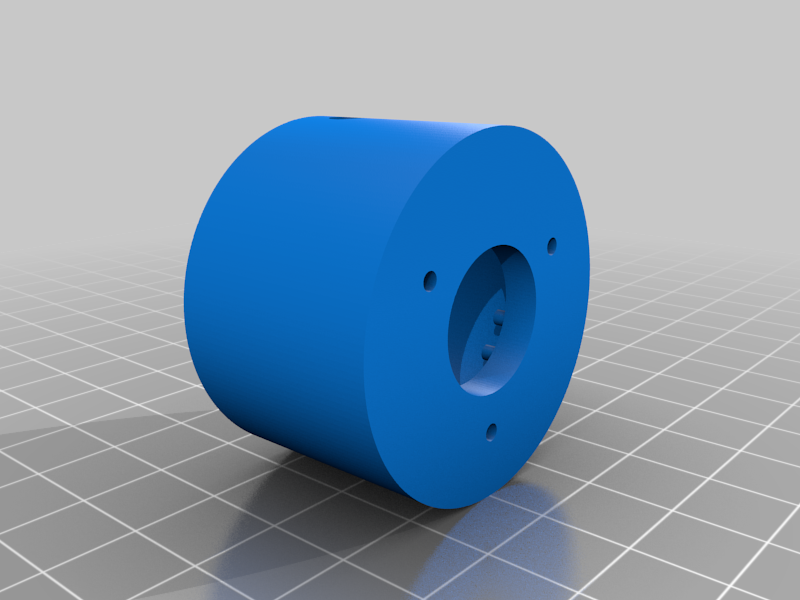
This is a DIY 3D-Probe to use with your CNC-Machine, the basic principle is fairly simple, the probe makes contact with something at any side, and the movement interrupts the internal connection, that's all. Additionally to the printed parts you need: 6x 4mm steel / metal balls 3x 5x6mm cylinder (can be cut from a larger piece) 3x 6x15mm spring (can be a bit longer) 1x 6mm shaft 1x 4mm proberod 1x contact PCB (can be DIY or ordered) 3x M2 screws (12-15mm) 3x M2 screws (6mm+ for adjustment) 3x M3 (grub-) screws to fix the shaft Any kind of wire that you can attach to your CNC-controller, a soldering iron and solder. For adjustment a dial gauge. For the PCB you can take the "PCB-Ring" from the f3d file and just mill them out, or use the KiCad files from the included zip file to order/etch the PCBs. Insert the six steel balls into the holes on the PCB and hold them down firmly. Then solder the balls to the PCB, this may need some time as the steelbals need to heat up. One track on the pcb is cut in two, this is to attach the signalwire for your CNC-Controller. you can either solder that directly, or if you have thicker wire insert the wire through the case and then solder it to the PCB. Now insert the three cylinders into the sides of the probeholder and the proberod afterwards. Then place the PCB inside the base (don't forget the wires ;D) and the probeholder above with the cylinders each touching two balls. Place the three springs in the little indents in the probeholder and align the lid with these springs. Then screw the lid into the base with the three (longer) M2 screws. The smaller M2 screws are for adjustment and you can screw them into the underside of the base so they barely touch the PCB. For the shaft just insert it into the lid and fix it in place with the M3 (grub-)screws. Now to the adjustment: Insert the sensor into your cnc machine and make sure the head is fixed (no movement but rotation) mount the dial gauge with the tip contacting the probe slightly. Now you can rotate the head so each adjustemnt scre faces the gauge and see if the value on the dial gauge changes. If it increases slightly turn the screw in, if it decreases turn it out (or the other two in). Repeat until the value stays fixed.
With this file you will be able to print 3D CNC Probe with your 3D printer. Click on the button and save the file on your computer to work, edit or customize your design. You can also find more 3D designs for printers on 3D CNC Probe.