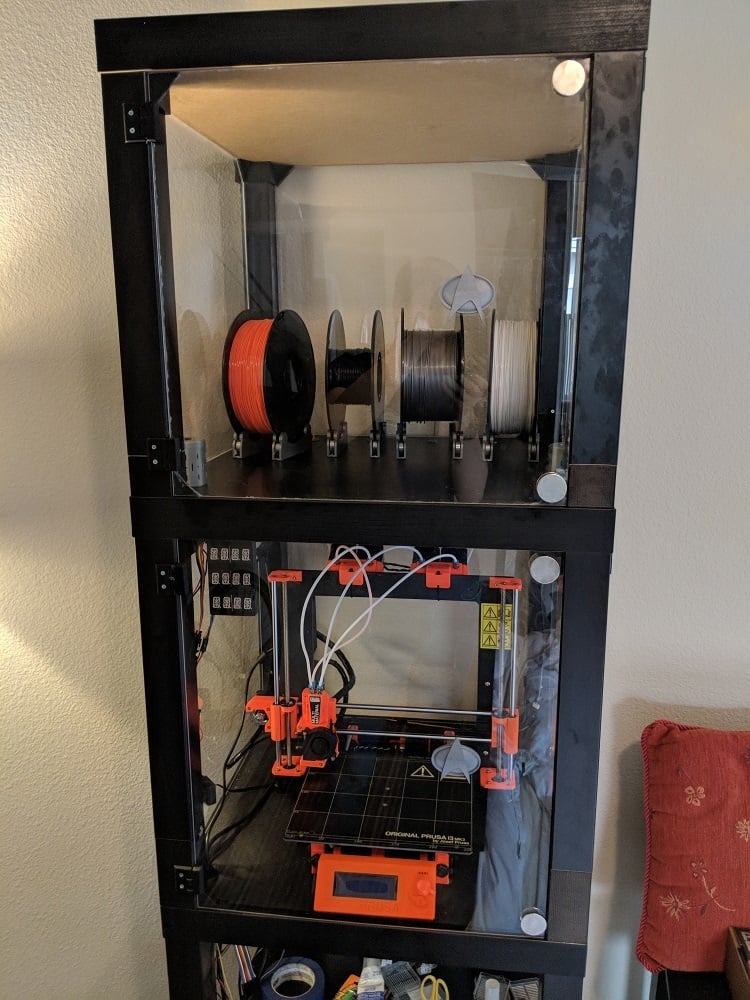
3D Ikea Lack table enclosure (0.125" panes & no link cuts required)
thingiverse
Huge shout out to [Shoyun's design](https://www.thingiverse.com/thing:2121640) for guiding an enclosure build process in the original thing. The same requirements are needed for this remix, but the stl files are replaced to match 0.125" acrylic panes, since the metric versions can't be ordered in small quantities in the states (I really wish we were metric...). This remix changes the acrylic pane supports to **not require cutting the rectangular panes** to make it fit by printing an external tab which wraps around the base to provide the second pane holding prong. This means you can ignore the "cut a little piece in plexi to fit with top links" comment from the original. Additionally I've added some smaller links for making square boxes, which I used for my dry box on top of the printer box. I ordered 0.125" x 19.68" x 17.52" and 0.125" x 17.52" x 17.52" panes from [Professional Plastics](https://www.professionalplastics.com/) for the two enclosures, with the square one for the dry box on top. The vendor choices in the U.S. seemed a little more restricted for small orders, but the two orders I had from them were perfect. I would recommend getting an extra or two if you plan on drilling any holes (e.g. for the door handle) and practice on the first one you mess up before trying again, as I did for the fan mounts. **Titanium wood drill bits work wonders for drilling holes in acrylic fyi**. Assembly takes a little while, especially if you're adding extra features like filament feeds, or need to manipulate any acrylic. Especially since you need to work the wood screws into the legs which are a little thicker than the tops. If you use an electric drill be careful about damaging the tables as the material isn't very strong nor thick. I did the drilling by hand, especially since some of the corners are hard to reach with an electric drill once it starts coming together. Additionally I threw in a ton of pictures, minus some failures and damage panes, to show the progress from zero to fully built. The final product has a range of additions including feet and top drill mount for better stability, PID PC fans mounted, HTU21D temperature / humidity sensor, 14 digit displays, a Dot Star LED strip, a wire through hole, filament feeds from the dry box, and magnets on the door panes. You can see I have 4 filaments feeding into the print box to feed into the Prusa Mk2 Multi Material feeders. This feed system works well and I haven't had a single filament tangle or tension issue since setting it up. The motors are more than strong enough to spin the spools above and twist the filament below the feeds and back out. The fans are key for multi-material printing with this setup, as you need to control the ambient temperature more than with single filament prints (learned that the very hard and slow way). Below the printer is a table with all my tools and small supplies. Below that I have a larger sealed dry box to store more filaments I'm not actively using. I have all the parts wired up to my Raspberry pie which is running Octoprint to manage the printer. The software is still a mess at the moment but I'm working on a plugin to Octoprint for managing enclosures better than the current options. **For all the parts I show in those pictures the following things can be seen added to the enclosure** (might have missed one or two items): * [Star Trek Badge](https://www.thingiverse.com/thing:34902) * [Filament Pass-Through](https://www.thingiverse.com/thing:2627700) * [Silica Gel Holder](https://www.thingiverse.com/thing:1012234) * [Spool Holder](https://www.thingiverse.com/thing:2521483) * [Raspberry Holder](https://www.thingiverse.com/thing:922740) * [Camera Holder](https://www.thingiverse.com/thing:92208) w/ [PI3 Back](https://www.thingiverse.com/thing:2307685) * [Temp Sensor Holder](https://www.thingiverse.com/thing:1067700) * [Wall Mount](https://www.thingiverse.com/thing:2358963) * [Floor Stabilizer](https://www.thingiverse.com/thing:1691760) * [Wire Pass Through](https://www.thingiverse.com/thing:2683782) Hopefully this helps someone else building a custom enclosure, got me absorbed for a few months' weekends and was a lot of fun (once it was working properly). Now if only the multi-material printing would be less finicky :)
With this file you will be able to print 3D Ikea Lack table enclosure (0.125" panes & no link cuts required) with your 3D printer. Click on the button and save the file on your computer to work, edit or customize your design. You can also find more 3D designs for printers on 3D Ikea Lack table enclosure (0.125" panes & no link cuts required).
