3D-Maze
thingiverse
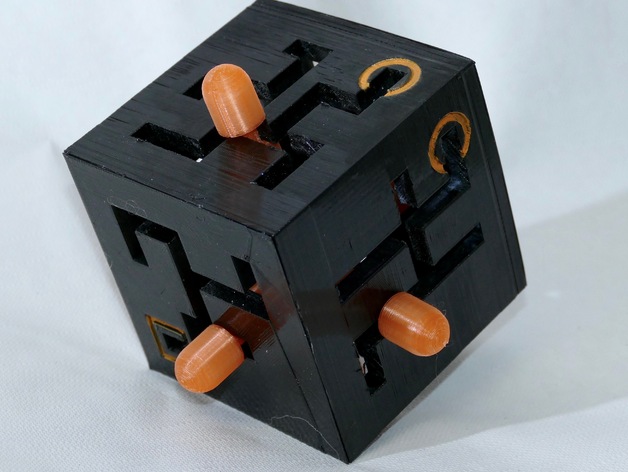
The 3D Maze V2 - is a brain-teaser based on an article from Scientific American September 1988. The present design of the maze, including the "actuator" structure, was created by me. My goal is to move the actuators from one corner to another. You must figure out how a possible movement in one dimension can be blocked in the next one. To build this machine, you need to print each wall (panel). I printed mine with the inside on the build plate for a sturdy outside structure. Ensure all "maze corridors" are smooth. Alternatively, you can print all panels except the top one at once and then glue it on later. For this, use supports and remove them afterwards. Also, polish any openings filled by supports. The puzzle is not too challenging yet, but I plan to make it more difficult in the future. As a beginner with 3D printing, I appreciate tips and suggestions. I'm also saving money for a printer with more features. If you like, please donate something. Print Settings Printer: Da Vinci Mini w Rafts: No Supports: Yes Resolution: 0.3 mm Infill: 10% Notes: I struggled with warping during printing, so use your experience to prevent warping of the components. I couldn't completely prevent warping but using a strong construction lamp to heat up the model improved the result. I'm grateful for any tips on how to prevent warping. You need to print the actuators three times and assemble them by cutting one actuator leg temporarily. Assemble the structure inside the box and glue it after assembly. Make sure all surfaces are smooth. Post-Printing Assembly and hints Final assembly can be tricky. Assemble the actuators first, then glue the panels together one by one. Insert the actuator structure after gluing two panels. In the end, attach the knobs to the actuators for a smooth movement (try it out before applying glue). When building the box at once plus the top panel, assemble the actuators inside and then glue the top panel. I sprayed the box with clear polyurethane lacquer. The smoother the parts are, the better they move. At this moment, the movement is slightly "sticky." I'm glad for tips on what glue to use. I used CA but it's now "forever" attached - impossible to disassemble without breaking it. The final assembly How I Designed This Designed with OpenScad
With this file you will be able to print 3D-Maze with your 3D printer. Click on the button and save the file on your computer to work, edit or customize your design. You can also find more 3D designs for printers on 3D-Maze.