3d mouse prototype
thingiverse
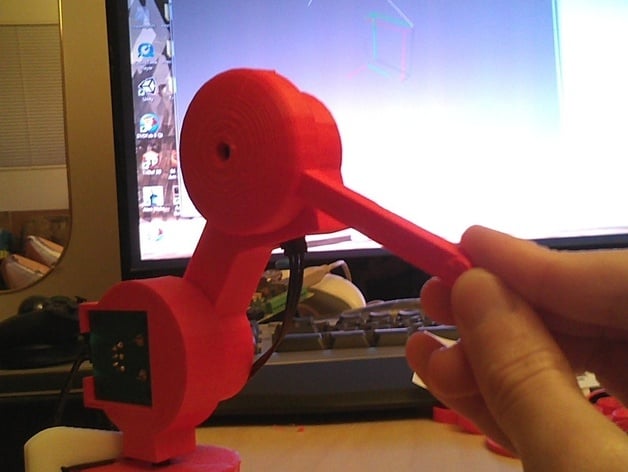
This prototype 3D mouse tests sensor precision; it lacks grip and buttons. Watch it in action at http://www.youtube.com/watch?v=taLBV3AzXNk or stereoscopic 3D at http://www.youtube.com/watch?v=xyEZV3lYuxE. It utilizes a Phidget I/O board and three of their potentiometers, with the demo program developed using Python, Pygame, and pyOpenGL. A Rotoscan Clamp and Sugru are used to hold it on the table (http://www.thingiverse.com/thing:12616). Future plans involve exploring software for Blender 3D integration and Kinect 3D tracking quality testing. This project was realized due to storage potentiometers and a Phidget I/O board, and the difficulty in creating a frame that is now easier with a 3D printer. The bill of materials includes a specific USB Phidget I/O board, three compatible potentiometers, a 3D printer, and a PC for software execution. To run the arm.py demo, additional software requirements include Python (2.x), phidget drivers and libraries, PyOpenGL, and Pygame. The provided bird.7z archive contains STL and OpenSCAD files along with the demo script. Customization of OpenSCAD files may be necessary to fit different potentiometers. Calibration of the demo requires recording values for 0 and 90-degree angles and modifying the demo script, where sensor 0 represents the base, sensor 1 is the neck, and sensor 2 is the arm with default positions being forward base and upward joints.
With this file you will be able to print 3d mouse prototype with your 3D printer. Click on the button and save the file on your computer to work, edit or customize your design. You can also find more 3D designs for printers on 3d mouse prototype.