3D Print a Volcano
thingiverse
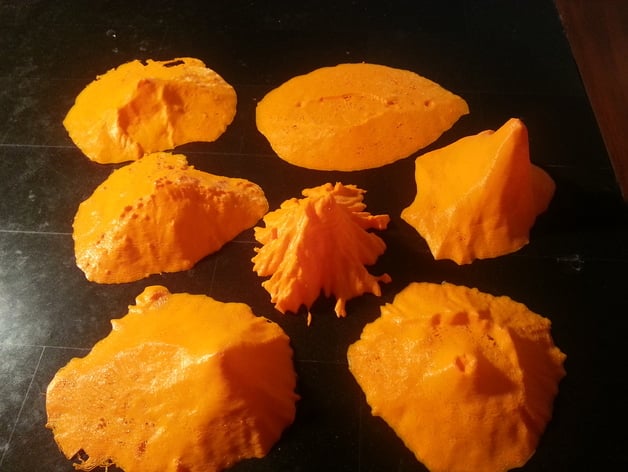
This is a 6th grade project to 3D print a volcano as part of an earth science unit. It uses the free web app Terrain2STL by Thatcher Chamberlin. This easy to use app converts terrain from Google Maps into STL files. The files were then cleaned up and modified in Tinkercad. It's easier to process the STL files in Meshmixer, but the students were using Chromebooks and didn't have asccess to this program. For more information about using Meshmixer with Terrain 2STL see here http://www.thingiverse.com/thing:1277448 The models here were created by the students and printed with the height (Z-direction) increased by 1.5X or 2X. http://jthatch.com/terrain2stl/ Standards NGSS Overview and Background This is a 6th grade project to 3D print a volcano as part of an earth science unit. It uses the free web app Terrain2STL by Thatcher Chamberlin. This easy to use app converts terrain from Google Maps into STL files. The files were then cleaned up and modified in Tinkercad. It's easier to process the STL files in Meshmixer, but the students were using Chromebooks and didn't have asccess to this program. For more information about using Meshmixer with Terrain 2STL see here http://www.thingiverse.com/thing:1277448 The models here were created by the students and printed with the height (Z-direction) increased by 1.5X or 2X. http://jthatch.com/terrain2stl/ Lesson Plan and Activity Go to Terrain2STL and find the volcano. Switch to Satellite view to see the terrain. Terrain2STL doesn't have a search function so the easiest way to find your volcano is by inputting the longitude and latitude (use decimal, S latitudes and W longitudes should be input as negatives). Click on Center to View to open a red box that outlines the area that will be turned into a printable STL file. Use the Box Size slider to adjust the box size so that it will cover the entire piece of terrain you want to print. Click and drag the box into position covering the target terrain. Under Model Details set the vertical scale to 2. Click on Create and Download. This will download a ZIP file which has an STL file of the volcano. Unzip the file. Create a new file in Tinkercad.com and import the STL file of your volcano. The model will have a lot of cracks and holes in it at the lower elevations (see example pictures above). You will need to cut the bottom off the volcano model so it is printable. The easiest way to do this is as follows Drag a red block onto the workplane. Stretch the block in the X and Y directions so that it is longer and wider than the volcano. Use the cone shaped control to push the block down -20 mm under the workplane so that the top of the block is flush with the bottom of the workplane Click on Hole to make the block negative space Select the volcano model and use the cone shaped control to push it down through the workplane until all the cracked bits are under the workplane. It's like pushing the model underwater. All the parts under the workplane will be cut off. Rotate your view to make sure no problem parts of the model are sticking out of the bottom or ends of the negative space block Click and drag a box around the volcano and negative space block. Click on Group, this will combine the volcano and negative space block Examine the cleaned up model. Use negative space blocks to cut off any remaining problem parts of the model. Use Design --> Properties to change the name of your model Use Design --> Download for 3D Printing to download your model as an STL file Load your volcano STL file in your slicer software, such as Cura. Usually your volcano will look better if you stretch the height (z-direction) by 1.5X or 2X. This can also reveal subtle details that would otherwise be missed. Project: 3D Print a Volcano Objective Students will create and print STL models of a real volcano. Audience This project was completed with a 6th grade science class, but could work for younger or older students. Preparation The students had limited experience with 3D printing and Tinkercad. Cleaning up the model in Tinkercad will require using Holes (negative space) to cut off problem parts of the model. This project came at the end of a unit about earth science and volcanoes. The students selected a real world volcano and completed a research project about their volcano. You can decide on the form of their report: written, oral, slideshow, video, etc. Research Questions Name of the volcano Location, with a map Physical description - elevation, type (shiled, stratovolcano, etc.), activity level (active, dormant, etc.) Eruption history Additional information about how it effects the people that live nearby, for example for Mt. Fuji you could explain it's symbolic meaning to the Japanese and history as a subject in art, for Mt. Vesuvius you could discuss what archaeologists have learned about the city of Pompeii destroyed by the eruption in 79 AD. These volcanoes have been successfully printed by the students Mt. St. Helen’s, Washington – scientists have studied how the ecosystem near the volcano has recovered since the eruption Hawaiian volcanoes, Mauna Loa, Mauna Kea – The Goddess Pele is an important part of Hawaiian culture Mt. Vesuvius, Italy – destroyed the city of Pompeii in 79 AD Paracutin, Mexico – popped up suddenly in a cornfield, find out how it affected the local farmers Mt. Pinatubo, Philippines – eruption in 1991 one of the largest ever recorded, how did it affect the citizens of Philippines Krakatoa, Indonesia – eruption in 1883 destroyed the island and caused a deadly tsunami Mt. Tambora, Indonesia – eruption in 1815 was largest ever recorded and changed climate worldwide Mt. Pelee, Lesser Antilles – considered the worst volcanic disaster of 20th century Mt. Thera, Greece – devastated the Minoan civilization in the Mediterranean Mt. Fuji - beloved symbol of Japan Mt. Etna - very active volcano in Sicily Steps Go to Terrain2STL and find the volcano. Switch to Satellite view to see the terrain. Terrain2STL doesn't have a search function so it might be helpful to have Google Maps open to help you find landmarks. Click on Center to View to open a red box that outlines the area that will be turned into a printable STL file. Use the Box Size slider to adjust the box size so that it will cover the entire piece of terrain you want to print. Click and drag the box into position covering the target terrain. Click on Create STL File and then Download to download the STL file of the terrain. The file name will be the latitude and longitude of the terrain. Create a new file in Tinkercad.com and import the STL file of your volcano. The model will have a lot of cracks and holes in it at the lower elevations (see example pictures above). You will need to cut the bottom off the volcano model so it is printable. The easiest way to do this is as follows Drag a red block onto the workplane. Stretch the block in the X and Y directions so that it is longer and wider than the volcano. Use the cone shaped control to push the block down -20 mm under the workplane so that the top of the block is flush with the bottom of the workplane Click on Hole to make the block negative space Select the volcano model and use the cone shaped control to push it down through the workplane until all the cracked bits are under the workplane. It's like pushing the model underwater. All the parts under the workplane will be cut off. Rotate your view to make sure no problem parts of the model are sticking out of the bottom or ends of the negative space block Click and drag a box around the volcano and negative space block. Click on Group, this will combine the volcano and negative space block Examine the cleaned up model. Use negative space blocks to cut off any remaining problem parts of the model. Use Design --> Properties to change the name of your model Use Design --> Download for 3D Printing to download your model as an STL file Load your volcano STL file in your slicer software, such as Cura. Usually your volcano will look better if you stretch the height (z-direction) by 1.5X or 2X. This can also reveal subtle details that would otherwise be missed. Results The students were able to 3D print a model of a volcano. The students created their models using this method in on class period (45 minutes). Samples of the student work are included here.
With this file you will be able to print 3D Print a Volcano with your 3D printer. Click on the button and save the file on your computer to work, edit or customize your design. You can also find more 3D designs for printers on 3D Print a Volcano.