3D Printable Design for FLORA NeoGeo Watch
pinshape
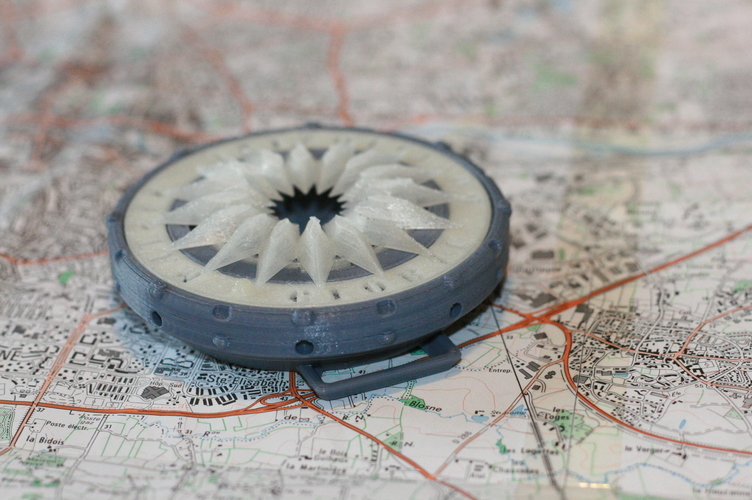
Hello, My design like an add on for the " Flora NeoGeo Watch - LED ring GPS navigation and timekeeping" ADAFRUIT project. I like 3D printing and I am fascinated by NeoPixel Rings that I recently discover. My idea to design something about electronic Pinshape contest will be around those new technologies products. So, I decided to present an existing and good developping project, compact, because I wanted that all the 3D printed parts could be produced by the Micro3D and the Robo C2 3D printers. I present to you some designed parts, for customize your " Flora NeoGeo Watch ", according to your day's mood or if you need a particular function between watch, GPS or compass. Instructions : 1) First, you have to realize the " Flora NeoGeo Watch " project : web link (complete tutorial) https://learn.adafruit.com/flo... 2) Print the "Main Body" , "Extend for Push Button" and "Battery Lid" parts. Remove the 8 small walls on the battery case at the bottom of the main body. Supports are designed : you don't have to choose supports on your slicer. For a better printable model, I use the 45 degrees rule, and the bridge capacity of 3D printers. We must use extraordinary possibilities of this fabulous tool, no ? With my friend 3D Printer, we didn't have to use any Brim. !!! All the parts are optimized for those settings : (I think, they are currently used parameters, like "default" settings by a majority of 3D printers). Nozzle diameter : 0.35mm or 0.4mm Layer Height : 0.2mm or 0.1mm Wall Thickness : 0.7mm or 0.8mm Infill : 20 pc Top and Bottom Thickness : 0.6mm I used PLA for testing the pieces, with my Friend 3D printer. He can't print ABS with his machine. So we are happy to participate at this contest, we will perhaps use other filaments soon ;-) Place the battery Li-ion Poly (150mA h / 3,7V) or an higher capacity (be careful of the size of the reserved case). Arrange electrics wires by the holes Connect Li-ion battery on the Flora board. Place the "Extend for Push Button" on the hole through all the main body, it must be link with the 12x12 mm push button on your wired board. Put the electronic block by the top of the main body. Arrange wires, and place the Battery Lid on the bottom. Use 2.5 mm or 3mm screws (lenght = 5 or 6mm) : the Thread is modeled on this model. Choose a diffuser part between GPS, compass or watch (or all of the functions, it will be very simple to remove as you want by simply twisting the diffuser part : the ring will be locked by the diffuser part). Print them with NATURAL or some other Transparent Filament. Choose a ring part between GPS, compass or watch. I suggest you to printing them with a PhotoLuminescent Filament. So you will see the indications on the night. Put the ring (for GPS and Watch) there is an ergot for locking the part with the good angle. For the compass mode, you can turn this ring like a real compass for orientation ! You can use a Velcro Rubbon, there are small tubes for fixing it on the main body part. So you can scratch the "FLORA NeoGeo Watch" on your wrist, your hand, your arm, or on a bike and where you need to have Time, GPS datas or a compass during a treasure hunt !!! I didn't have all the material, so I have printed on purple color electronic componments. It's what you see on pictures. All the sizes are good (verified). Credits for ADAFRUIT, good job !!! Thank you for sharing very interesting projects like this one. Designed by the excellent AutoDesk Fusion 360 software. Enjoy !!! my.49 (France)
With this file you will be able to print 3D Printable Design for FLORA NeoGeo Watch with your 3D printer. Click on the button and save the file on your computer to work, edit or customize your design. You can also find more 3D designs for printers on 3D Printable Design for FLORA NeoGeo Watch.