3D Printed Angle Finder
prusaprinters
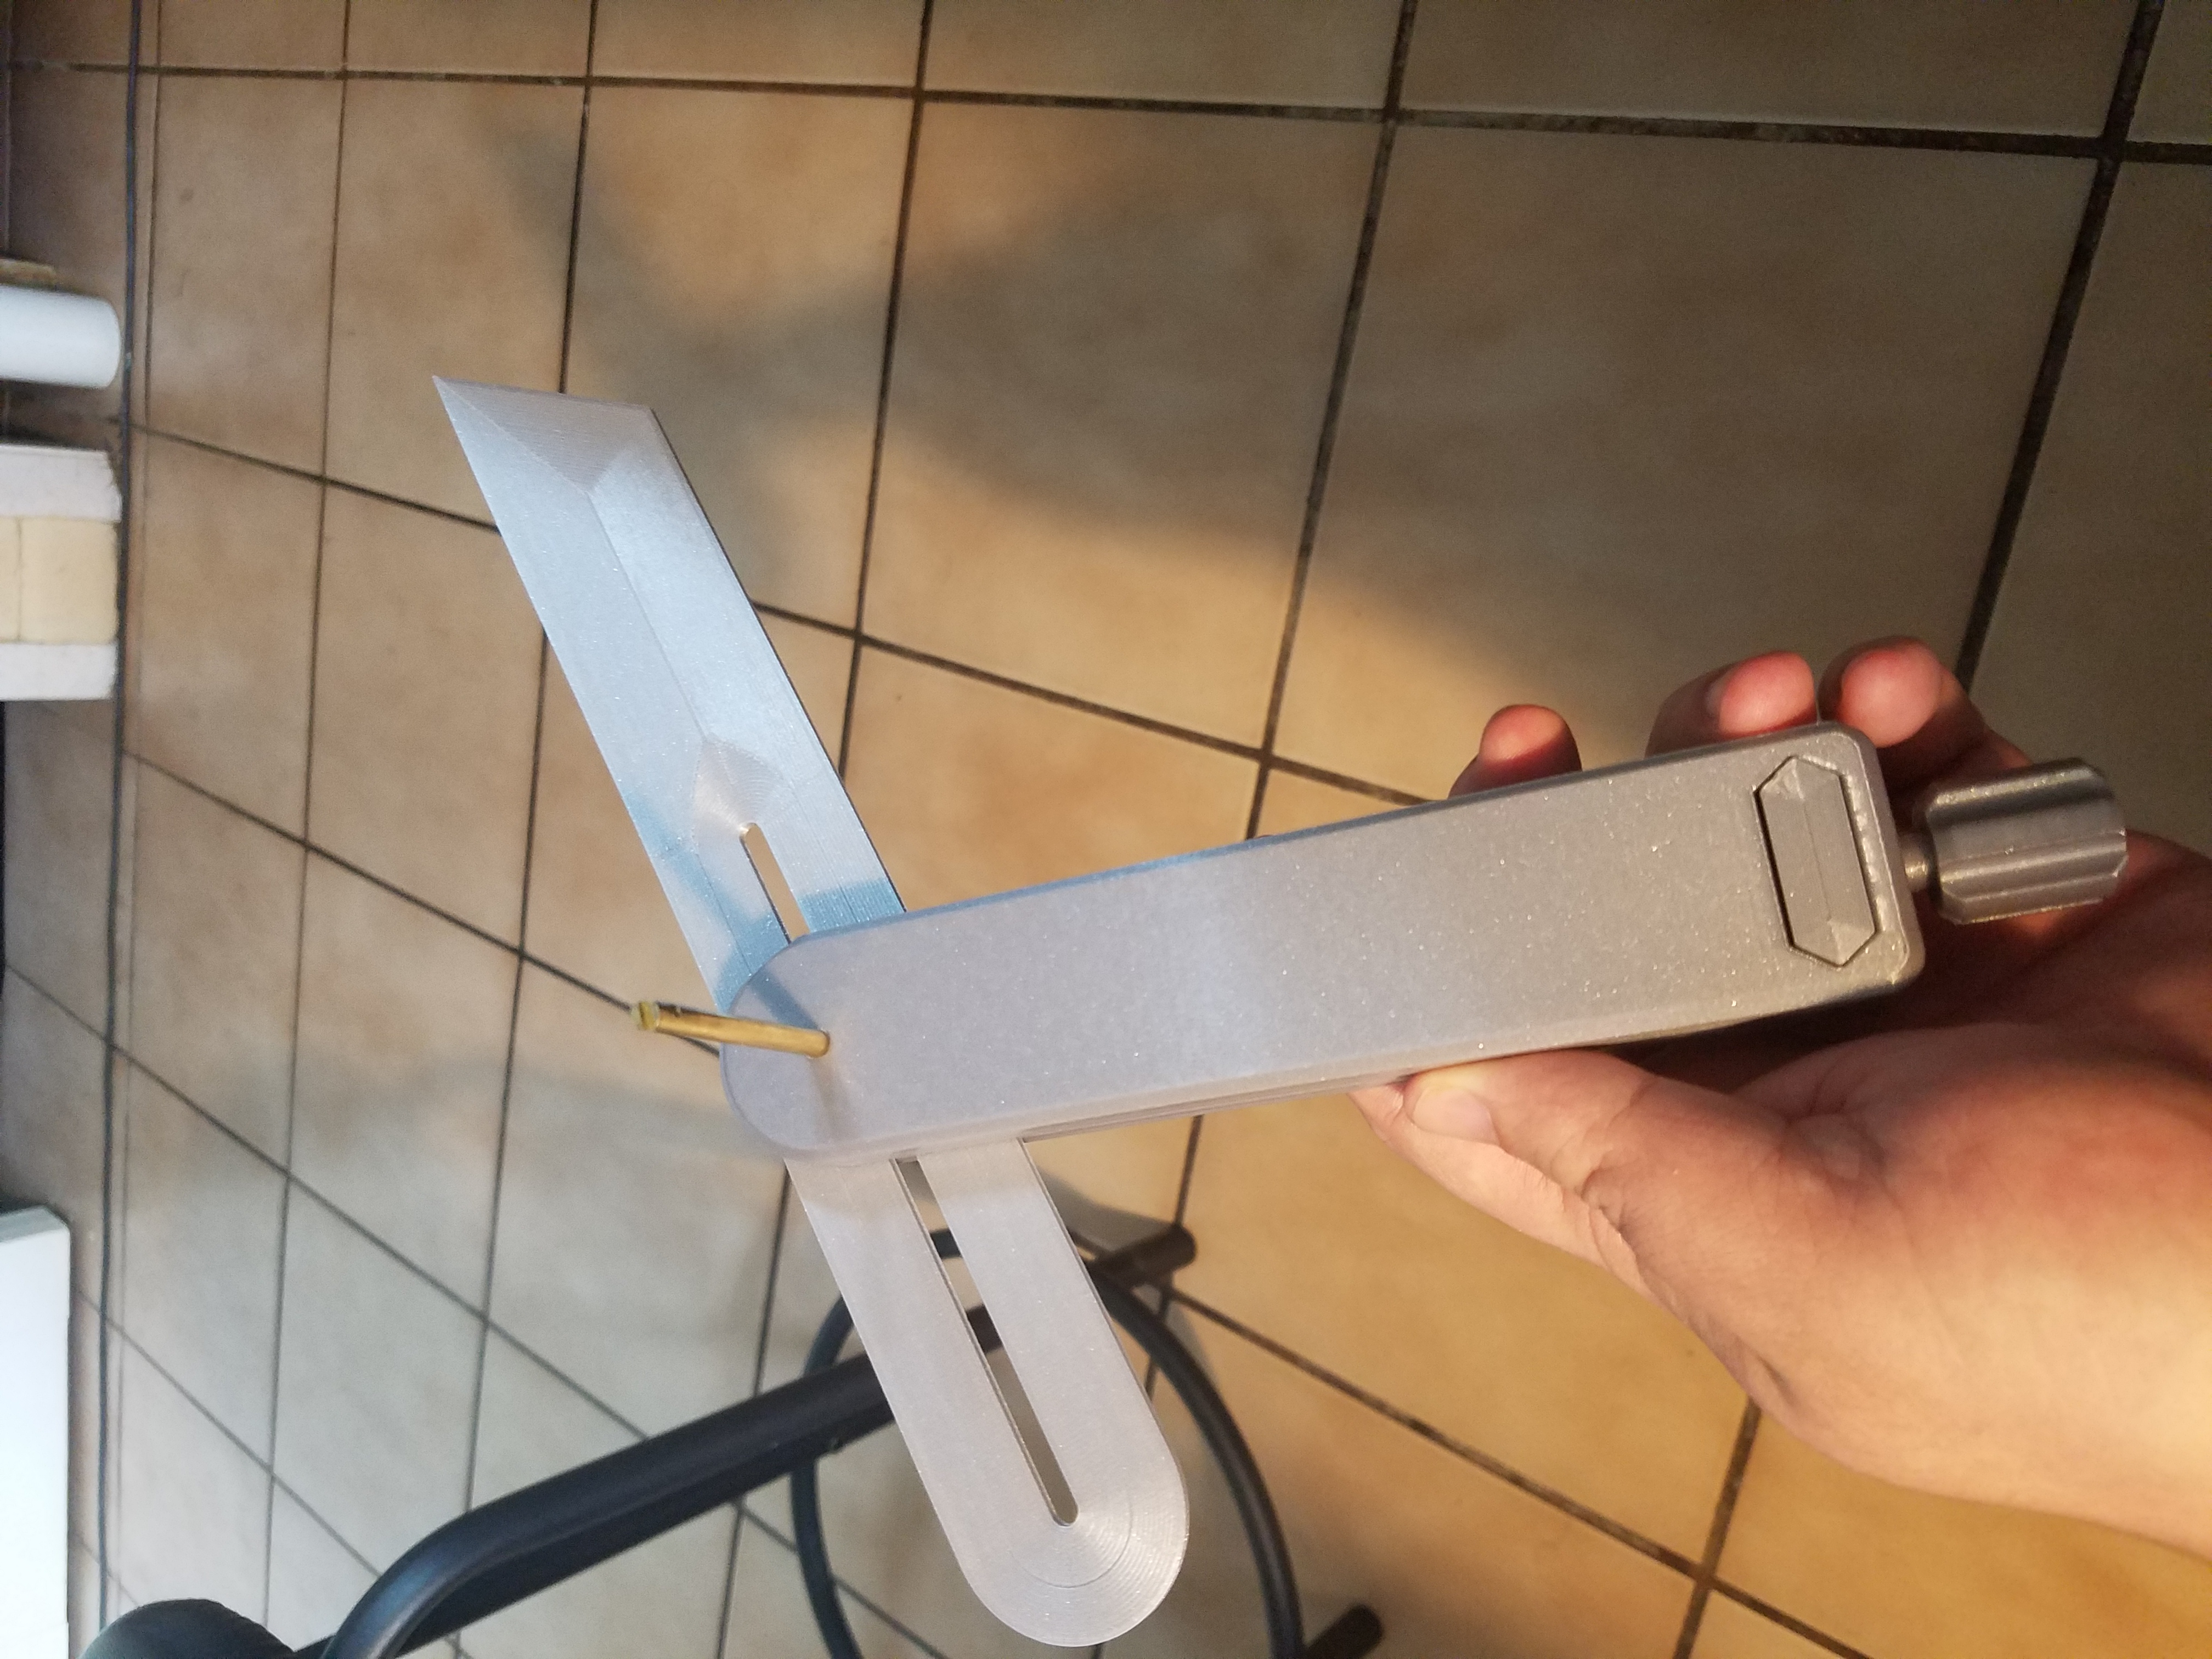
<p>Inspired by a particular angle finder from Adam Savage's favorite tools video on angle finders, I present my take on his "ANGULUS" (watch the video, you'll understand why I put that in all caps :P ).</p> <p>After seeing his video, and due to events around another cad modeling software that had occurred around that time, I wanted to try to learn FreeCAD and figured attempting to recreate the functionality of his "ANGULUS" may be a fun challenge. Two days of modeling and a day of printing and reprinting later and it was complete. Fun challenge overall. Might go back and rework some parts as the wedge locking mechanism does <em>work</em>, but the draft arm can still be forced with moderate pressure. Also not 100% satisfied with how the main body prints. I printed the pictured one in PLA, but after some redesigns, I might go back and print the Grippers in PETG instead.</p> <p>Included the Freecad file along with the STLs in case anyone wanted to mess with the design as it currently stood.</p> <p>Should you just want to print this yourself, there is a few pieces of hardware required.</p> <p>x1 - M3 30mm screw<br/> x1 - M3 Locking Nut<br/> x1 - M3 Nut<br/> x1 - 4mm diameter 25mm long rod *</p> <ul> <li>(I used brass, but I don't see why any other material shouldn't work, as long as it hits the right specs, and I would actually suggest cutting <em>AFTER</em> as the tolerances were super tight for my printer and it needed to be hammered in place.)</li> </ul> <h3>Print instructions</h3><p>Most parts <strong><em>will</em></strong> need to be rotated to print properly.</p> <p><em>Suggested Orientations</em></p> <p>AF_LockV2 = opening going upward<br/> AF_Pusher = Hole going upward<br/> AF_AngleArm = No Change<br/> AF_Gripper = Print flat/Opening going upward</p> <p>The Following 2 <em>may</em> need supports while printing</p> <p>AF_BodyV2 = Slotted side facing upward<br/> AF_Knob = larger grip side down/smaller part up in the air</p> <p>As an additional heads up, you will need to print 2 of the gripper parts.</p> <p><em>Assembly</em></p> <p>1) The M3 screw and the locking nut go on the "Pusher" piece. Insert the screw through the part with the head finishing in the round pocket. The m3 locking nut goes on the other side in the hexagon shaped pocket. Tighten as much as possible without breaking the part.</p> <p>2) The other M3 nut can be pushed into the hexagon shaped pocket in the knob. After the nut has been pushed into place, Attach the knob onto the pusher piece by screwing them together until the two plastic parts are touching for easier assembly later. The nuts should be essentially facing each other when the parts are assembled properly.</p> <p>3) Place the 2 Grippers inside the main body through the hole in the back of the body. Try to align them one to each side.</p> <p>4) Place Pusher/Knob assembly inside the main body on top of the Grippers.</p> <p>5) Insert the Lock piece into the other hole on the body, aligning the angled feet into the right place. It should fit flush with both sides of the main body when placed correctly, and cup the underside of the nut holding end of the knob.</p> <p>6) Insert the Angle Arm, making sure the small hole on the main body isn't blocked by anything and it is aligned with the slot of the angle arm and then drive your 4 mm pin in place through both ends of the main body. It should be a tight fit. Trim off the excess now from your pin if you did not do that in advance.</p>
With this file you will be able to print 3D Printed Angle Finder with your 3D printer. Click on the button and save the file on your computer to work, edit or customize your design. You can also find more 3D designs for printers on 3D Printed Angle Finder.