3D Printed Conductive Circuit - Train Crossing
pinshape
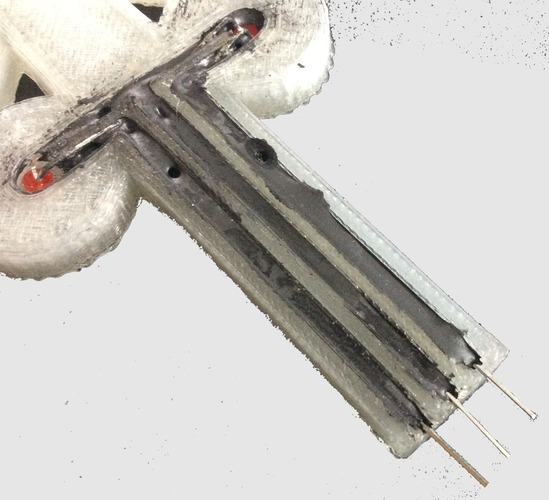
I wanted to create a 3D printed circuit using conductive ink similar to a Voxel 8 3D printer but on the cheap. I found some affordable conductive glue at Radio Shack and used it to make a 3D Printed Train Crossing Circuit powered by an Arduino board. The circuit simply flashes LEDs back and forth like a train crossing, with a crucial part of the circuitry consisting of conductive ink placed in custom channels created through a 3D print. To view more details about this project, visit my YouTube Channel at: https://youtu.be/k-52WRqUocw I utilized this conductive glue from Radio Shack: http://shack.net/1R1aNR6 Printing Details: * Printer: Makerfront * Rafts: No rafts were used during the printing process. * Supports: None were required for this design. * Resolution: A resolution of 0.3 mm was chosen for optimal results. * Infill: An infill percentage of 25% was used to achieve a balance between strength and weight. Notes: You can experiment with different fill options or resolutions if you prefer. I used clear filament to make the conductive ink more visible in the channels. Post-Printing Steps: To complete the circuit, simply apply the conductive glue/ink to the channels created during the 3D printing process, establishing the necessary connections for your project. I designed the traffic light with custom channels in Tinkercad.
With this file you will be able to print 3D Printed Conductive Circuit - Train Crossing with your 3D printer. Click on the button and save the file on your computer to work, edit or customize your design. You can also find more 3D designs for printers on 3D Printed Conductive Circuit - Train Crossing.