3D-printed Digital Camera Obscuras
prusaprinters
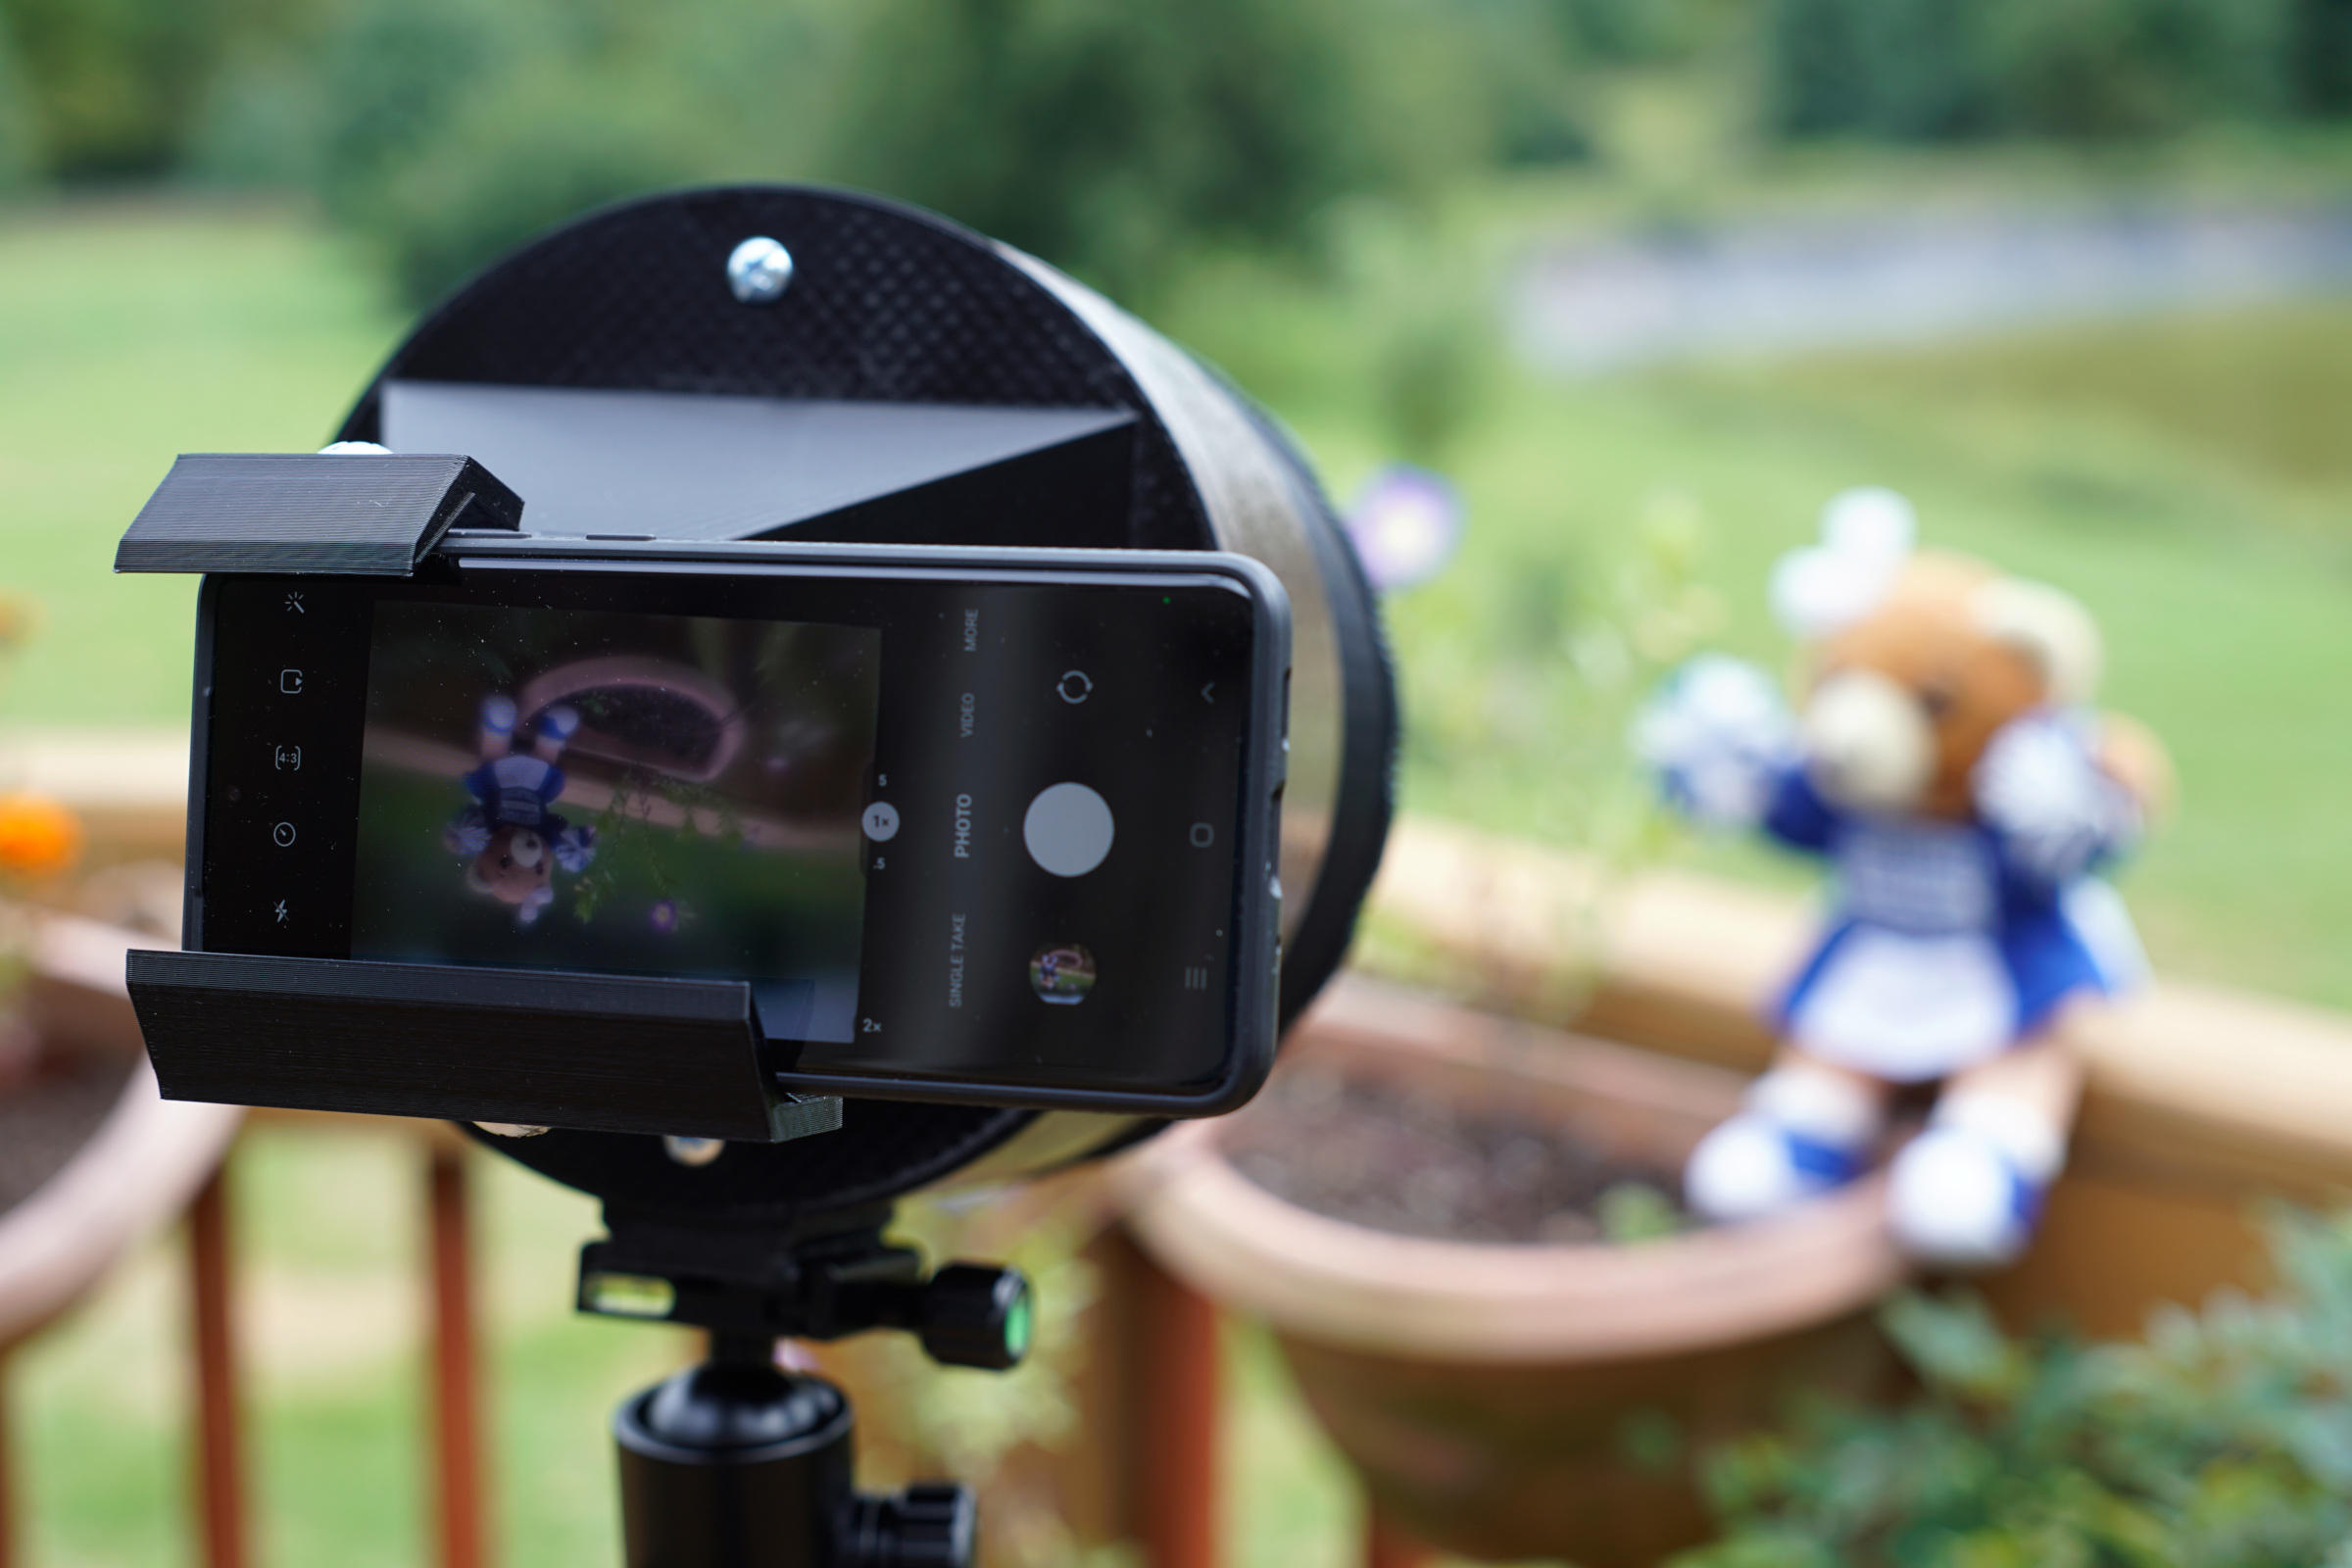
<p>In photography, it's usually the case that the larger the film or sensor, the better. Large-format film is a pain to deal with, but large-format sensors are extremely expensive. Fortunately, most of the properties of a large format sensor can be obtained by building a camera obscura that projects an image onto a relatively large screen, which we simply photograph using a small-sensor digital camera. Our particular obscura is of the rear projection type, which means that the obscura's lens and our digital camera are on opposite sides of the screen. This thing is a collection of parts for 3D-printed digital camera obscuras that use your compact digital camera (especially ones similar to the Canon PowerShot ELPH 180) or cell phone to capture the image projected on a large-format screen... and can cost less than $25 to make (including the lens).</p><p>Such devices are often generically called depth-of-field adapters because they can produce images in which the subject is reasonably sharp, but everything behind, or in front of, the subject seems to melt away into a soft blur -- beautiful bokeh. This particular device is called <strong>Faboky</strong> (fah-bow-key), initially standing for <strong>Fresnel Apodized Bokeh Obscura from KentuckY</strong> -- because it can use a cheap Fresnel magnifier as the lens and use an apodizing filter to give more control over the appearance of the out-of-focus portions of the image. However, the reason there are so many parts here is because Faboky has <i>LOTS</i> of variations, including using conventional large-format lenses or even a pinhole. Thus, it might be better to think of it as being <strong>Flexibly Adaptable Bokeh Obscura from KentuckY</strong>. The first photo shows Faboky being used with a Samsung S20 Ultra and a conventional 4x5" format 135mm <i>f</i>/2.2 lens to obtain an image equivalent to a 32mm <i>f</i>/0.53 on a full-frame camera, and that image is shown in the second photo. The next four photos show some different versions of Faboky using Fresnel lenses, the 135mm <i>f</i>/2.2, and even a homemade pinhole. The most extreme version is the second Fresnel-lens version shown here, which behaves like a 23mm <i>f</i>/0.13 full-frame lens!</p><p>In any case, it's a bit complex to explain how to pick which version of Faboky you want to make, which parts you'll need for that, and how to make everything into a working system. Thus, there's a companion Instructable that goes through all of that. <strong>You should read the Instructable before making any of these parts.</strong> That Instructable is <a href="https://www.instructables.com/3D-printed-Digital-Camera-Obscuras/">https://www.instructables.com/3D-printed-Digital-Camera-Obscuras/</a> .</p><p>All the parts needed for Faboky can be printed on a typical consumer FDM 3D printer, and a typical version requires less than 1000g of filament for all parts. However, some parts barely fit in the build volume of most printers, and total print time can be 24 hours or more.</p><h3>Printing</h3><p>The initial release version is 220912, currently posted only as STL files with each part oriented in the best way for printing.</p><p>Except for the elphback, none of the parts have unsupported spans, and they are thus easy to print except for the fact that many parts are quite large and will take a long time to print even at a 0.3mm layer height. The elphback unsupported span is not particularly critical, and usually can be printed without supports without suffering problematic sagging. Dimensional consistency across the parts is critical, so make sure your printer is well adjusted, and try to avoid using significantly different materials or printing conditions for different parts.</p><p>Most of the larger parts are very thin to minimize print time and weight, but they must be completely light-tight, even blocking NIR (near infrared), to work well. Many "black" filaments use dyes that are translucent in the deep red and NIR, so you may need to test several to find one that is truly opaque. Blacks that contain carbon black tend to be the most opaque, and Overture Matte Black PLA worked well for us, especially when set to deliberately overextrude by a few percent. Alternatively, the parts can be light-sealed by painting.</p><h3>Hand Grip Accessory</h3><p>I've also designed a 3D-printed Arca-Swiss-compatible hand grip that makes Faboky a lot easier to shoot with handheld. Because it is useful for more than Faboky, it is posted separately at <a href="https://www.printables.com/model/284933-arca-swiss-compatible-hand-grip">https://www.printables.com/model/284933-arca-swiss-compatible-hand-grip</a> .</p>
With this file you will be able to print 3D-printed Digital Camera Obscuras with your 3D printer. Click on the button and save the file on your computer to work, edit or customize your design. You can also find more 3D designs for printers on 3D-printed Digital Camera Obscuras.