3D Printed Dremel Lathe
prusaprinters
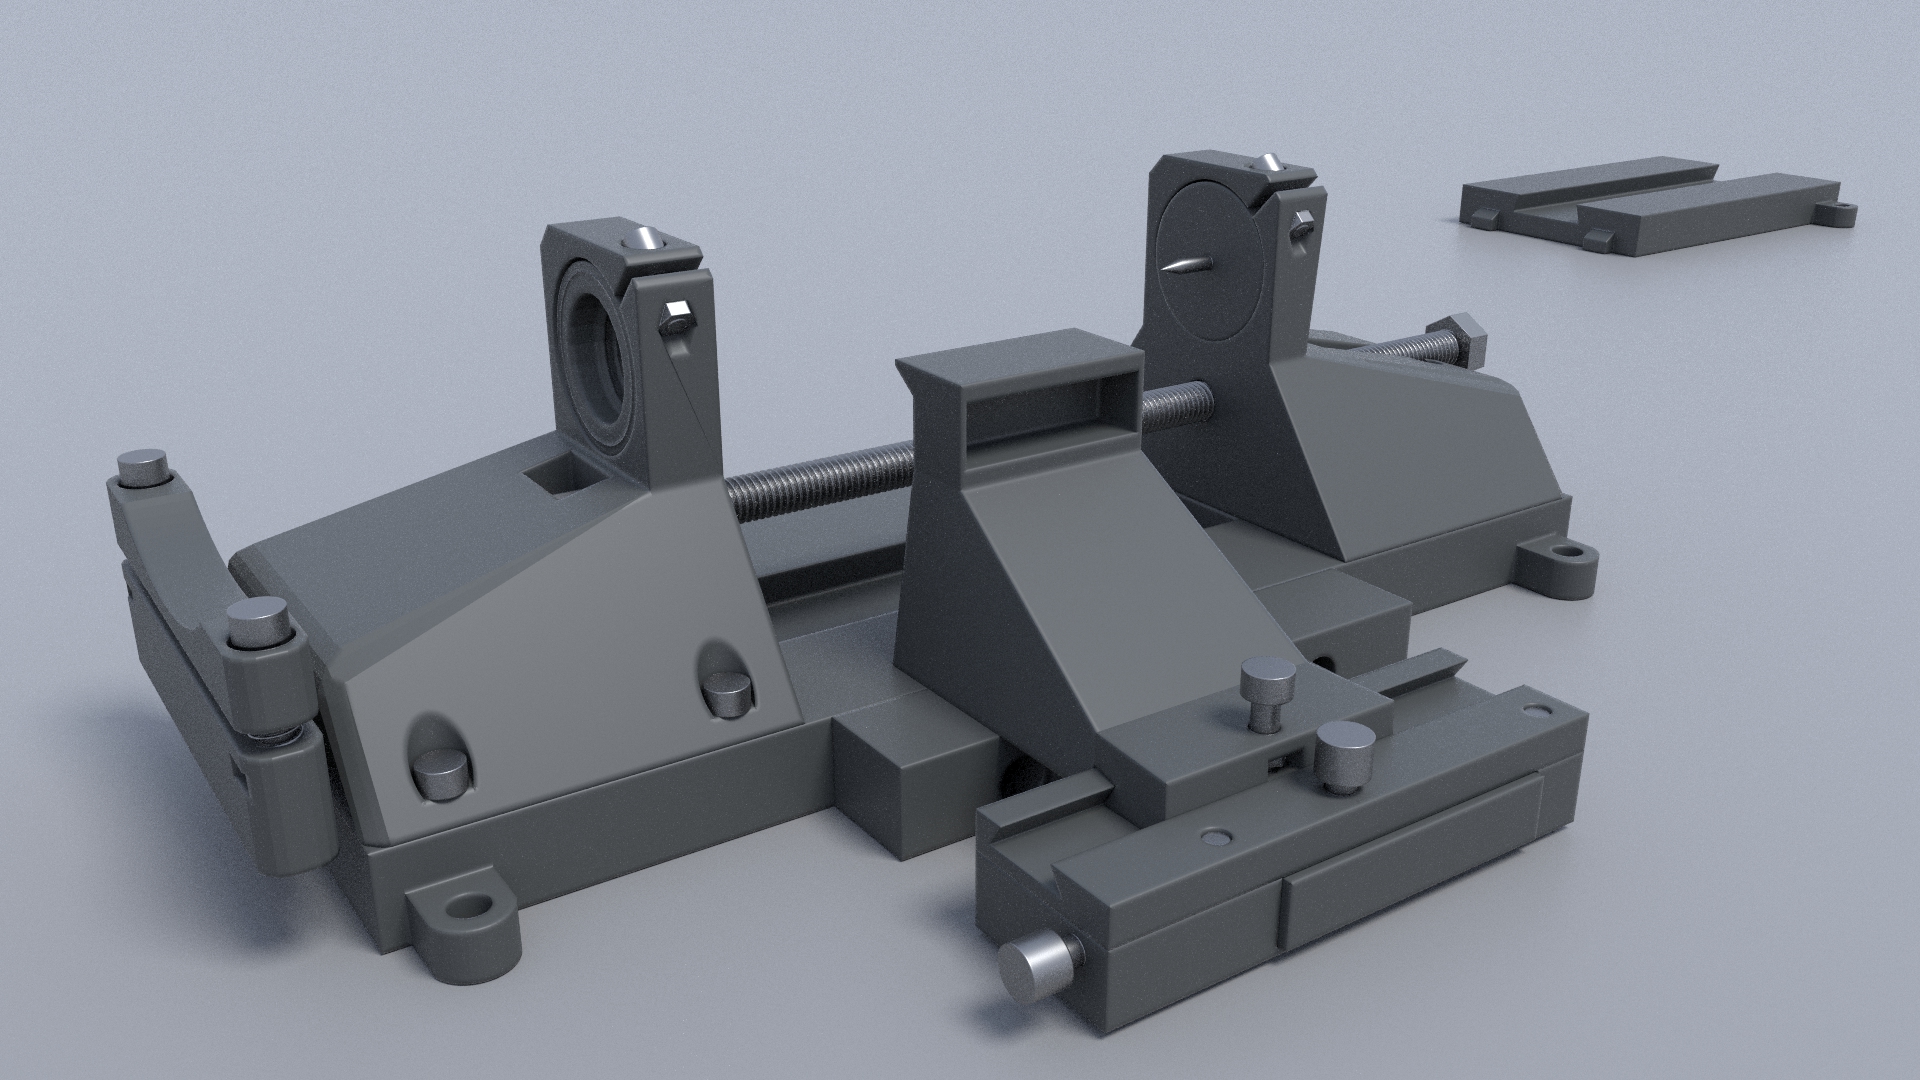
<p>3D Printed Dremel Lathe</p><p>Precision lathe for most Dremel models intended for fine hobby work (dolls house spindles, model locomotive funnels, wargames canon barrels, etc). Only tested with a Model 800 but should work with any Dremel with the standard collet screw.</p><p>The workpiece can be up to about 48 mm dia. and about 70 mm long but I've included a base extension piece that extends the length by 130 mm (per extension used).</p><p>The tool rest slides in and out or can be removed.</p><p>NOTE: The tool rest has been redesigned and can be found at -</p><p>https://www.printables.com/model/268675-new-tool-rest-for-the-dremel-lathe</p><p>The locknut on the end of the main head screw is used to adjust the tailstock position. Use a driver or electric screwdriver (for speed) with a 13 mm socket or turn by hand.</p><p>NOTE: I've designed an extension to the lathe that includes a hand crank to speed up adjustment of the tailstock. You can find it at -</p><p>https://www.printables.com/model/176086-geared-crank-add-on-for-dremel-lathe</p><p>The pics are self-explanatory but note that the photographs are from the prototype - many minor and superficial refinements have been introduced to the STL files since.</p><p>I've used this with wood dowels and hardened Milluput ‘blobs’ (mounted on chopped up 2 mm dia. nails, etc) but I've NOT tried it on metal as I'm only using home-made tools from cut down needle files. Let me know if you have any success with other materials.</p><p> </p><p>Materials: PLA (other materials may require scaling adjustments)<br>Layer height: (see gcode filenames for layer heights per part)<br>Infill: 15% on all parts<br>Brim: None<br>Supports: (already configured in the 3MF files)</p><p>Non-printables:</p><p>8 mm threaded rod (210 mm + 130 mm per extension if required)<br>2 x M8 locknuts<br>2 x M3 x 12 hex bolts<br>2 x M4 x 20 hex bolts and nuts<br>2 x M4 x 16 hex bolts and nuts<br>4 x M4 x 18 hex bolts and nuts<br>5 x M4 x 30 hex bolts and nuts<br>2 x M4 x 6 hex bolts<br>2 x M2 x 12 hex bolts</p><p>2 x M3 nuts<br>15 x M4 nuts<br>2 x M2 nuts</p><p>2 x 6 mm x 6mm extension springs (quite strong - to support the Dremel body)<br>2.5 mm dia x 15 mm nail (turned to a point for the tailstock collet)</p><p>Assembly Notes:</p><p>Drop the M8 locknut down into the slot in the headstock and jam it with a small screwdriver while screwing in the 8 mm threaded rod - don't screw it much past the end of the nut as it must spin with the rod.</p><p>All the nuts (except the M8s and the collet tension M3s need to be either tapped into place with a light hammer or by using the Prusa method of employing a long threaded bolt to pull the nut into position then unscrewing the bolt. Using a hammer is more satisfying, though.</p><p> </p><p>Usage Notes:</p><p>A standard Dremel chuck won't accept anything much bigger than a 3mm dia. rod so for larger dia. stock either drill the end and insert and glue a rod or use the Dremel screw-head bit on the workpiece. In either case, if using the tailstock (on long workpieces) drill a small pilot hole in the end to engage the pointy tailstock pin (there's probably a name for that bit).</p><p>WARNING:</p><p>For working on short stock I recommend you remove the tailstock collet (or the whole tailstock) as the turned nail will be extremely sharp and could cause injury. For this same reason leave the tailstock collet off while assembling the lathe.</p>
With this file you will be able to print 3D Printed Dremel Lathe with your 3D printer. Click on the button and save the file on your computer to work, edit or customize your design. You can also find more 3D designs for printers on 3D Printed Dremel Lathe.