3D Printed FPV Quadcopter The Crossfire
pinshape
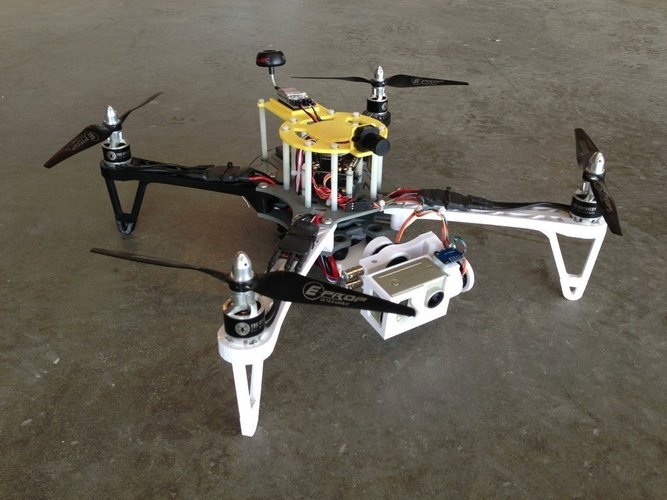
SummaryThe Crossfire has now been updated, check it out here for the new and improved version http://www.thingiverse.com/thing:234867 This is my version of a 3D printed quadcopter. I designed it from the ground up for FPV, but it will work equally well as an aerobatic quad. This quad had been under development and testing over the last few months. Thanks to a lot of input from the members of this site I have decided to publish it as a finished thing. That being said I will continue to develop and add components/ modules for this quadcopter in order to make it more customizable. I am also in the process of designing a tricopter and a hexacopter. Many of the components will be interchangeable across my line. Print, fly and enjoy. As always input is always appreciated. Thanks everyone for all the support. If you like my designs please consider a small donation, it allows me to keep adding cool things! Donate Video Link: http://vimeo.com/79370836 http://vimeo.com/71358538 I sourced Most of this stuff from Hobbyking, but try http://www.getfpv.com for your electronics. They are a great one stop shop for multirotors and FPV. Electronics List: Motors - RCTimer 750 Kv ESCs - Turnigy Plush 30A Battery - Turnigy Nanotech 3S or 4S 4000mah Flight Controller - KK 2.0 Update 11/14/13: Just uploaded a video I shot of some BASE jumping. Check it out if you are wondering about a gimbal. Update 8/14/13: If anyone if looking to use a CCD camera instead of a GoPro check out this thing http://www.thingiverse.com/thing:133200 Update 7/30/13: I've edited together a video of the print and some flight with my quadcopter. It's long overdue but hopefully it will inspire some people to give it a shot. Update 6/30/13: I have deleted the links to HobbyKing.com because their links always seem to change. A quick search for any of the components on HobbyKing or google should return good results. Sorry for the inconvenience. Update 5/20/13: I have uploaded the .SKP files for the quad. Have fun modding and tweaking! Update 3/18/13: Added the Bottom Plate for use with the Tube spacers. The only change was a new set of holes on the Bottom plate. Instructions1.) Print the main body parts top plate and the leg, pad and GoPro case at 20% infill. 2.) Print the Arms at 50% infill. Depending on material used you may be able to get away with less infil. Using ABS and 50% will give a good starting point for a very strong, light arm. 3.) The arm, leg and pad can just be press fit together. They should fit snugly, some sanding or shaving may be required to get desired fit. Super glue can also be used if parts do not fit snugly. I have printed mine on a replicator and tolerances work well. 4.) Assemble frame and arms using 8-32 nylon machine screws or like. 5.) The bottom plate is designed to accept a 9g servo for articulating the GoPro tilt mount. Us a push rod to connect the servo arm to the hinge arm on the GoPro case. 6.) Using ear plugs or other vibration dampening material in between the GoPro case and the hinge. This will dampen out any vibrations that get to the GoPro and reduce or eliminate the rolling shutter problems that GoPros have with multi-rotors. 7.) Add electronics. 8.) Dynamically balance props on the motors. THIS IS VERY IMPORTANT FOR A STABLE FLYING PLATFORM AND TO ELIMINATE VIBRATIONS. 9.) Fly!
With this file you will be able to print 3D Printed FPV Quadcopter The Crossfire with your 3D printer. Click on the button and save the file on your computer to work, edit or customize your design. You can also find more 3D designs for printers on 3D Printed FPV Quadcopter The Crossfire.