3D-Printed Ice Cream Maker (i3 MK3S + Prusaslicer 2.3.0)
prusaprinters
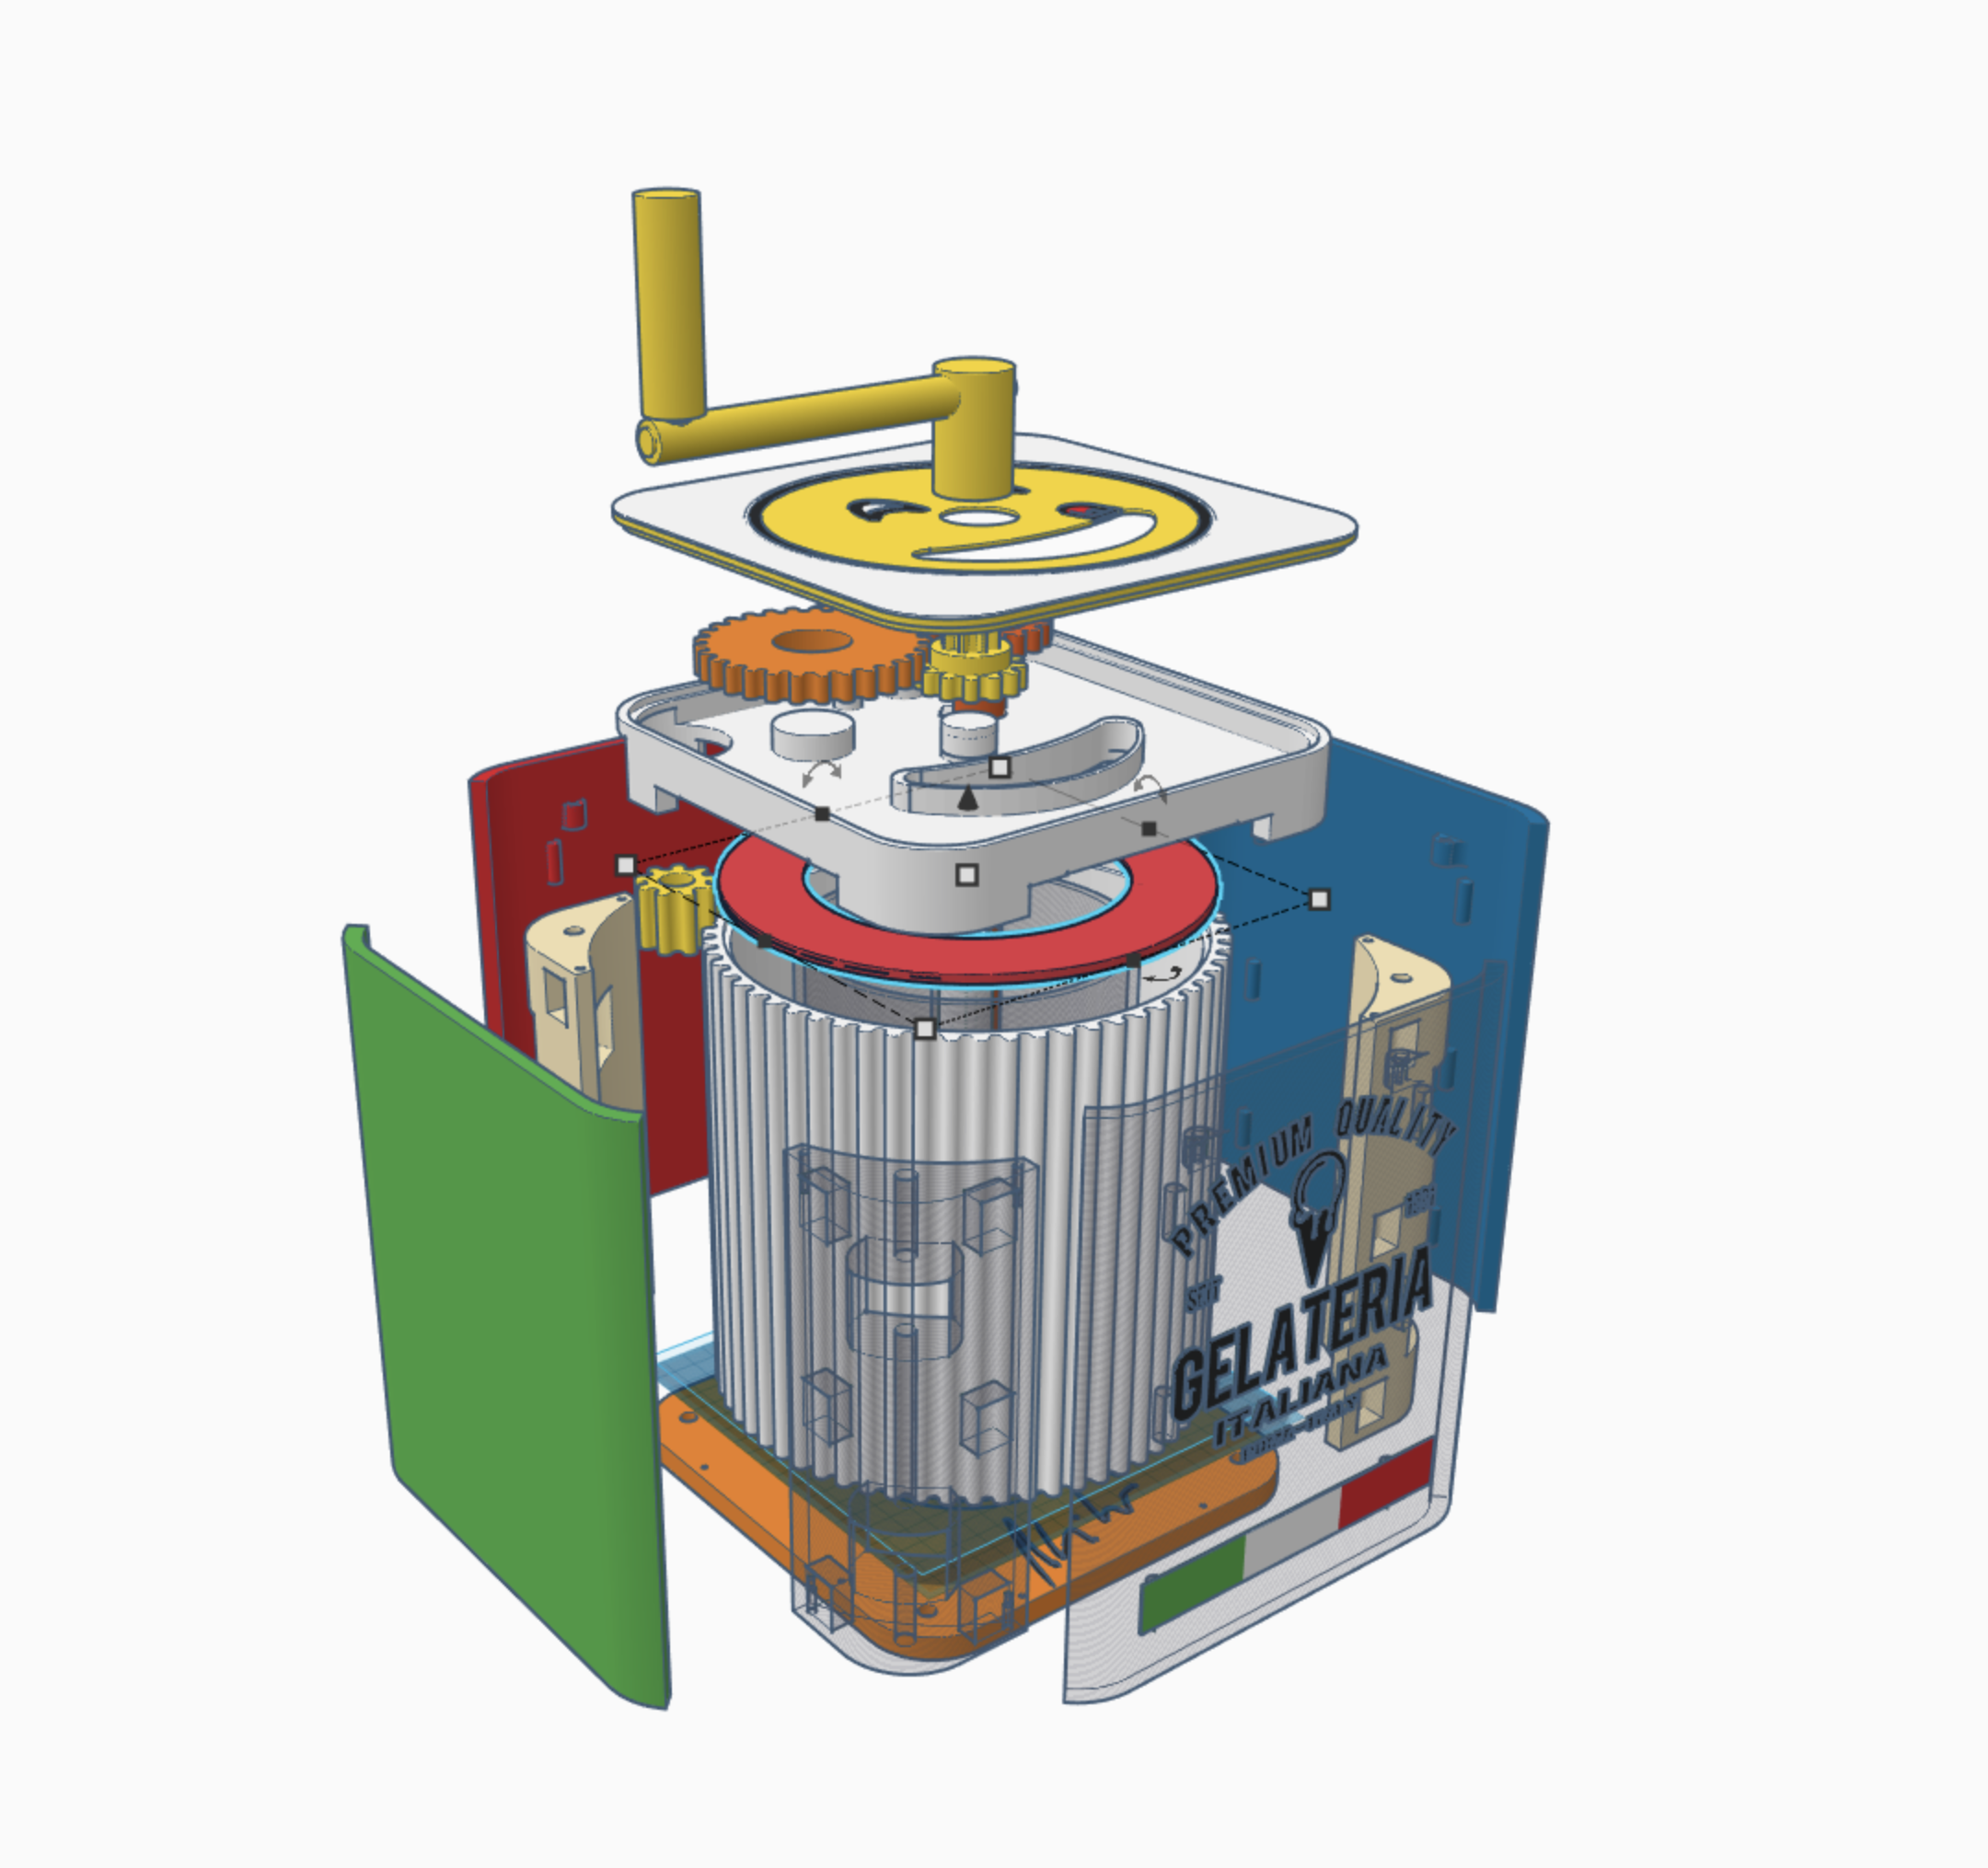
<p><strong>01.03.2021 - </strong><i><strong>First piece the bottom base.</strong></i></p><p>Today I'm starting to post on my profile the pieces to build an ice cream maker to make ice cream at home.</p><p>This project took me two years to complete, leading me to build five ice cream machines, each time improving the design to improve performance. I will publish the assembly instructions on the way. </p><p>You can buy some excellent filament to print your ice cream maker using the discount code ICECREAM on www.inprinted.de (EU only)</p><p>HAPPY PRINTING!!! </p><p><strong>Before you get started I recommend you read the following article on the PrusaPrinters Blog about 3D printing in combination with food.</strong></p><p><a href="https://blog.prusaprinters.org/how-to-make-food-grade-3d-printed-models_40666/">https://blog.prusaprinters.org/how-to-make-food-grade-3d-printed-models_40666/</a></p><p>By following the various treatment phases of the printed parts that will come into contact with food you will avoid problems.</p><p> </p><p><strong>08.03.2021 - </strong><i><strong>Second piece the corner</strong></i></p><p><strong> </strong>(Something went wrong last week and it didn't load the text... I'll put it back today)</p><p>After the base we print the corners of the ice cream machine. We need 4 pieces, one per corner. We must use the supports and a Layer height of 0.3.<br>Happy printing and see you next week.</p><p> </p><p><strong>15.03.2021 - </strong><i><strong>3 of the 4 sides</strong></i></p><p>Today we are printing 3 of the 4 sides of the ice cream machine.</p><p>The printing is very simple, always Laver 0.3 (those who want can also use a 0.2) and supports to have a smoother finish.</p><p>I use bright colors to give a nice look to the ice cream machines, but you can choose the colors you like.</p><p>P.S. Next week we're printing the fourth side, and we're going to make it multi-colored, you don't need to have the Palette or MMU, and I'll give you my tutorial and you can use it to print other awesome colored objects too!</p><p> </p><p><strong>22.03.2021 - how to print Multicolour?</strong></p><p>Today I propose a particular piece printed in 3d because of the technique that I used to print the front piece in color even with a single extruder.</p><p>I also uploaded the 3MF file for those who want to load all the settings in Prusaslicer.</p><p>Just remember the color sequence:<br>Yellow<br>Black<br>Red<br>Green<br>White<br>Yellow</p><p>Also check out my tutorial for setting up the Prusaslicer for best results.</p><p>Let me know what you think about the tutorial and contact me on Instagram if you need any help.</p><p>Happy Printing</p><p><strong>23.04.2021 - I'm still alive ;)</strong></p><p>I have to say sorry for not posting more of the ice cream machine parts to print.<br>The last few weeks have been very busy so I've really been short on time for this project.</p><p>However, we're continuing now and I'm leaving you with three pieces to print. They are the heart of the ice cream maker. The brine tank and the sorbet bowl where the ice cream is kept and the top to close it all up.<br>Print the two central parts with at least three perimeters and the brine tank with a Gyroid infill to increase the temperature seal thanks to the air chambers.</p><p>Happy Printing</p><p> </p><p>P.S. Next week I'll start preparing assembly instructions as well!</p>
With this file you will be able to print 3D-Printed Ice Cream Maker (i3 MK3S + Prusaslicer 2.3.0) with your 3D printer. Click on the button and save the file on your computer to work, edit or customize your design. You can also find more 3D designs for printers on 3D-Printed Ice Cream Maker (i3 MK3S + Prusaslicer 2.3.0).