3D Printed Instrument: Tenor Taishokoto / Bulbul Tarang
thingiverse
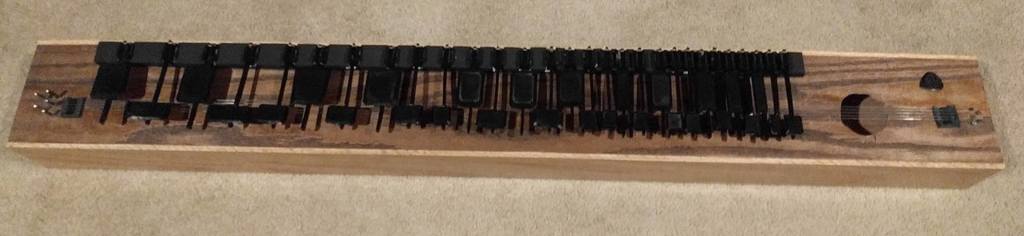
This is a tenor version of the Japanese Taishokoto (or the Indian Bulbul Tarang / Benju, sometimes known as the "China Organ"). All of the levers and keys are 3D printed, the rest is made of wood. I created this because I have a bulbul tarang which is more of a toy than an instrument--its range went from C5 to C7, which sounds quite tinny and toy-like. This tenor instrument is a whole octave and a half lower, going from G3 to C6, so it sounds more like a professional instrument. Consequently, this makes it much harder to play, since the lower strings are so far apart that proper fingering is almost impossible. This is normally acceptable on a guitar or other stringed instruments, but not for a keyboard setup. So build and play one of these at your own risk. The file name of each lever contains instructions on how many to print. The rest is up to you if you decide to build one. The process is fairly straightforward if you take a look at the pictures--just make a soundbox roughly a meter long, then put strings on it with tuning pegs (I used five strings in unison for a fuller, tremolo sound). Then it's best to use a pencil and a chromatic tuner to mark off where each key should go. Then mount a half-inch piece of wood onto the back-top edge of the soundbox and use a Dremel Multi-Max tool to cut out a spot for each of the lever bases. Then glue all of the levers together. Then just glue each completed lever in place, and you're done. Some other notes: - Print each piece individually for best results. - You may need to use a heat gun to bend some of the levers in place for best pitch - I used a heat gun to widen each hole at the end of each lever slightly so it snugly fit each cylinder - Never leave the instrument in a hot car, especially if using PLA, as the whole thing could melt out of place - I made a QuickSteel molded cast of the two "string base" pieces since, if I used the original plastic pieces, the strings might cut right through them if the pieces got warm enough to be malleable. I recommend doing this to be safe - I originally intended to wind my own metal springs for each key, but then I found out that my 15 year old braces rubber bands did the trick just fine! I used the American Orthodontics brand "Steller's Sea Lion" 1/4" 6.4mm gauge rubber bands. I recommend using them instead of springs, simply because they're still highly elastic after all these years, with no signs of cracking. Here's a link to buy some (if you didn't suffer the torment of having to wear braces): https://www.amazon.com/pack-Orthodontic-Elastics-Bands-diameter/dp/B002GCNZMU/ref=sr_1_1_a_it?ie=UTF8&qid=1519612175&sr=8-1&keywords=braces+sea+lion+rubber+bands&dpID=41eiGtJMz9L&preST=_SY300_QL70_&dpSrc=srch Message me if you have any questions! Please consider subscribing to my YouTube page to see cool VR/360 tours of maps from video games: https://youtube.com/mintyfries
With this file you will be able to print 3D Printed Instrument: Tenor Taishokoto / Bulbul Tarang with your 3D printer. Click on the button and save the file on your computer to work, edit or customize your design. You can also find more 3D designs for printers on 3D Printed Instrument: Tenor Taishokoto / Bulbul Tarang.