3D printed LARP safe parrying dagger
prusaprinters
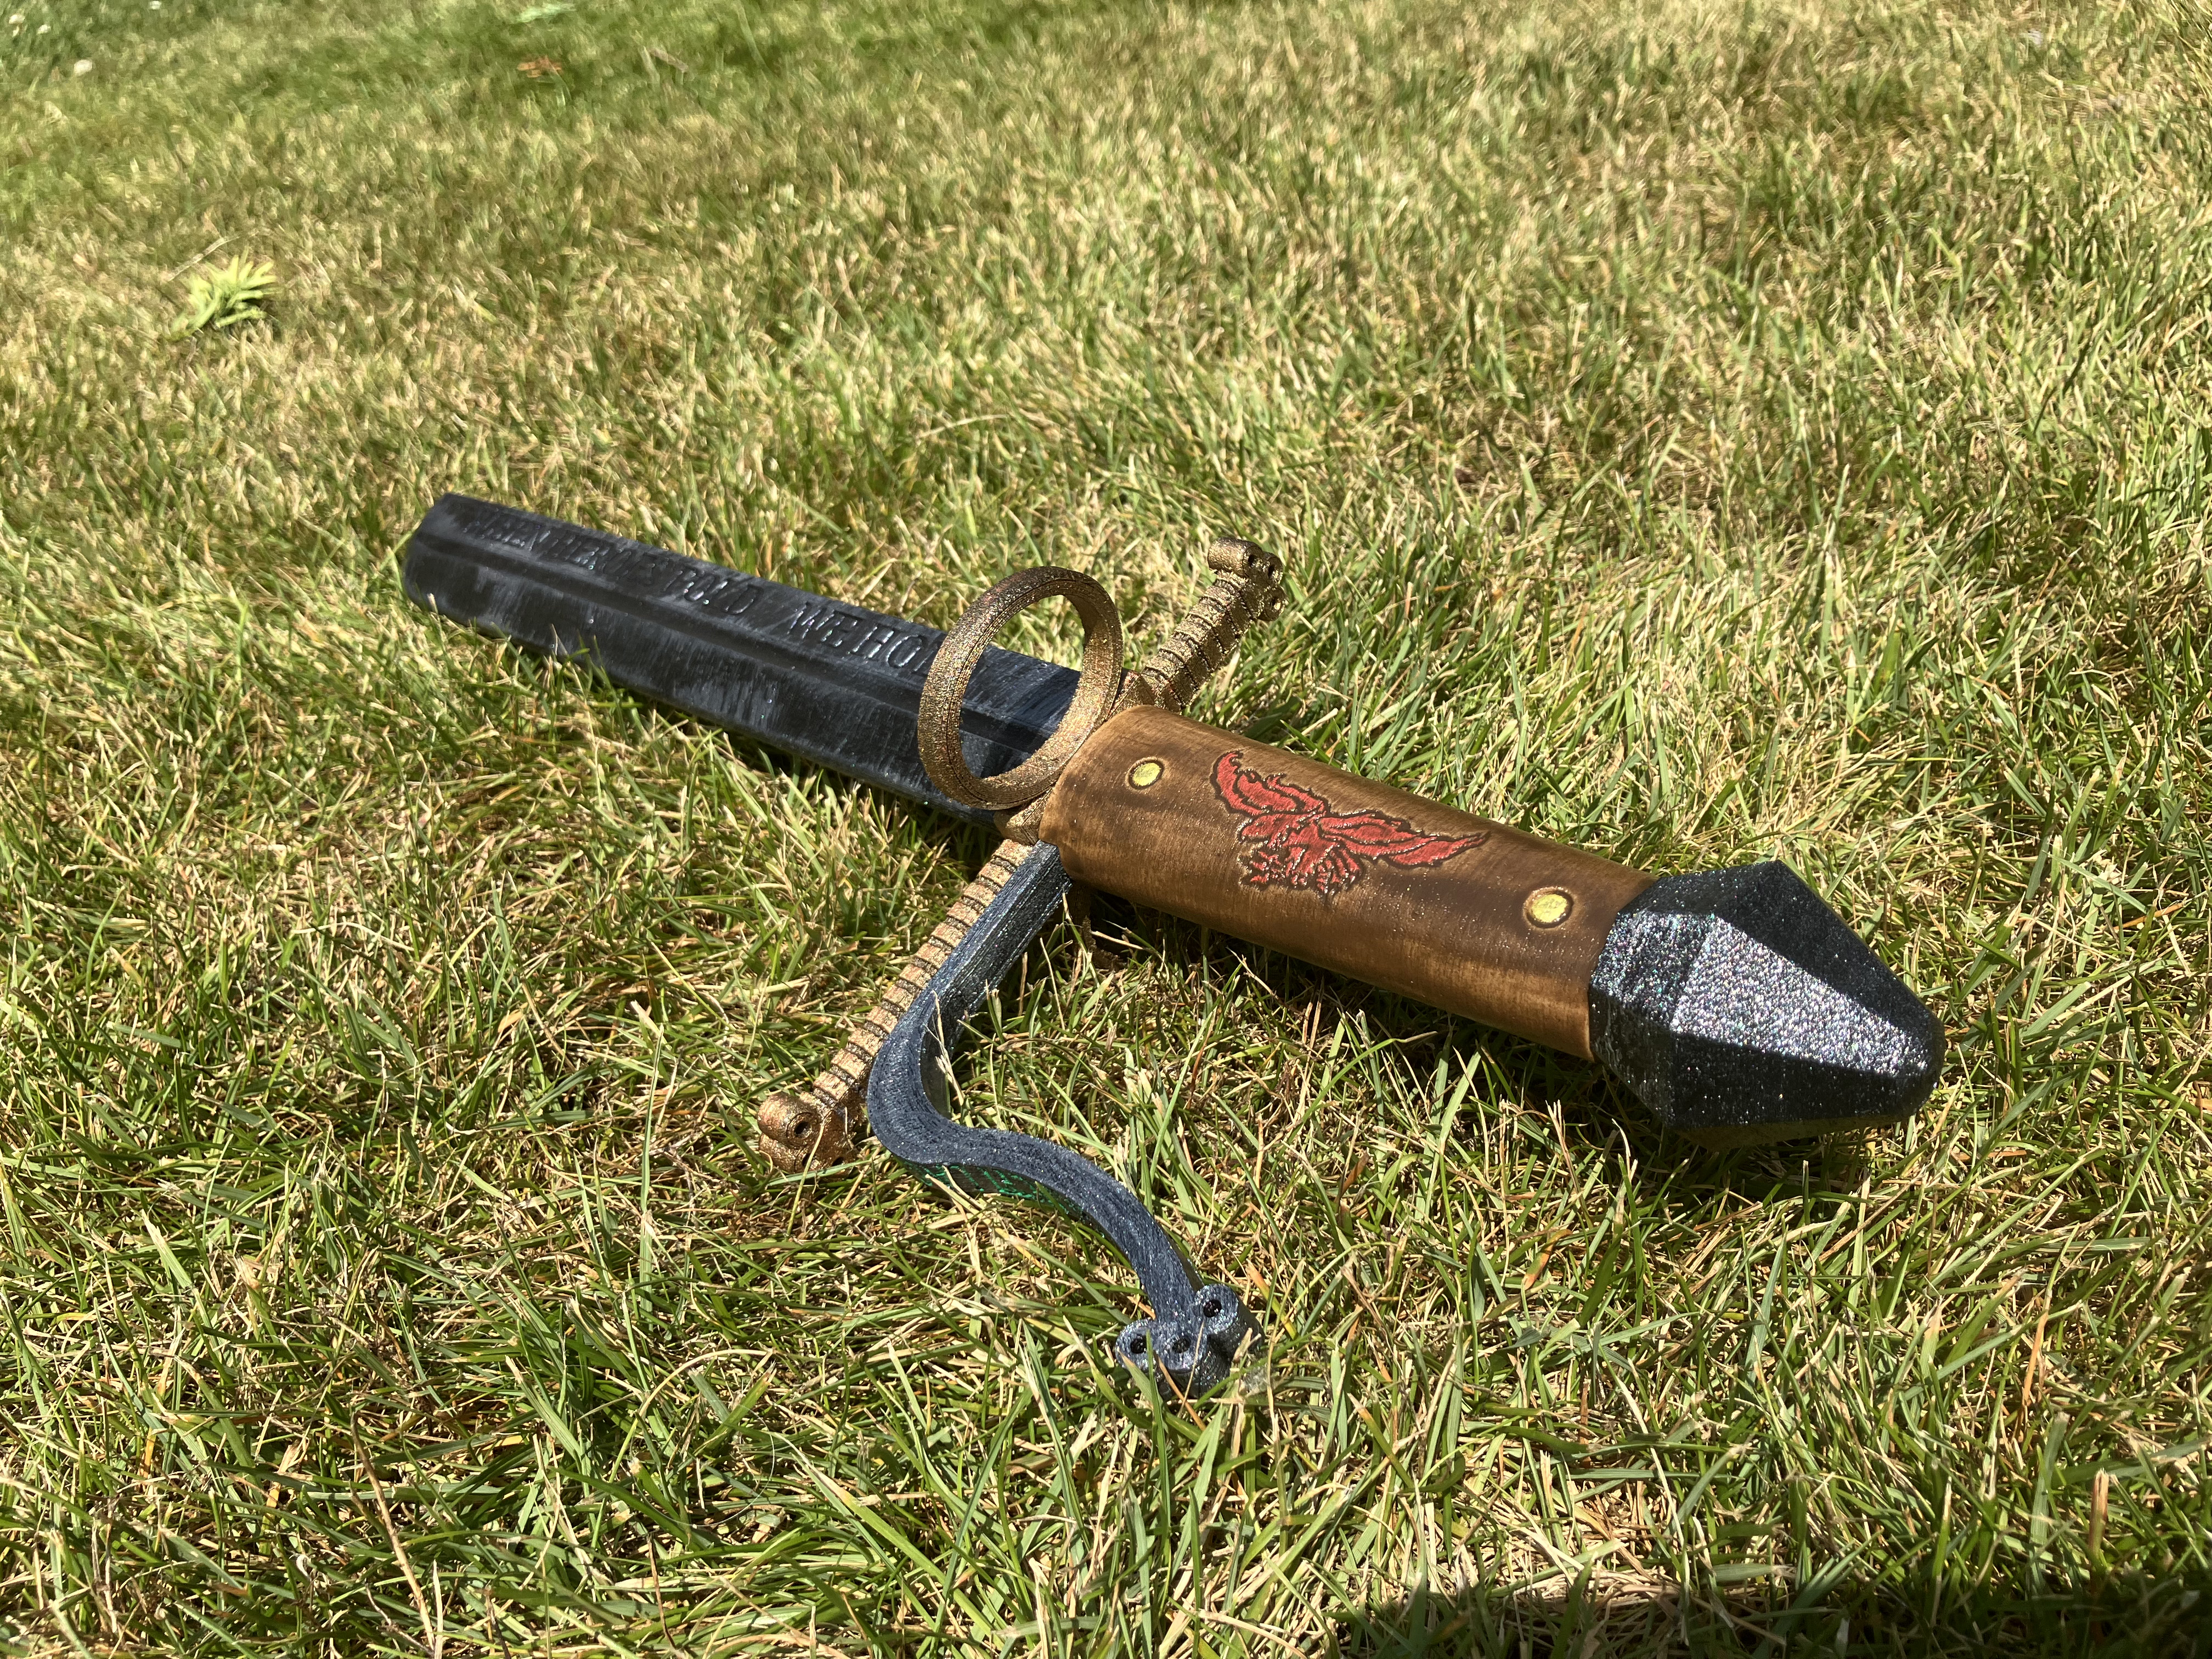
<p>Hello</p><p>I designed and printed my own 3D printable LARP safe parrying dagger. The result is both safe to hit people with and safe to get hit on for other (non printed) blades. 3d printing offers extra possibilities for a level of detail not possible with foam crafting and a level of customization not possible with moulded larp weapons. The pictures show my personal customizations, the version available here doesn't have the personal text or logo's.</p><p>Warning: This is an experienced and expensive filament build, do not try this as your first big 3D printing (larp) project, you might get very frustrated trying to print TPU.</p><h4>Necessary items: </h4><ul><li>Items<ul><li>8mm thick fiberglass rod (40-43cm)</li><li>Superglue and optional contact glue</li><li>Acrylic paints</li><li>Flexipaint sealer gloss</li><li>Woodstain or pigmented wood varnish for the grip</li></ul></li><li>Filament<ul><li>(black) 60A TPU for the blade and pommel→ I used filatech filaflex pro 60A</li><li>(black) 98A TPU for the knucklebow and crossguard -→ I used flexfill 98A</li><li>Woodfill filament for the grip</li></ul></li><li>Tools<ul><li>Very fine sandpaper</li><li>Standard print cleaning tools (file, cutter knife, wire cutter, …)</li><li>paintbrushes</li><li>3D drawing software like tinkercad to add your own custom logo's and text, because if you don't why bother printing it in the first place ;) (I drew this completely in tinkercad and that is free)</li></ul></li></ul><p>Start by reading up on printing with TPU filament. The 98A TPU I used has it's settings included in the prusa slicer, the 60A had them downloadable for prusa on it's product site.</p><h4>TPU printing tips:</h4><ul><li>Don't forget to untighten your extruder screw</li><li>Load the 60A TPU by sticking it on a nozzle cleaning accupuncture needle, it is so soft on it's own that it won't load normally</li><li>Brims, really, I printed the knucklebow and the crossguard both with a brim, do so too</li><li>Getting your printer to unroll the 60A filament might be more challenging than you think, it is very stretchable. I had to unroll it and arrange it in clean ‘lanes’ on the floor because it wouldn't unroll properly from the drybox which gave me severe under-extrusion.</li><li>Powder coated bed is your friend</li></ul><p> </p><h4>Printing</h4><h5>60A TPU</h5><p>First you should try printing the ‘blade test’ .stl and see if you can print that one. Print it on it's flat ‘back’ surface and not on the 2 flat surfaces with the hole If you managed to print it it is time to start testing the amount of walls and infill. Slide in the core and adjust until it feels good when testing. I used 4 walls, floors and roofs and 30% infill gyroid.<br>If you have found the setting that is right for you you can print the blade. On the prusa I3 it fits diagonally on the bed. </p><p>if the blade worked out well you can print the pommel, for this one up the infill density to 50%.</p><h5>98A TPU </h5><p>Print both the crossguard and the knucklebow with 8 walls and 100% infill and use a brim. </p><h4>Woodfill</h4><p>Print the grip standing up with a brim (woodfill brims are easy to remove), don't forget to use 0,2mm layer heigth here and not less!! (or get clogs)</p><p> </p><h4>Cleaning and painting</h4><p>Clean all printed parts, yes you can use soft sandpaper and wire cutters to remove unwanted print artifacts on the 60A TPU parts. Use files, cutters, sandpaper etc to clean the 98A TPU, sand the woodfill for a better look when staining/varnishing.<br>Then paint all parts as you like, varnish the TPU parts with flexipaint gloss sealer (all alternatives so far are highly toxic so do yourself a favor and get this). I found varnishing the easiest by sticking all TPU parts except for the pommel on the fiberglass core and holding them like that.<br>I used a dark wood varnish to colour my grip, finished with gold paint for the fake nails.</p><h4>Assembly</h4><p>First add all parts in order to the fiberglass rod and cut it to the right length.</p><p>Start assembly by putting contact glue or superglue inside the hole in the blade part, then insert the fiberglass rod as far as it goes. Wait until it dries.</p><p>Then add the crossguard and glue it to the blade part preferably with contact glue</p><p>Place the knucklebow inside the grip and fix in place with superglue; add more superglue in the grip hole and add the grip to the sword, glue the knucklebow to the crossguard for some extra anti bend support.</p><p>lastly glue the pommel with superglue to the core and the bottem of the grip</p><p>Let it dry</p><p>And done!</p><p> </p><p> </p><p> </p><p><br> </p><p> </p><p> </p><p> </p><p> </p><p> </p>
With this file you will be able to print 3D printed LARP safe parrying dagger with your 3D printer. Click on the button and save the file on your computer to work, edit or customize your design. You can also find more 3D designs for printers on 3D printed LARP safe parrying dagger.