3D-Printer Controller Box
thingiverse
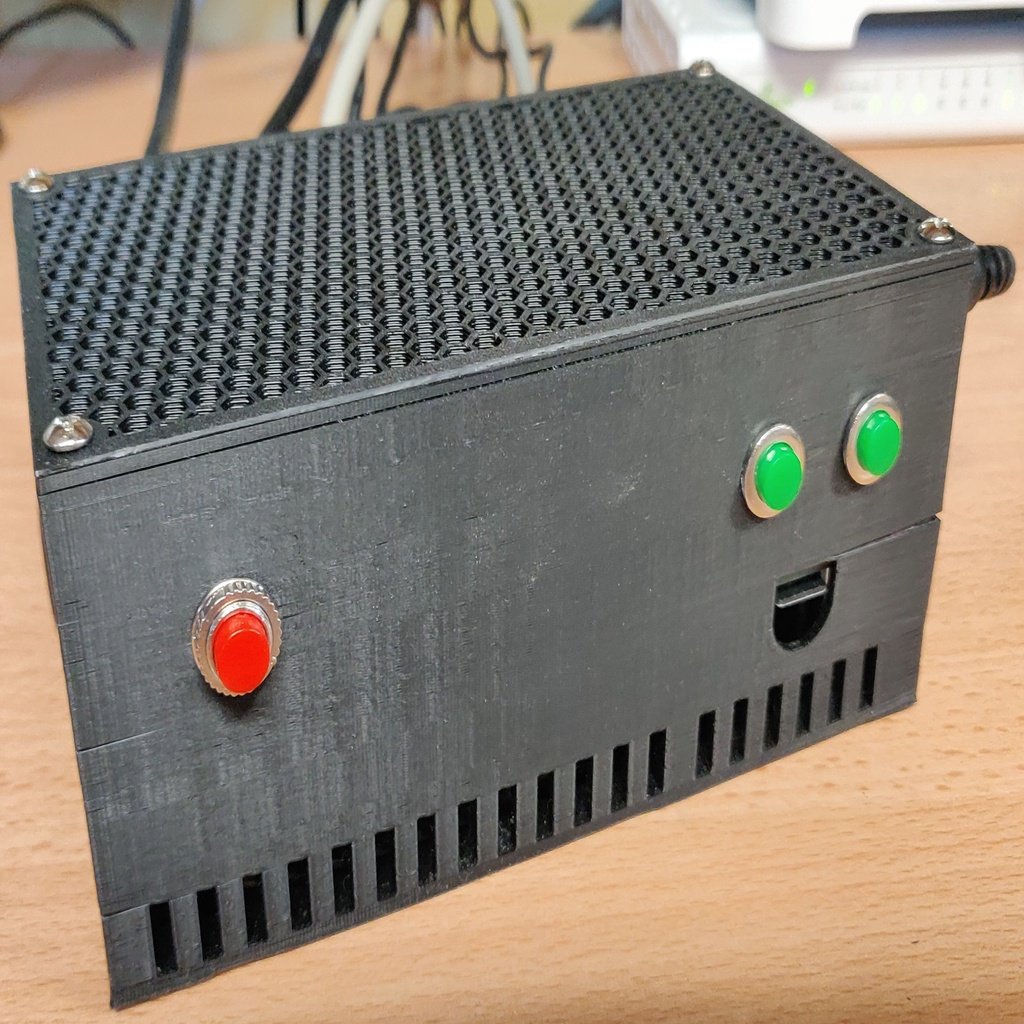
Here's a control-box containing everything needed to run two 3D printers using two instances of Octoprint on a Raspberry Pi 3+ (on different ports). Update: Added "Big Box 2 v1.stl" for the other relay board, which is a better option. This setup includes: * Power-control for the printer and power supply unit. * LED-status lights for up to two ledstrips. * A power button for the Raspberry Pi that provides real shutdown capabilities. * Two physical buttons that can be used for whatever purpose you want (I use them to turn the power on and off to the printers). * Two AM2302 sensors for monitoring temperature and humidity. The following components were used: * Raspberry Pi 3+ * A USB-relay board (but I recommend using a different relay board with more channels that doesn't require one of your USB ports) * Two chassis power sockets * One male power socket with a breaker * Two AM2302 sensors * Two ledstrips * Two green and one red buttons * Two RJ10 female sockets * Two RJ10 male connectors * A BEC (power regulator) * Two 10kohm resistors and two 1kohm resistors for pull-down use * Various cables The following plugins are installed in Octoprint: * Cancel Objects * Cost Estimation * Custom Background * Dashboard * DisplayLayerProgress Plugin * Dragon Order * Enclosure Plugin * Filament Manager * Preheat Button * PSU Control * Pushbullet * RGB Status The holes on the box are designed to fit M3 screws, and you'll need to drill your Raspberry Pi's holes to 3mm. Note that this setup does not include connecting the power from the power plug to the printers. Instead, an external power brick (12-24v) powers both the Pi and LEDs. The LED lights have not been configured yet. This is simply a description of the hardware used; you'll need to figure out how to connect everything and configure the software on your own. If you have any questions, feel free to ask!
With this file you will be able to print 3D-Printer Controller Box with your 3D printer. Click on the button and save the file on your computer to work, edit or customize your design. You can also find more 3D designs for printers on 3D-Printer Controller Box.