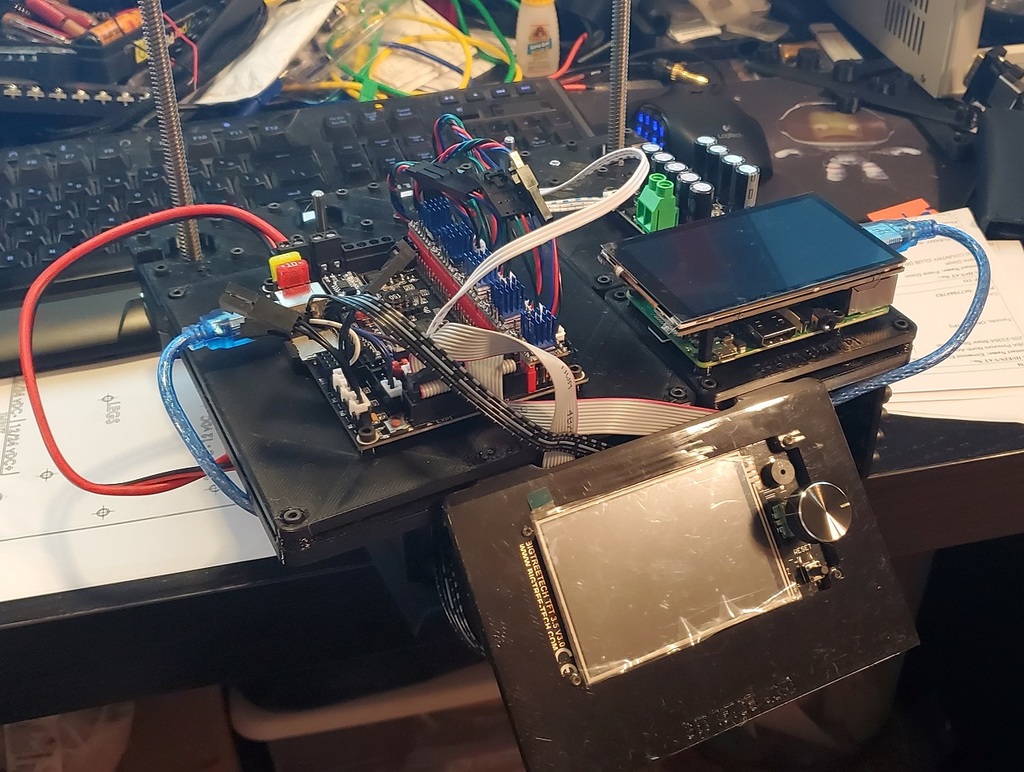
3D Printer Electronics Test Bench
thingiverse
I wanted to be able to test the electronics and firmware for my 3D printers without having to take a machine out of service, so I designed a modular test bench for the purpose. It is designed to use a 24v 10a+ power supply, and has step-down converters to get 12v and 5v for powering lights, Raspberry Pi's, 12v boards, etc. All circuits are fuse-protected. The parts are labelled to aid in assembly and component placement during construction, and then the various mounting plates are labelled with the component they are designed to mount. Blank STEP files are also included in order to allow additional mounting plates to be made. Print all parts using PETg or another suitable self-extinguishing material. There are 6 feet for the legs to be printed from TPU. This print will require a bed at LEAST 250mm x 200mm. Parts List: 8x M3x10mm Socket Head Screws for mounting electrical components to the board bottom 8x M3x16mm Socket Head screws for mounting main board and motor board to legs. 12x M3x0.5 short (5mm) heat-set inserts for installing mounting plates. 18x M3 nuts for various screws (min, each expansion/display plate will require an additional 2 hex nuts, each component mounting plate will require an additional 4 nuts for installing the PCB/component) The motors and component mounting plates can be installed using either M3x8mm or M3x10mm screws. The display and expansion plates should be installed using M3x8mm (2ea) screws, although 10mm screws are possible, they just press on the PCB plates a bit. A Meanwell 24v 10A or 15A powersupply will work just fine for this project. I use a Riden 60V 12A power supply: https://www.aliexpress.com/item/4001053200176.html?spm=a2g0s.9042311.0.0.30494c4de2q0eF For the step-down converters, I used these from Tobsun: https://www.amazon.com/gp/product/B07V7YY5X6/ref=ppx_yo_dt_b_asin_title_o00_s00?ie=UTF8&psc=1 https://www.amazon.com/gp/product/B07V6X6L89/ref=ppx_yo_dt_b_asin_title_o00_s00?ie=UTF8&th=1 For the terminal strips, I used a 5-gang and 8-gang from this set: https://www.amazon.com/gp/product/B07Y21W11W/ref=ppx_yo_dt_b_asin_title_o03_s00?ie=UTF8&psc=1 For the Raspberry Pi USB cable, I used this and cut off the wall wort: https://www.amazon.com/gp/product/B01N9SL18E/ref=ppx_yo_dt_b_asin_title_o05_s00?ie=UTF8&psc=1 For the fuse holders, I used these: https://smile.amazon.com/gp/product/B00OK9H3EI/ref=ppx_yo_dt_b_asin_title_o06_s01?ie=UTF8&psc=1 Version 1.0 Initial Release Includes mounting plates for the following: 5x NEMA 17 motors (labelled Z1, X, Y, E, Z2/E2) Creality Melzi/BTT SKR Mini E3 v1.x and V2.0/Panucatt Kinetica Duet 2 (all versions) Duet 3 (all versions) EINSY RAMBo/RAMBo Mini MKS Gen 1.0/ Gen L MKS GEN v1.4/ BASIC v1.6 RAMBo v1.x BTT SKR 1.x BTT SKR Mini v1.x BTT SKR Pro v1.x RepRap 2004 LCD BTT TFT35 v3.0 Raspberry Pi (All versions except Pi Zero) BTT 24v Mini UPS
With this file you will be able to print 3D Printer Electronics Test Bench with your 3D printer. Click on the button and save the file on your computer to work, edit or customize your design. You can also find more 3D designs for printers on 3D Printer Electronics Test Bench.
