3D-Printer Enclosure Controller ESP32
thingiverse
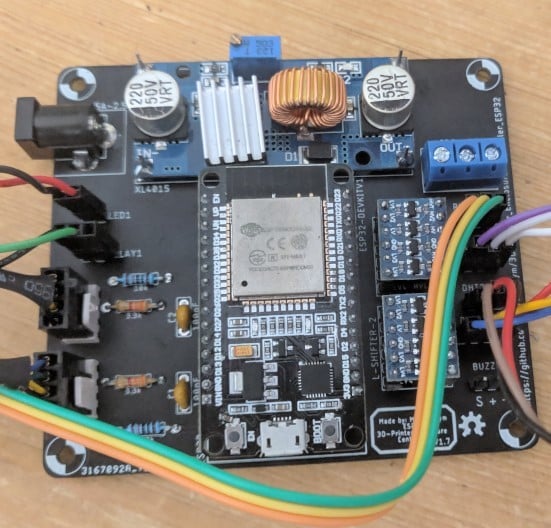
This is my first large project. ## This project is fully open source and all files are available including 3d print files, pcb files and software. PCB files and Firmware both for the display and esp32 can be found on GitHub. With some notes about the components. The GitHub repository can be found here: https://github.com/MarvinBeym/3D-Printer_Enclosure-Controller_ESP32/ These are the 3D files for my self designed enclosure controller based on the esp32 micro controller. What can it do? (For more detailed information look at my github repo) Control 2x 4-Pin pwm fans Read 2x DHT22 humidity/temperature sensors It uses a Nextion NX4832T035 3.5inch 480px320p color touch TFT display to display all values and make it possible to change them There is also a webinterface made with ESPUI It also features WifiManager to make it easy to setup a wifi connection with your homes network. You can control 1 output using a relay to switch 12v (like 12v white led strip) You can also connect a WS2812B single addressable led strip. The software even has some animations and colors to choose from. This is quite a quick release so some information might still be missing. I'm working on adding everything I think is needed. You can even create your own effects super easily :) If you have suggestions on what information might be useful, please let me know :) ## Print instructions - All can be printed as fast as you like - Backplate.stl: Flat on the build plate, no support - Enclosure.stl: Flat on build plate, big opening up, support Touching Buildplate - DisplayCover.stl: Flat on buildplate, front side on build plate, support Touching Buildplate - make sure the screw holes and the inner wedge get support - Lower arm.stl: Flat on buildplate - Stand.stl: Flat on buildplate - Upper arm.stl: Flat on buildplate ## Post printing - 1. Cleanup support and such - 2. Get youself 8x M3x4mm - These are for the pcb and display - 3. Get yourself 8x some longer M3 screws (like M3x12) (anything should do) - 4. Get yourself 4x some M4 screws (something like M4x10) (anything should do) - 5. Depending on your amount of links any how you will mount it, you will need to get some - more for the links and arms and such - 5. Assemble everything - 6. Be happy.
With this file you will be able to print 3D-Printer Enclosure Controller ESP32 with your 3D printer. Click on the button and save the file on your computer to work, edit or customize your design. You can also find more 3D designs for printers on 3D-Printer Enclosure Controller ESP32.