3D Printer Lead Screw Cleaner
thingiverse
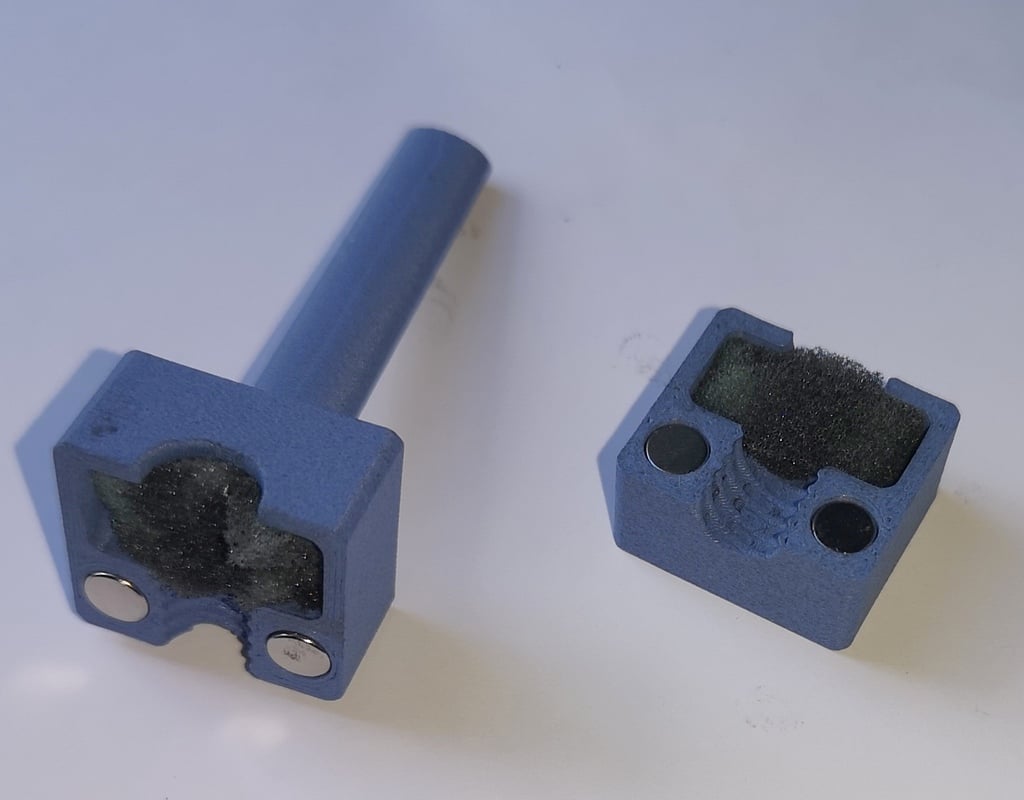
four magnets required; 6x3mm (N52 Neodymium recommended). Absorbent sponge required - stop throwing away the small sponge from the scourer you may use to wash pans etc. Use the softer sponge section and cut to a size slightly larger than the space on both parts. That foam holds the IPA well and also slows down the IPA's evaporation. As evidenced in the photo (the clean foam is a very pale green colour!), this does a great job of lifting off grunge & debris from the screw's thread. Once that's done, two new pieces of foam makes a great job of distributing the synthetic grease evenly, too. Once four pieces of foam are cut to size wet the whole of two sponge parts with IPA to clean the lead screws.Insert into each part. Once cleaned, give it a few minutes for the traces of IPA on the screws to evaporate then replace the dirty sponges with clean ones to distribute synthetic grease across the length of the lead screw leaving just a fine film. I put four or five small 'dabs' of grease on each screw, the sponges do the rest. The magnets keep both sides together and by powering the lead screw up and down two or three times, the cleaning tool will quite naturally follow the screw's thread. The handle (intentionally angled) gives an element of stability to the process. Especially so for the BambuLab X1 printer's rear lead screw which is behind a metal panel and only accessible through a small vertical slot.
With this file you will be able to print 3D Printer Lead Screw Cleaner with your 3D printer. Click on the button and save the file on your computer to work, edit or customize your design. You can also find more 3D designs for printers on 3D Printer Lead Screw Cleaner.