Extractor for Raspberry Pi 40 Pin Edge Connector
thingiverse
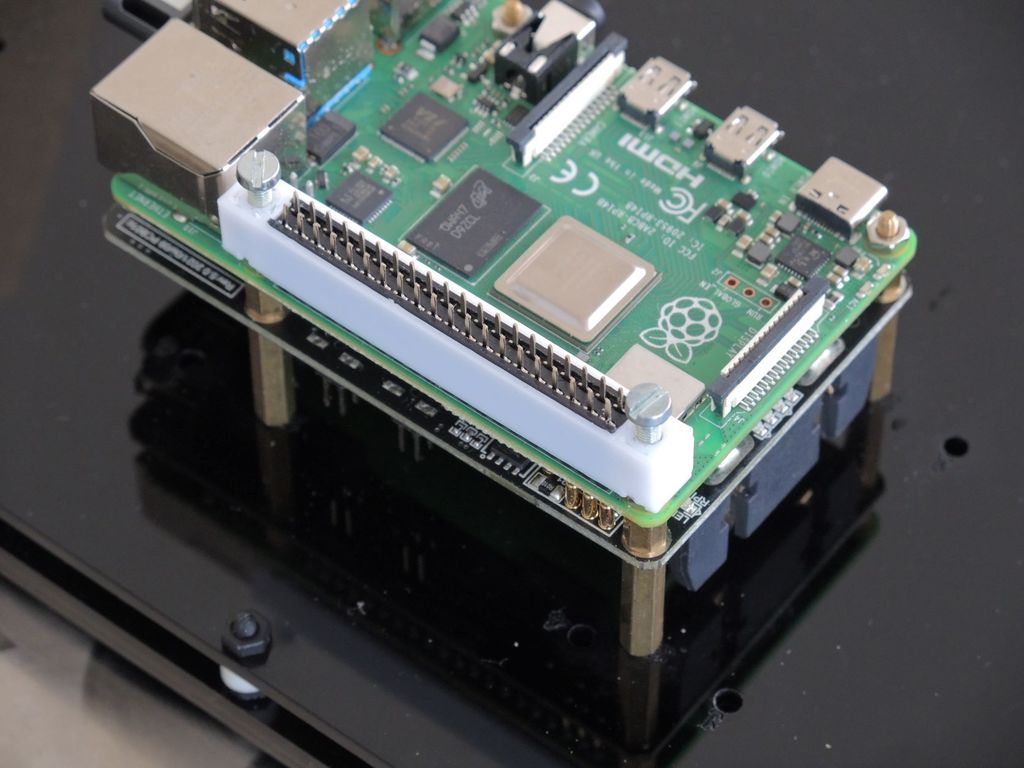
Extracting the Raspberry Pi's 40 pin edge connector can be a bit delicate at times. So I designed this extractor. Printing: - Obtain either two screws M2.5 or two screws M3, each with a thread length of at least 12 mm . - Obtain either two nuts M2.5 or two nuts M3 (matching the screws). - Print either the M2.5 or the M3 version of the extractor (matching the screws and nuts). No supports required. I used PLA through a 0.4 mm nozzle and with a layer height of 0.3 mm. Assembly: - Insert two nuts into the extractor and pull them to the end stop with the screws. - Unscrew the screws. - Insert the 40 pin edge connector into the extractor. It should be a tight fit. You may optionally use glue. I use Revell CONTACT Professional. Insertion: - Plug the assembly onto the Raspberry Pi's GPIO headers. Unless you had applied glue you may have to press the edge connector down with a small screw driver between the pins. Extraction: - Insert two screws into the nuts. - Extract the edge connector by alternatively tightening the screws a few turns. - Unscrew the screws. The Raspberry Pi PCB's two mounting holes adjacent to the edge connector must be plugged with screws or hex pillars in order to provide the extractor's M3 screws with a counter force. As always I include the OpenSCAD source file for you to improve and/or customize.
With this file you will be able to print Extractor for Raspberry Pi 40 Pin Edge Connector with your 3D printer. Click on the button and save the file on your computer to work, edit or customize your design. You can also find more 3D designs for printers on Extractor for Raspberry Pi 40 Pin Edge Connector.