3FPD-Replicator 2X - Extruder Upgrade
thingiverse
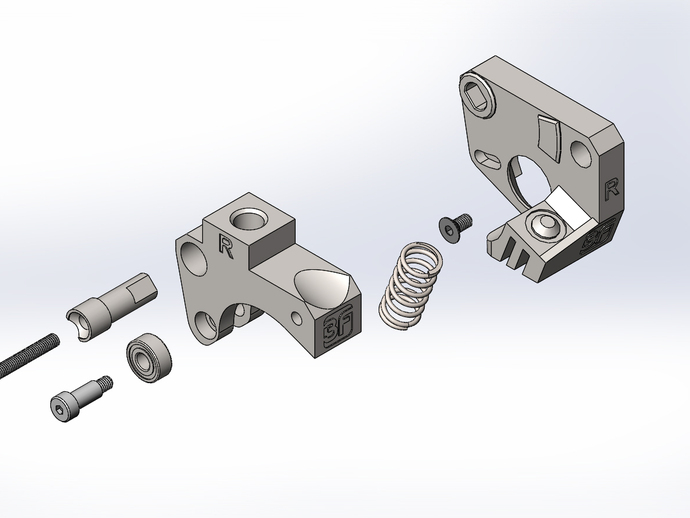
This Replicator 2X-specific extruder upgrade, inspired by whpthomas and others, boasts various enhancements over previous designs. Key features include a fully printable base without supports, an arm that prints with only external support in the bearing slot area, integrated feed tube mount on the arm, improved tension spring geometry, and a recommendation to use 5/32" and 1/4" bits for clearance holes. Compatibility with Makerbot's hardware kit for Rep2 + 1 extruder screw is ensured, and pre-assembly can be done in under two minutes per side for quick swapping. Both L and R extruder parts are included and labeled for ease of use. To install, acquire the Makerbot extruder upgrade kit hardware (shoulder bolt, small flathead screw, bearing, spring) and print the upgrade at 0.27mm layer without supports on the base and with external supports on the arm's bearing channel. Chasing the bore for the bearing shoulder bolt and pivot hole in the arm with a 5/32" and 1/4" drill bit, respectively, is necessary for a tight fit. Light filing of pin flats and rounded edges ensures proper fit into the base key slot. Pre-assembly involves assembling LH-Arm, LH-Base, RH-Arm, and RH-Base with a common pin and following makerbot's instructions for extruder removal and installation. The upgraded extruder should seat flush to the stepper face, secured by long flathead screws from the removed Makerbot extruder. Suggestions for improvements are welcome.
With this file you will be able to print 3FPD-Replicator 2X - Extruder Upgrade with your 3D printer. Click on the button and save the file on your computer to work, edit or customize your design. You can also find more 3D designs for printers on 3FPD-Replicator 2X - Extruder Upgrade.