3in1 Color Wheel with 61 Different Colors in single print
thingiverse
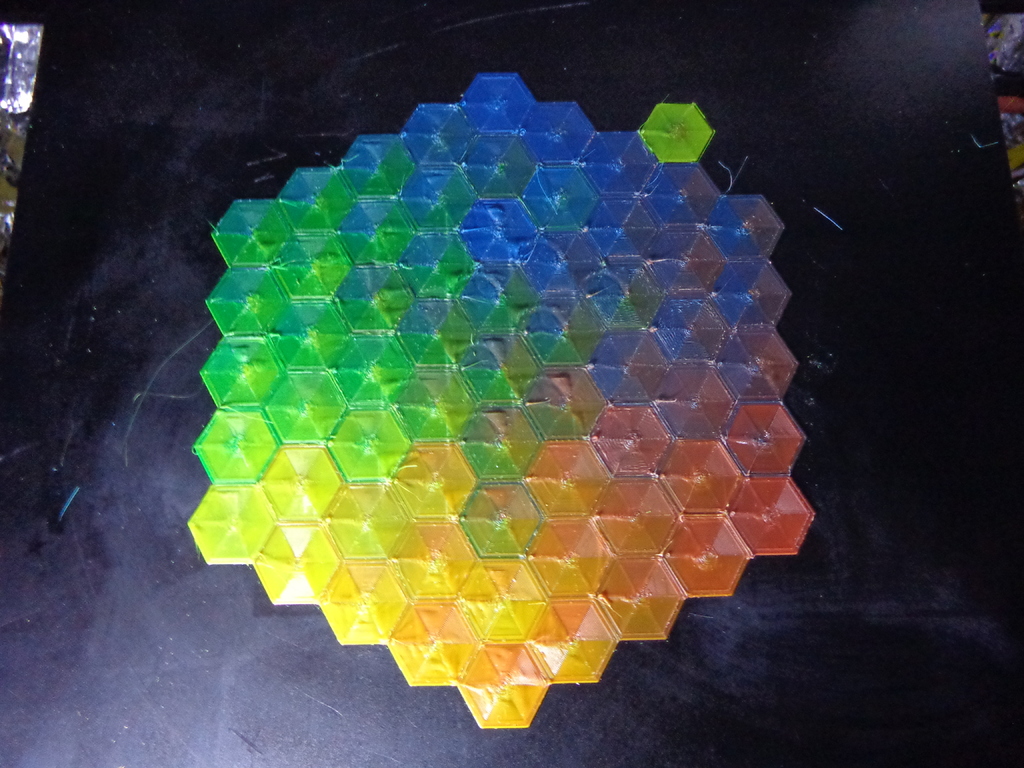
**Updated and more advanced prints with mixers can be found here https://www.thingiverse.com/thing:3657366 3in1 Color Wheel with 61 Different Colors in single print I created this so I can see the difference in mixing 3 filaments and also from different brands of filaments and colors. Current pictures are E0 Yellow, E1 Blue , and E2 Red Normally I always use Hatchbox ABS, but I gave up waiting for Yellow to return to stock, so I could buy some. I went with Inland from Microcenter on Amazon. So far woks just as good and cheaper. I prefer hatchbox’s colors though. You do not have to only use primary colors, you can use any you like or have then see how they blend together. I have 61 hexagon’s placed together to form a circle like. I also have an extra E0 hexagon as a placement holder to you can easily find ones you may want change. I included the Sketchup source and all 62 hexagons STL’s. But personally, I would just modify GCODE to work with your unit. I used Cura setup up with 8 extruders and placed all files with E0 and merged, then ungrouped. Then 7 at a time I changed them from E0 to E1-E7. Then using an editor found those E1-E7 (T1 – T7) and copied over to new file. Then renumbered them as I was adding them to new GCODE file. The “T1, T2, …) are commentated out so you can easily find them. The Sketchup model has each component individually named witch Extruder it is once printed. If you make your own just keep the order of Extuders to match layout and print order. Warning! I use a purge bucket located at -10X and -20Y, on a 300mmx 300mm bed. See Picture way more filament is purged than used. This is a Color Test so all Colors received higher than normal max for a color purge. Normally for my Zonestar Z9M3 I have a purge of E90 or switching back to white, and as low as E50 for switching to a dark color. For the Color test all switches are E110. I hope to improve this down the road. Ejoy! `mike How to modify GCODE I use marlin, so I can not say how this works on others while using just the supplied GCODE. Find a hexagon you want to change the color to. Now in an editor find the group of code that reatlers to that hexagon (Example find T31 on COLOR_07_Print_order.jpg now in an editor find ;T31 The first small group is the purge and color change area for the following block of code. So, M163 S0 P16 M163 S1 P16 M163 S2 P68 Means 16% on E0 16% on E1 and 68% on E2 Along as they all ad up to 100, and if they’re zero then a “0” must be in place, just removing the line does not change the flow from last time M163 commands ran for each extruder. If a purge bucket at -10Y and -20Y does not work for you then you will have to change these lines to go to a good location for EACH (61) times the purge is used G0 X-10 F9000 G0 Y-20 F9000 If you want to change amount purged, then this is the line (Change the Exxx) G1 E110 F400 If you want to get ride of the purge ( I many try to see how it looks, filament change will be while printing) G10 S1 G0 X-10 F9000 G0 Y-20 F9000 G11 S1 G1 E110 F400 G92 E0 G1 F300 Z0.3 And 2nd line in main group of code G1 F300 Z2.1 Other settings I use. 8.5 for retraction That’s probably all you could easy change by editing GCODE, any more just start from scratch.
With this file you will be able to print 3in1 Color Wheel with 61 Different Colors in single print with your 3D printer. Click on the button and save the file on your computer to work, edit or customize your design. You can also find more 3D designs for printers on 3in1 Color Wheel with 61 Different Colors in single print.