3rd Gen Toyota 4Runner Clock Bezel Phone Mount
thingiverse
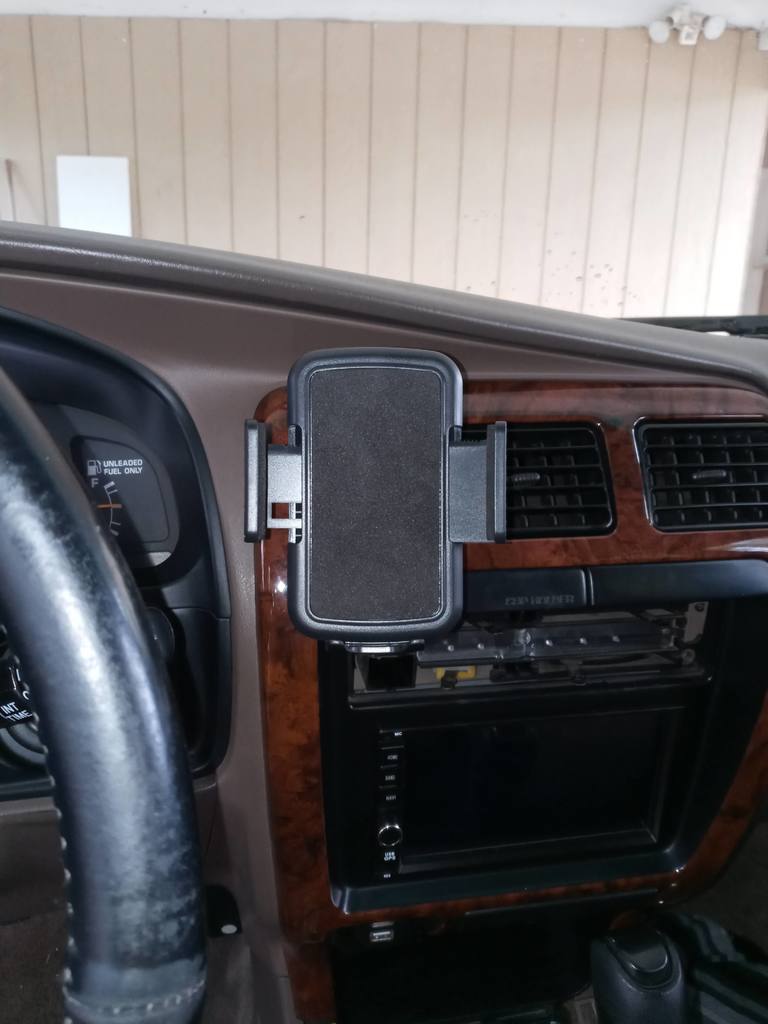
UPDATE: Added actual printed ball mounts in addition to the stud mount to accept the ONN ball. Drove around and noticed there was a little too much stick-out causing some vibrations. I believe "Ball Mount 4" is the best and is very solid... UPDATE 2: Added two more top mounts for a captive 10mm or 8 mm nut or bolt for other mounting options 3rd Gen 4Runner clock insert phone mount. 3 piece robust design with very little support needed when printing, you'll need 8 dollars in additional parts which includes the phone holder and ball mount. This was originally inspired by a member of TR4.org and was based on a B style RAM mount with the hole pattern. I didn't want to order the RAM mount which costs about 13.00 itself, and you're still just getting the ball (no phone holder) so I decided to just try to get everything “around town”. The main part you want to buy is an ONN phone mount at Walmart for under 6 bucks. The rest are 2 M6x1.00x25 button head bolts, 2 M6x1.00x30 button head bolts, and 4 M6x1.00 nuts. 2 nuts are captive in the rear mount block to clam shell the bezel insert, 2 nuts are captive in the bezel insert to mount the ball adapter. In regards to the ONN phone holder mount, remove the screw (retain for re-insertion to ball adapter) from the ball mount and pull the flexible shaft out. Print the 3 parts out, 50% infill for the back block and bezel insert, 100% for the ball adapter. Insert the nuts in the prints where they need to go, a little dab of glue might help hold them in. Pull your bezel off, pull your clock out. Screw the two pieces together with the 30's to squeeze them to the bezel, do a little on each side at a time so the front piece centers itself in the pocket. The rear block has an alignment ring around the perimeter that centers itself on the back of the bezel hole. Take the ONN ball and slide it over the ball adapter making sure it is keyed to the rectangle protrusion. It should be no more than .125” from the top of chamfer, drill a small hole through the screw hole on the ball mount, into the rectangle protusion print on the print and reattach the screw. Use the remaining bolts to attach this to the bezel insert and mount the phone holder. A few things to note...this was originally designed for the later style bezels with the clock in the center and it fits beautifully in in those bezels, which I used for prototyping. I have a 97 which has a different bezel opening for the clock (come to find out later). It fits well as you can see in the pics but could use some improving so it fits like the later styles. That being said I also included STEP files of the models for anybody who wanted to tinker with the design. Also, I always print my parts out heavy on the dimensions to take into account the sloppiest of machines, you'll probably be doing some post processing like cleaning the holes up a bit. Scale x10 or 1000%...
With this file you will be able to print 3rd Gen Toyota 4Runner Clock Bezel Phone Mount with your 3D printer. Click on the button and save the file on your computer to work, edit or customize your design. You can also find more 3D designs for printers on 3rd Gen Toyota 4Runner Clock Bezel Phone Mount.