3uP Fan Bracket (EZStruder)
thingiverse
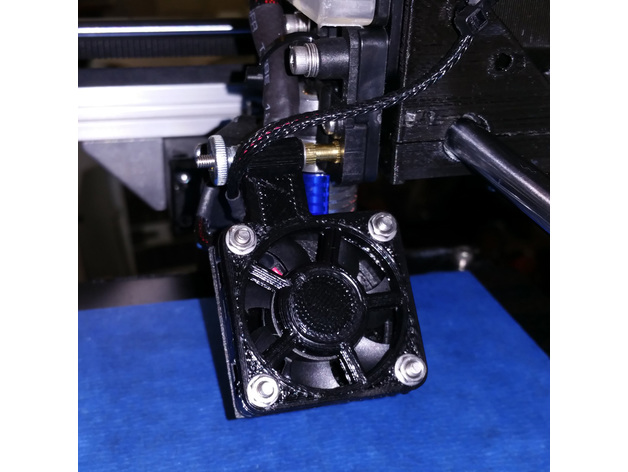
A customized modification of DDeGonge888's original design to suit direct mount compatibility with SeeMeCNC EZStruder. The revised assembly necessitates the original fan duct, Fan_Bracket_B.stl, for completion. Instructions Apart from this printed component, print DDeGonge888's recommended Fan_Bracket_B.stl part due to thin walls and severely inclined sides, requiring slower speeds to avoid forming gaps in the duct. Successful assembly demands the following additional items: M3*20mm Button Head Hex Socket Cap Screws (4 pieces) M3 Hex Nuts (5 pieces) 40mm Silent Fan [example Scythe Mini KAZE 40mm Silent Case Fan (SY124010L)] M3*40mm Button Head Hex Socket Cap Screw M3*10Φ5 Knurled Nut M3 Washers (6 pieces) M3 Hand Thumbscrew Install the fan guard and duct on the fan utilizing button head M3*20mm screws, washers, and nuts while ensuring the correct fan direction (usually indicated on the side of the fan casing), allowing for air to flow towards the workpiece. Run a 40mm bolt through the back of EZStruder then secure it with knurled nut before adding the fan bracket. Finally tighten in a sequence including washer, thumbscrew, and hand-tight. Guarantee that bottom of duct is at a safe distance from the work surface to prevent damage or malfunction. Correct wiring procedures depend on application specifics. This particular setup involved wiring the fan directly to Printrboard's header, thereby enabling slicer control over fan speed.
With this file you will be able to print 3uP Fan Bracket (EZStruder) with your 3D printer. Click on the button and save the file on your computer to work, edit or customize your design. You can also find more 3D designs for printers on 3uP Fan Bracket (EZStruder).