4" Coil Jig
thingiverse
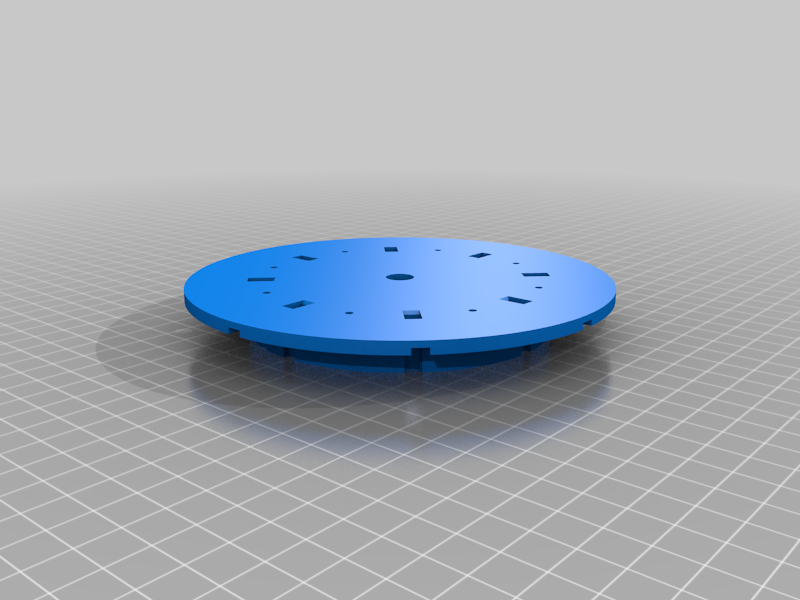
This is a jig I made for the very specific purpose of making a continuous wind coil. The Inside diameter is 4 inches (101.6mm), the width is 12mm, and the height is 20mm max. It was designed to use a whole 1lb spool (823') of 24 AWG enameled copper wire. This electro-magnet was for a project to manipulate the raster of a CRT screen. Materials needed: -3/8" bolt 2 or 3" in length, with washers and stop-nut (to keep it from loosening) -x8, #4 x 1/2" Pan Head screws. -masking tape + hobby knife or 1/2" wide masking tape. -thin string -electrical tape Instructions; 1. attach a 3/8" x 2" bolt with fender washers and stop nut to the hole in center. This will connect to a drill. Choose a drill with a chuck big enough and that has good speed control. 2. apply masking tape with adhesive side out to the inner surface of the spool, trim off excess. This will make extracting the finished coil easier. 3. Attach outer flange with eight #4x1/2" Pan head screws. 4. Wrap the wire starting with the first few inches sticking out. Make the first few layers in neat and even rows. When finished winding coil, tape down excess to keep from unraveling. 5. The channels are for threading string to bind the coil while still on the form. you can use a 2" piece of excess wire as a flexible needle. be careful not to stich it to the form itself. You can make something like a chain stitch perhaps. I had enough room to go around three times. 6. Remove the screws and the side. Very carefully pry the coil off with a flat head screw driver. Go around the sides evenly. Once it is off, wrap it with electrical tape if you so choose.
With this file you will be able to print 4" Coil Jig with your 3D printer. Click on the button and save the file on your computer to work, edit or customize your design. You can also find more 3D designs for printers on 4" Coil Jig.