42 - Version41
prusaprinters
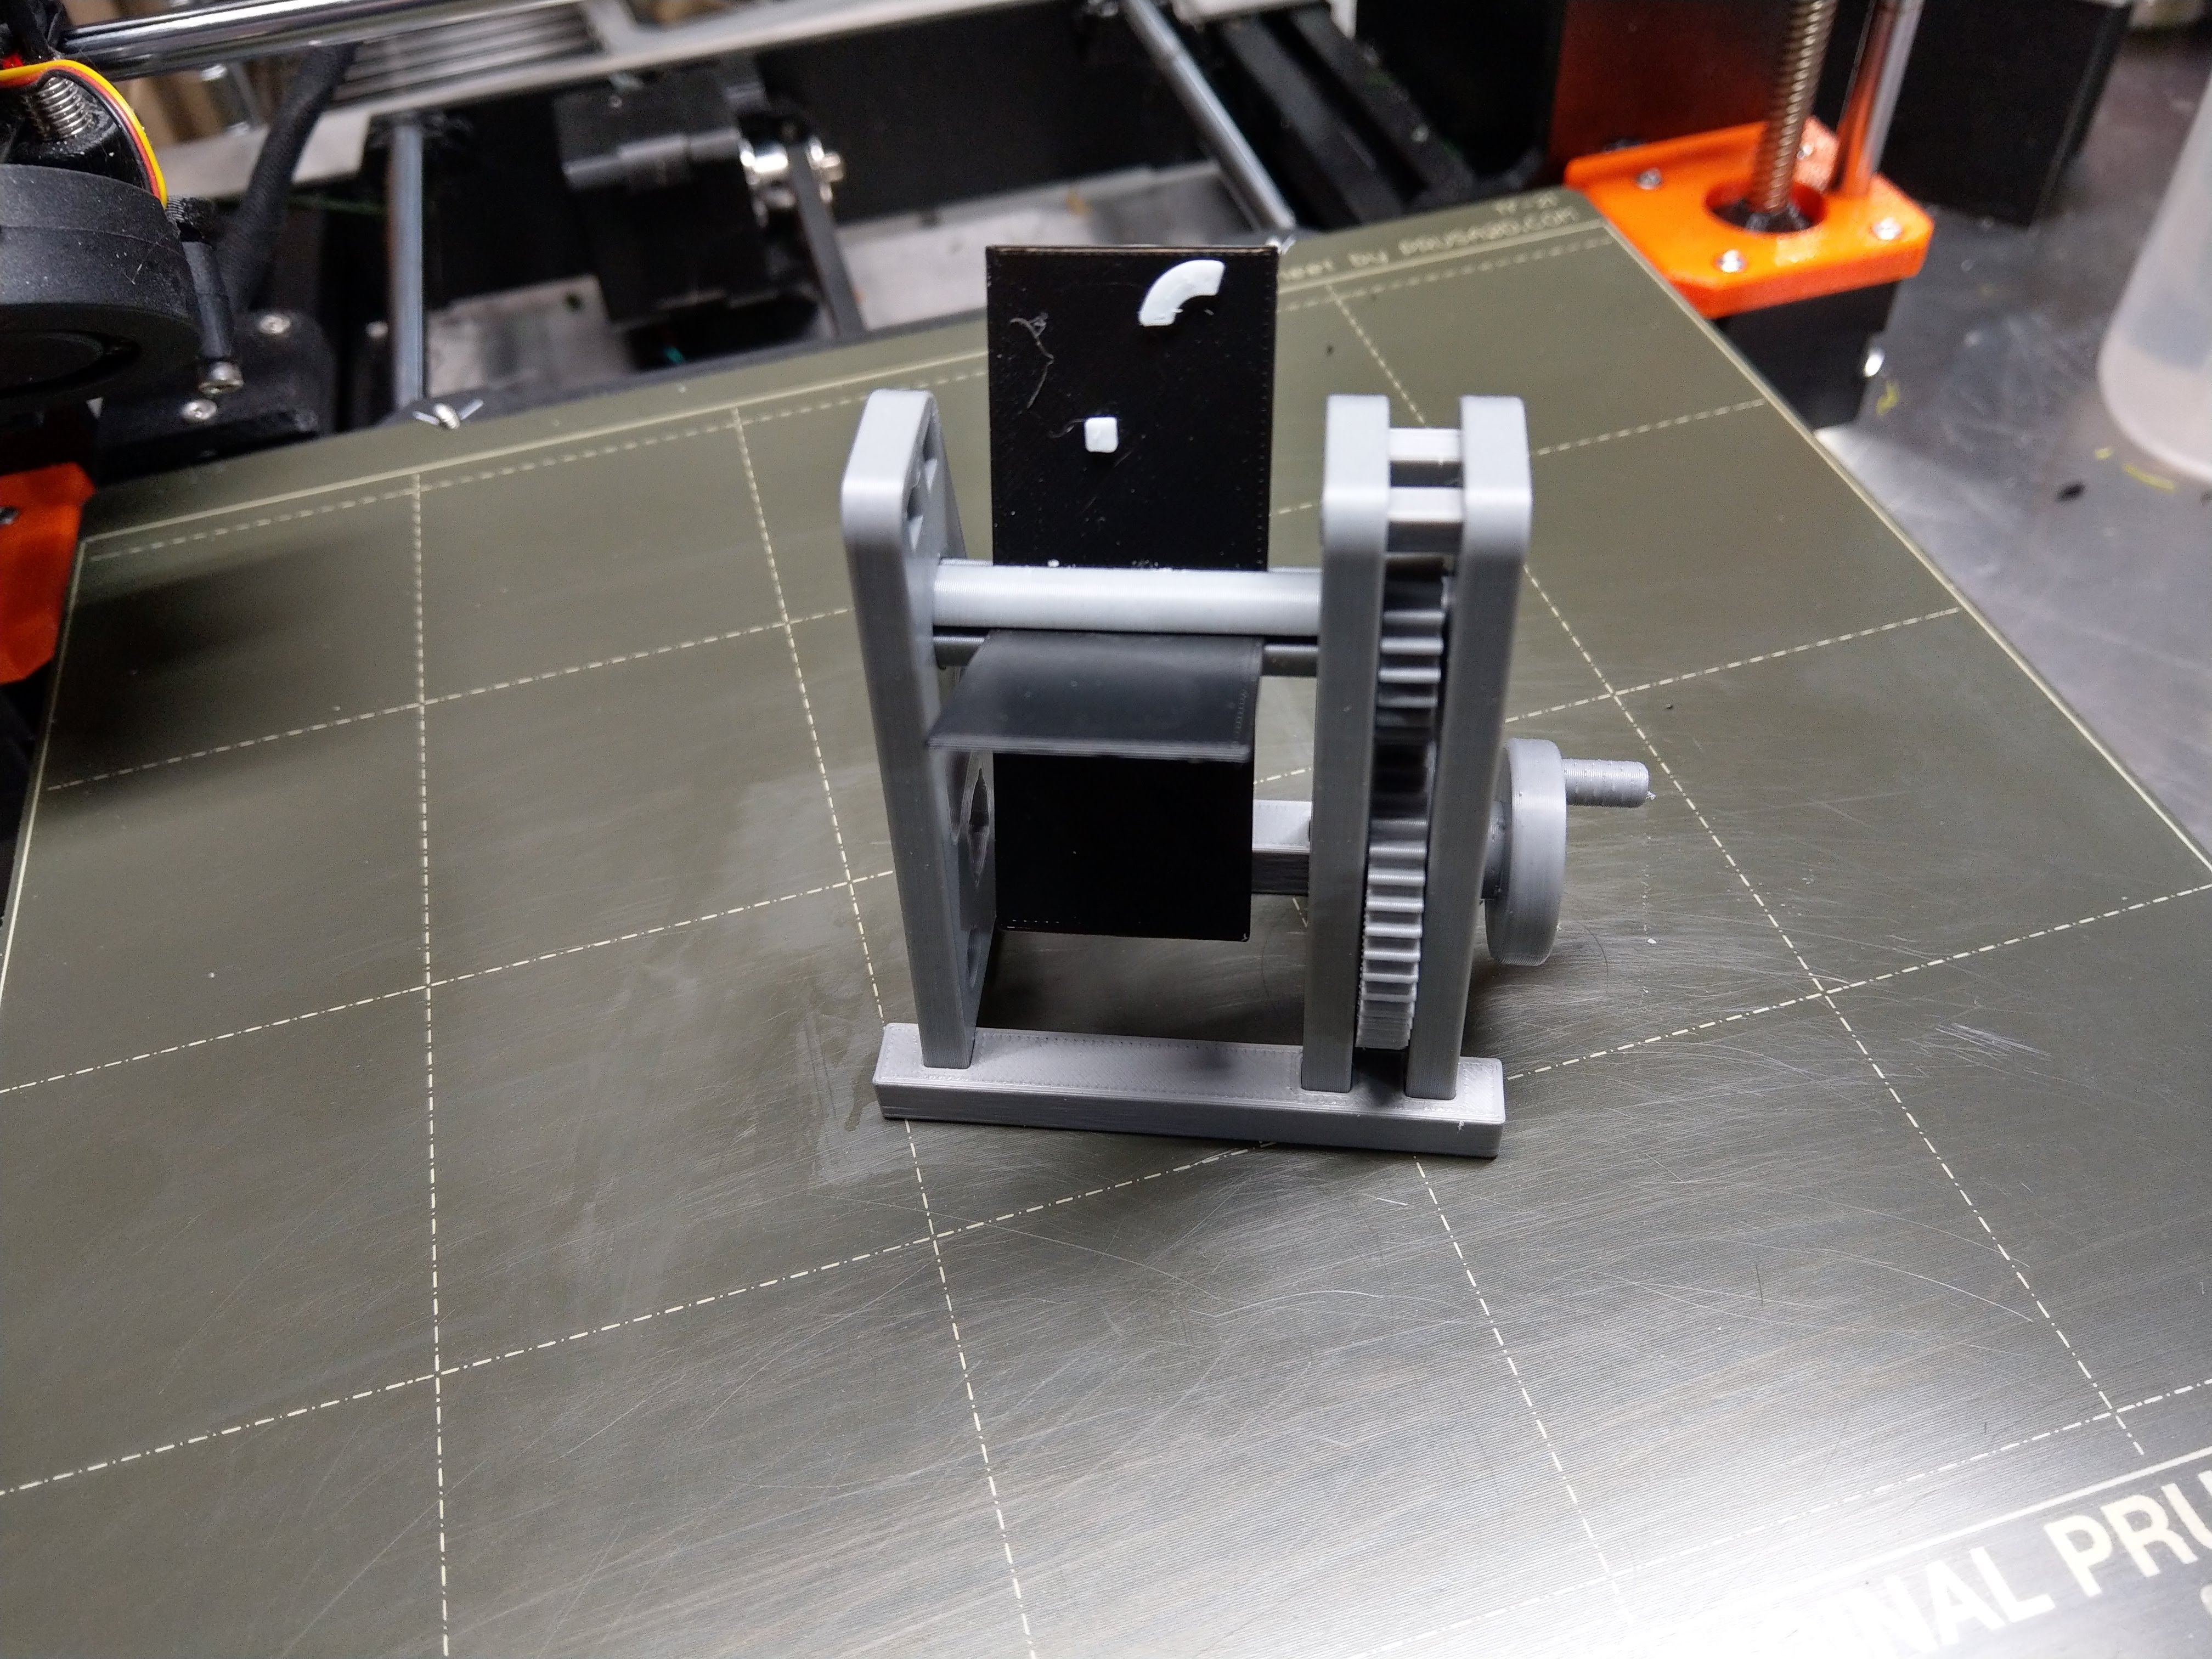
<p>The Answer.</p> <p>Also, just having fun trying out a some 3D CAD and printing ideas. More versions on the way.</p> <p>This one : 42 Zoetrope</p> <p>How does it work? :</p> <p>This print uses persistence of vision to display a "42" when you turn the crank to bring all the segments together. Unfortunately I did not get a photo of the effect - just more trouble than it was worth. In any case - turn the crank quickly in either direction while looking at the panel and the segments will "combine."</p> <p>This is the simplest type of zoetrope there is - some might even say it is not a true zoetrope. However, in this case simple is what I was going for (relatively speaking - as this print has 13 parts!). I wanted to try making a simple geared mechanism before I tried my hand at something with more complex gearing.</p> <p>OnShape 3D CAD files :</p> <p><a href="https://cad.onshape.com/documents/23ed5c9f4b9cef7172e69b17/w/aeec17dea8e6ae92e53ec58d/e/a5767f488dd95b8b3669d641">https://cad.onshape.com/documents/23ed5c9f4b9cef7172e69b17/w/aeec17dea8e6ae92e53ec58d/e/a5767f488dd95b8b3669d641</a></p> <h3>Print instructions</h3><p>Print the parts in PLA using the 3mf files provided. The "sheets" (which all print together) must be printed in two colors using filament switching; I found that a light color on a dark background works best - in my case white on black.</p> <p>Probably many of the parts can be printed together if you want to reduce the number of print jobs.</p> <p>Assemble the parts as shown in the photos. The sheets fit into grooves in the axle - this is most easily done by inserting the sheets into the end that prints on top. Suggested assembly order :</p> <ul> <li>Insert sheets into axle</li> <li>Insert axle though middle frame into small gear (can be reversed if you are left handed)</li> <li>Insert crank axle into large gear (align the "bumps" on the axle with the grooves in the gear bore</li> <li>Insert the crank axle (smooth end) into the middle frame</li> <li>Add the crank braces (small rectangular pieces) to the middle frame</li> <li>Add the crank-end frame</li> <li>Add the crank handle</li> <li>Add the 3rd frame</li> <li>Position the frames in the base pieces - note there is a left and right base; the angled side should face out</li> </ul> <p>Finally, position the sheets in the middle of the axle and make sure they are all spaced the same. I found they have a tendency to slide in the grooves when spun, so I added a single drop of superglue to the back of each sheet where it meets the slot.</p>
With this file you will be able to print 42 - Version41 with your 3D printer. Click on the button and save the file on your computer to work, edit or customize your design. You can also find more 3D designs for printers on 42 - Version41.