4th Doctor TARDIS Console (Seasons 15-17)
thingiverse
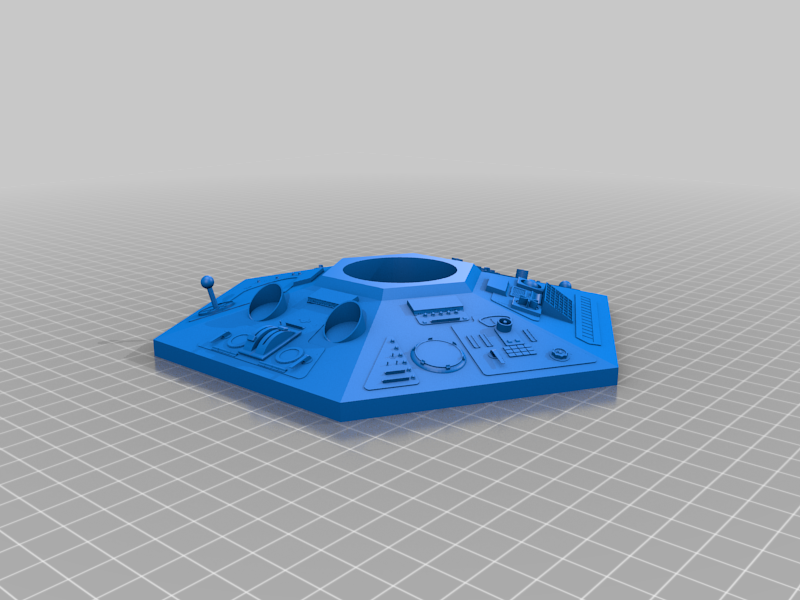
I am currently working on test printing these files. You will need: Console Base x1, or Console Base With Circuits x1 Console Base cover x1 (if using the Console base With Circuits) Console Top x1 (one of the many versions) Time Rotor Base x1 Time Rotor Poles x1 Time Rotor Tube x3 (clear filament, red if you have it) Stick x4 5/8" wide by 1.5" compression spring x1 40mm acrylic tube with 2mm wall thickness x1 40mm acrylic disc 2mm thick x1 Superglue The console top versions aren't that significantly different, but they do evolve over time. After "the Pirate Planet," one of the large black covers for the lights vanished and left a gap, which in my opinion is awful. If you don't care very much and just want any 4th Doctor console, I recommend the Pirate Planet version, as it has most of the small modifications but before it started losing parts and they started tacking junk onto it instead. Print the console top file at about 15% infill at the finest quality you can. Print the Time Rotor Tubes, Time Rotor Poles, and both files called "cover" at 100% infill in transparent filament. The sticks go in the four holes in the console top and base and keep them together. If they don't fit, try sanding them down. You ideally shouldn't need to glue the two together, but the spring may push the time rotor up against the console top making it necessary. I tried to use the same type of spring as the 80s console hosted on 3DprintingDoctorWho.com in case anyone had spares lying around, there are links to the specific springs there. Glue one end into the console base and one end into the time rotor base, but make sure the squares on the sides will fit in the grooves of the console top once it goes on. Put the three tubes in the three big holes, then the poles aligned so they run through the middle of each tube. For the time rotor glass, I use an acrylic tube and cut it down to size. You'll have to saw through it and it's easy to break, so look it up online to make sure you're doing it right. It should be cut to be 2 and 3/8" tall, then have the acrylic disc carefully glued on top. If you're using the console base with circuits, the cover on the base should easily slide right into the notch right above it. For painting, I recommend Citadel paints. If you're not printing the tubes out of transparent red filament, you can either use one coat of Citadel's contrast paint or use Kryon's stained glass spraypaint, both of which should go on decently clear. You can do the same with the poles object if you printed them clear, paint the middle triangle red and the light bulbs white with silver dividers. The large triangle-shaped piece keeping them together should be a transparent yellow. The console top is a dark silver color, while the sides of it are a noticeably lighter silver, as well as the metal supports on the base. The rest of the base, as well as the console's underside, is white, with black rectangles that end at the groove in the console. The rest of the console is very complex and has multiple random lines all over its surface. For references, see TARDISbuilders and the "Kenneth Sharp Console (altered)" section, which has screengrabs from every episode. For the console base specifically, its circuitry is only seen in The Invasion of Time.
With this file you will be able to print 4th Doctor TARDIS Console (Seasons 15-17) with your 3D printer. Click on the button and save the file on your computer to work, edit or customize your design. You can also find more 3D designs for printers on 4th Doctor TARDIS Console (Seasons 15-17).