5-Gallon Tool Bucket Upgrades
prusaprinters
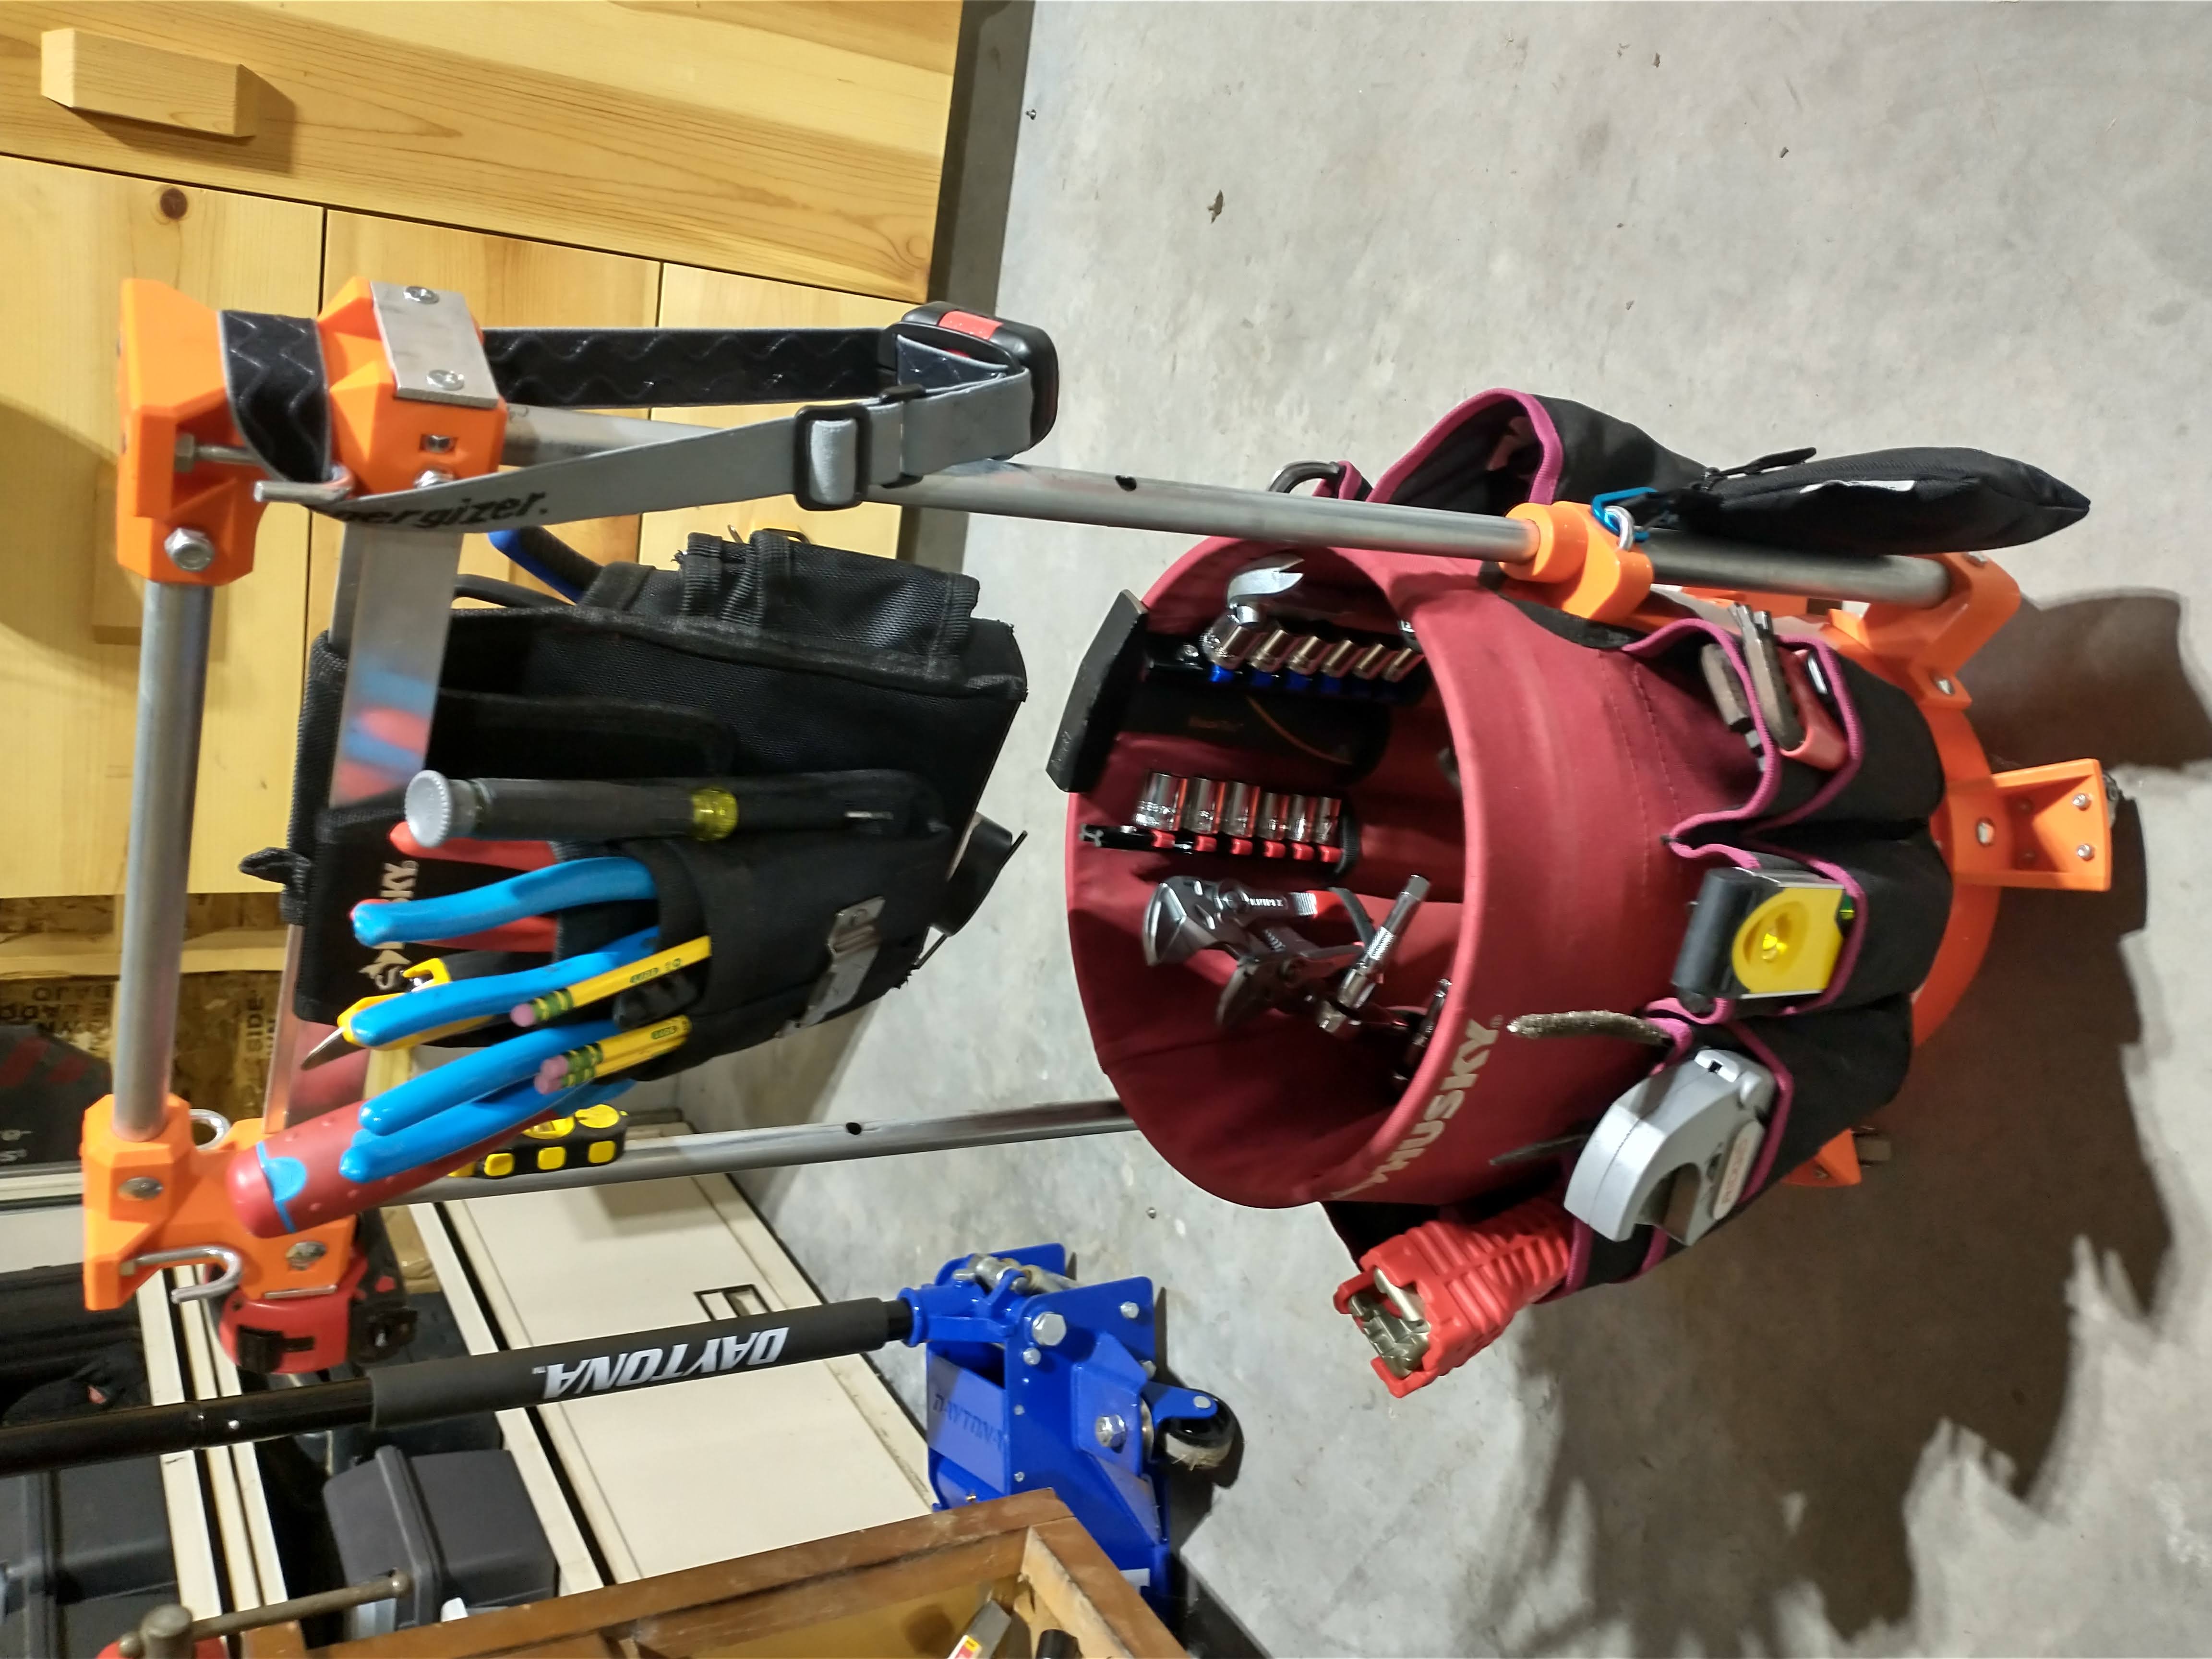
<figure class="media"><oembed url="https://youtu.be/zsj0JJAzKco"></oembed></figure><p>Mods for my 5-gallon tool bucket.</p><p>Starting from the bottom: outboard caster brackets to increase the wheelbase and make it possible to use locking casters. Makes the whole thing very easy to spin while looking for a tool, and moving on concrete and hardwood floors is effortless. For each caster bracket, a carriage bolt is installed through the bottom of the bucket and the side of the bucket. I haven't had any flexing issues with this setup and have loaded it to 60+ pounds (before paring down a bit!)</p><p>The bottom bracket: installed flush with the bottom of the bucket with one carriage bolt through each “wing” of the bracket. ¾" EMT fits snugly into the hole, and a clearance hole is drilled through the EMT. A captured ¼-20 nut within the print lets you secure a bolt through the EMT to connect the handle to the bucket. </p><p>The top bracket: the most complicated to design and the part I'm most proud of! Slide it up to the rim of the bucket and install with the pipe slot in the center of the slit in the canvas tool organizer. This is the same mechanism used to lock multi-position ladders. A spring is inserted from the back of the print and a nut captures it. The “pin” (just a ¼-20 j-bolt), is installed from the outside and then marked, removed, and cut to size. The spring is always pulling the pin inward because it pushes against the trapped nut. As soon as the EMT holes are lined up it snaps and locks right in.</p><p>The handle: as multi-functional as possible. The aluminum bars across the middle serve as tool pouch hangers for hook & loop or the Toughbuilt “clip tech” pouches (nothing that needs to be threaded on and off the end of a belt, unfortunately). There are belt clips at each side that I hang my drill and driver on after I get them out of their bag. There are more j-bolts that serve as hooks for shorter things (as long as they don't hit the bucket or tools when the handle is dropped).</p><p>All parts printed in PETG (with no internal supports due to lots of optimization! Just one column on the handle protrusion does the trick.)</p><p>I love this setup. Great for around the shop, around the house, to take to friends/family when they need help, can still toss in extra supplies or tools as needed, etc.</p><p> </p><p><i><strong>Bill of materials:</strong></i></p><p>[All carriage bolts are ¼-20. Some of these will require shortening to make flush.]</p><p> </p><p><i><strong>Telescoping handle (minimum):</strong></i></p><p>1: 5' Section of ¾" EMT</p><p>1: 5' Section of ½" EMT</p><p>2: 2.5" Carriage bolts (through bottom section of top handle print)</p><p>2: 1 ½" Carriage bolts (through top section of top handle print)</p><p>8: ½" or ¾" carriage bolts (for handle brackets)</p><p>Many: ¼-20 Lock nuts</p><p>A few: ¼-20 Nuts</p><p>6: ¼-20 J-bolts (or only 2 if not installing hooks at top of handle)</p><p>2: 3/8" * 1 7/16" .035" wire diameter springs (looks obtuse, but this is actually a pretty common size. Should be able to find at your local hardware store)</p><p> </p><p><i><strong>Aluminum bar “belt” and clips:</strong></i></p><p>1: 3' section of 1"x1/8" aluminum bar</p><p>4: 10-24 flat head screws (Philips drive) [requires countersinking to not interfere with clipping tools on/off]</p><p>4: 10-24 lock nuts</p><p> </p><p><i><strong>Casters:</strong></i></p><p>4: 1" swivel casters with grey brake ("bayite" brand in my case but sold under a few names on Amazon)</p><p>8: ½" or ¾" carriage bolts</p><p>8: ¼-20 washers</p><p>16: M4 button head screws</p><p>16: M4 nylock nuts</p><p> </p><p>Assembly instructions in the form of a bill of materials and the included photos/video is the best I can provide right now. Anyone who cares this much about their tools can probably handle it from there, but comment if you need help after printing and I'll do my best.</p>
With this file you will be able to print 5-Gallon Tool Bucket Upgrades with your 3D printer. Click on the button and save the file on your computer to work, edit or customize your design. You can also find more 3D designs for printers on 5-Gallon Tool Bucket Upgrades.