5RAILS CORE XY 3D Printer
thingiverse
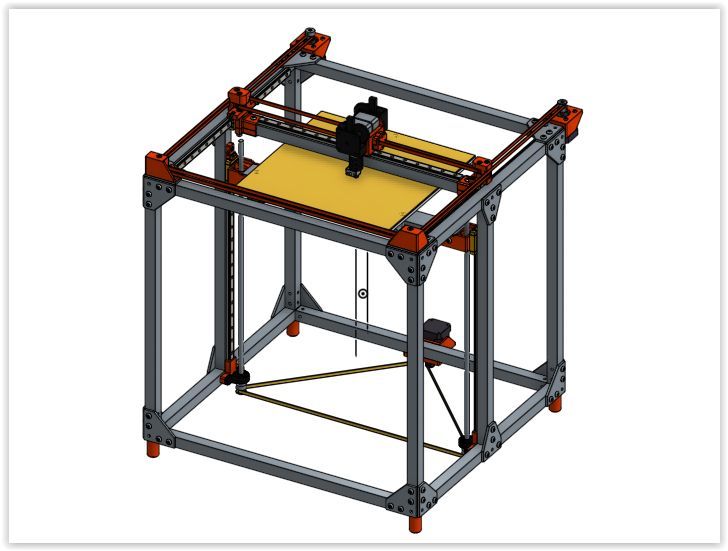
Functionally complete. Screw lengths and quantities in BOM may need adjustment. Specs: MGN12 linear rails are used on all axes for accuracy and space savings. Five rails are employed - one for x, two for y, and two for z. This configuration is denoted as '5RAILS'. The printer boasts a spacious 300mm x 300mm x 350mm print envelope, a robust 500W heated bed powered by a reliable 120VAC solid state relay, dual z non-cantilevered lift on TR8x8 trapezoidal leadscrews driven by a single z stepper motor, two e3D Titan direct drive extruders that eliminate bowden tubes, and 2020 extruded aluminum frame with laser cut aluminum corner supports for enhanced rigidity. Rigidity, speed, and minimal printed pieces are the primary design goals. The estimated cost is approximately $750 USD, excluding tax, shipping, and duties applicable to your country. Full design CAD files can be accessed in Onshape, where a free account is required to copy and edit the design. The design files are exportable to .stl for convenience. Onshape files are available here: https://cad.onshape.com/documents/58c0e9de910b980f78db313a/w/f2cc9715f90baade4735c223/e/94a5242ec921dd91f2257e06 A detailed bill of materials is provided in this Google spreadsheet: https://docs.google.com/spreadsheets/d/1Hk-xcSfI6vfVNKvCDCkBKN79KrJszzolMjrFaeewW4o/edit?usp=sharing For assembly, please consult the 3D model live in Onshape and the respective assemblies - frame, x, y, z, and e. This will demonstrate how the components fit together. An assembly guide, including mechanical, electrical, and software sections, will be created within the next few weeks. It is recommended not to shop around for cheaper 'core' items: rails, leadscrews, extruders, 3D printer controller (re-arm for ramps, and RAMPS 1.4 SB). These components are cost-optimized already and offer good quality - stainless rails and leadscrews, precise tolerances, reliable electronics. Shopping around may compromise the entire design. Updates and changes: 8/21/2017: An e3D v6 bowden mount option has been added for those who do not want to use the e3D v6 Titan direct drive option. One or two bowden mounts can be attached to the existing X Extruder Mount frame. New parts have been added to the printable files. 8/21/2017: The 3D printed spacers for the 694ZZ bearings used in the Y axis idlers are not functioning as intended. It is suggested using some 0.5mm H x 5mm ID washers with a small outside diameter of ~6-7mm, and stacking them (three on top, two in the middle, three on bottom). 8/21/2017: The Z axis continuous belt is too long for proper tensioning by about 150mm. The positioning of the Z idlers on the Z Idler Mount will be re-positioned to take up the slack. 8/21/2017: The z axis Z Bearing Mount may not be thick enough to position the z trapezoidal lead screws straight vertically. If it appears that the trapezoidal lead screw will bend, some washers can be used to space it correctly vertically. 8/28/2017: The Z Bed Mounting has been modified - please see the Z section assembly in Onshape for changes and how components are assembled. Two M5 x 15mm OD washers are now used to 'sandwich' the build plate from the outer edge, compressed and held by a spring below the build plate. Any large flat washers >15mm OD can be used as long as they are not flexible and heat resistant, although an ID of about 5.3mm is recommended (to fit an M5 bolt). Three new 'Z Bed Mount.stl' files have been added to the printable files.
With this file you will be able to print 5RAILS CORE XY 3D Printer with your 3D printer. Click on the button and save the file on your computer to work, edit or customize your design. You can also find more 3D designs for printers on 5RAILS CORE XY 3D Printer.