6×12 AGFA ANSCO PLENAX PD 16 CAMERA Conversion
prusaprinters
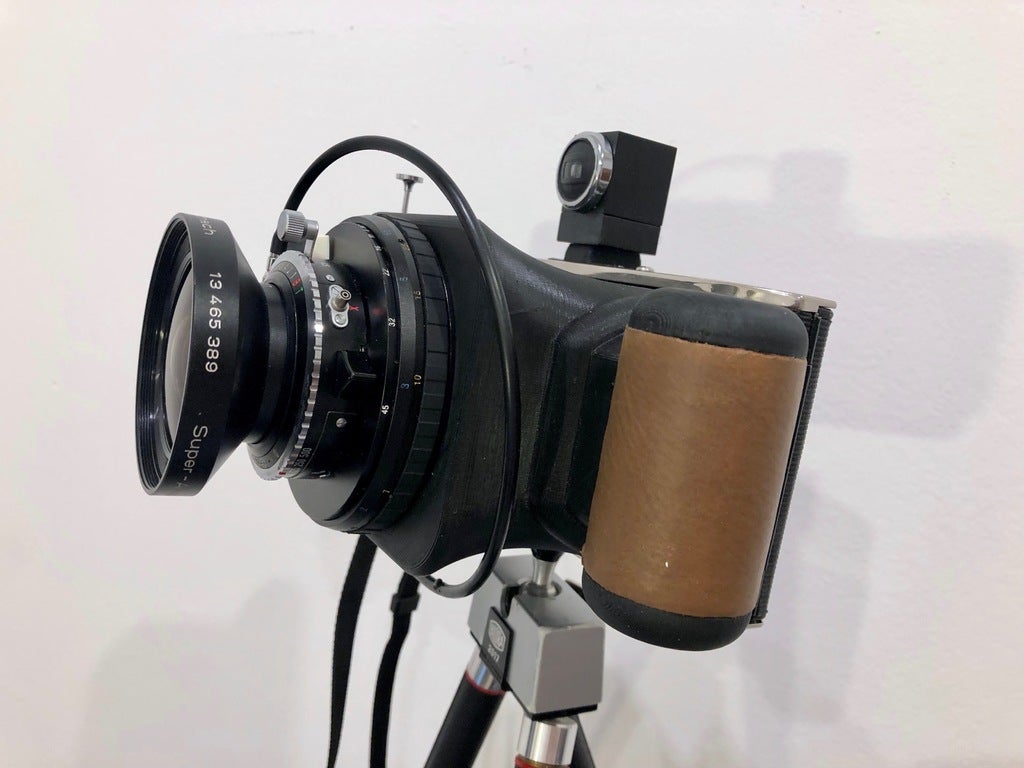
<p>The Agfa Ansco Plenax PD 16 were are series of folding cameras for 116 film (PD16) format for 2½×4¼ inch negatives (nominally 6.5×11 cm) which was manufactured around 1935.</p> <p>Since the camera is available on the market for a reasonable price (around 40$), it suits perfectly as a basis for the modification. The camera was manufactured for the 116 film format where the picture frame of 6.5 x 11 cm almost reaches the common 6×12 format.</p> <p>Further items required for the modification:</p> <p>Fotoman Helical for 90mm lens<br/> Schneider Super Angulon f8 / 90mm with Copan No. 0 Shutter<br/> 6×12 viewfinder<br/> Foam Rubber sheet (self adhesive)<br/> some woodscrews<br/> Super X glue<br/> For using 120mm film, film adapters are required. Alternative, original 116 film can be used.</p> <p>Assembly</p> <p>The assembly is straight forward. The whole front of the camera needs to be removed with a bit force. Once accomplished, it needs to be checked that the remaining internal metal parts of the body have not been bent. Otherwise, they need to be re-adjusted.</p> <p>Once everything is in place again, the 3D printed front part needs to be placed in the now empty area, replacing the previous bellow assembly. The front part reaches until the film guide to narrow the frame for the 120 film format.</p> <p>When everything is perfectly aligned, two holes need to be drilled from the bottom and the top through existing holes to fix the assembly with screws. Ensure that the holes fit with the chosen thread of the screws. Woodscrews are perfect for this job.</p> <p>Now insert the helical and ensure that the scale is proper aligned and the focus operates smoothly. Take a small screw driver and heat the front with a lighter to burn 2-3 holes into the plastic to screw the helical onto the front part. Assemble the whole front part and check if everything works as expected. If so, dis-assemble everything and burn the further holes into the plastic to put the remaining screws of the helical in place. Again, ensure that the holes are not too big, that the screws fit perfectly into the thread. Don’t assemble the lens yet.</p> <p>Now, if everything is working, unscrew the 2 screws which are holding the whole front and put sufficient glue into the inside of the Ansco camera body. I highly recommend to use Super X glue. (<a href="http://www.cemedine.co.jp/e/product/super_x.html">http://www.cemedine.co.jp/e/product/super\_x.html</a>)</p> <p>Once the glue is applied, slide the front part into the camera body and fix it again with the two screws. Ensure again that everything is perfectly aligned. Now it’s time for a 24 hour rest to let the glue dry.</p> <p>The final step is to cover the inner part of the camera with foam rubber sheets.</p> <h3> Print Settings</h3> <p><strong>Printer Brand:</strong></p> <p>MK3</p> <p><p class="detail-setting printer"><strong>Printer: </strong> <div><p>Prusa i3</p></div><strong>Rafts:</strong></p> <p>No</p> <p><p class="detail-setting supports"><strong>Supports: </strong> <div><p>Yes</p></div><br/> <strong>Filament:</strong><br/> Prusa PETG black</p> </p></p> Category: Camera
With this file you will be able to print 6×12 AGFA ANSCO PLENAX PD 16 CAMERA Conversion with your 3D printer. Click on the button and save the file on your computer to work, edit or customize your design. You can also find more 3D designs for printers on 6×12 AGFA ANSCO PLENAX PD 16 CAMERA Conversion.